Monday, May 23, 2011

Harvest Monday - May 23, 2011

Something brand new came out of the garden this weekend, the very first Pixie Baby Cabbage. Here it is, cut from the plant and trimmed but still in the garden. This is the largest of the heads and came in just .7 ounces shy of 3 pounds, a big baby! I used half of the head to make an Asian style slaw from Steve Raichlen's book Barbecue! Bible. The slaw was delicious with some Sweet Soy Glazed Baby Back Ribs (another Raichlen recipe).


One other new harvest started for the year, I picked, weighed, and processed the first batch of caper buds last week. It was actually the second picking of buds, but I shamefully picked and then neglected to do anything with the first small harvest of the buds so those didn't get included in the harvest tally. The caper harvest is starting right on schedule, in 2009 I harvested the first ounce of buds on May 20, in 2010 I harvested the first 3/4 ounce of buds on May 10, and this year I harvested the first buds sometime around the 12th or 13th (the ones that didn't get recorded).

Here's the harvest totals for the last two weeks:

Piracicaba broccoli - 11.5 oz.
Pixie Baby cabbage - 2 lb., 15.3 oz.
Caper buds - 1.6 oz.
Fava beans - 22 lb., 4 oz.
Green garlic - 3 oz.
Butterhead lettuce - 4.5 oz.
Super Sugar Snap peas - 3 lb., 7.5 oz.
Oregon Giant snow peas - 1.7 oz.

The total harvests for the past two weeks were - 30 lb., 1.1 oz.
The total harvests for the year are - 144 lb., 4 oz.

Harvest Monday is hosted by Daphne on her blog Daphne's Dandelions, head on over there to see what other garden bloggers have been harvesting lately.

Tuesday, May 17, 2011

Caper Update

I've been trying to do a caper post for the last couple of weeks so that I can document what the plants look like at this time of year but I continue to be distracted by the hiking trails in the park across the valley. These days I've been joking that it's my new boyfriend "Garland". But we've got a late taste of winter weather today and Garland's head is in the cold damp clouds so I'm putting off today's hike for a couple of hours in hopes of drier or at least less cold weather.

I'll start with some shots of my most productive plants.

A look down from the top of the wall to a plant growing on the level below. I planted the plants right up against the inside of the outer wall.


These two plants are particularly happy to be facing almost due south. In the winter the ivy that covers the wall behind them drops all its leaves and the wall reflects back whatever warmth it can collect from the low winter sun. These caper plants don't go quite fully dormant, their tops lose leaves but the lower branches and the crowns retain some greenery through the winter.


The same two plants from a slightly different angle.


The second plant seen from above.


In this shot you can see the variability that I've been getting from the same strain of seed grown plants planted in the same location. At the very bottom is a small plant that hasn't grown any bigger than when it was in a 4-inch pot. Next to that is one of my star performers, it'll spread out and across as the summer progresses and nearly cover up the runt. Beyond the star is an up and comer, it has slowly been getting established and last year it finally started to produce a few buds.


After a good hard pruning this winter it is putting out some pretty good new growth. Capers bloom on new shoots so you need to prune the bushes back quite hard to encourage them to put out lots of new growth. On my post about pruning capers you can see what my two star performers and a couple of my pot grown plants looked like back in February of this year. Wouldn't you know it, after I pruned these plants we had a late freeze and all that nice new green growth that can be seen on that post got frozen. The plants this year are actually a little behind where they were at this time last year.


Next to that plant is another runt shown below on the left and yet one more plant that is starting to size up a bit this year and may perhaps start producing buds later this summer (I hope). It's a mystery to me why two plants are growing like crazy in this location and the rest are just plodding along.


One of the star performers from yet another angle.


Buds, buds, buds!


The harvest is about to begin...


My pink flowering bush a couple of weeks ago.


And now it is starting to bloom.


I've got more plants growing in large pots in an area of the garden that is less protected in the winter. These plants don't get any reflected heat from walls so they go fully dormant in the winter and take a little longer to put out new growth in the spring. This plant is from the same seed source as the pink flowering plant but has the typical white petals and purple stamens of the rest of my plants.


I've got an experiment going outside the vegetable garden where I'm trying to get some plants established in the ground. It's a little difficult to see in this photo but the large rocks on the right have created a raised area where I've planted a few bushes. It is necessary to protected the young plants from the deer that wander through this area and trample everything.


This plant has been in the ground for about 18 months. It might be a little bigger if the deer hadn't nearly crushed it to death. It did well enough last year to prompt me to put in some more plants in the same area.


This plant has been here since last fall. I'm experimenting with a rock mulch for these plants since they don't have the benefit of a nice warming wall.


Once I figured out how to grow capers from seed I went a bit overboard. Here's part of my collection of plants, 24 plants in one-gallon pots. These are of mixed heritage, some from a Tuscan seed source, some from a Croatian source, and some from seeds that I collected from my first two plants that I purchased from Richter's Herbs. I have another dozen or so plants in one-gallon pots in another part of the garden and another 40 or so plants still in 4-inch pots... Plenty of material to experiment with to see if I can get more plants established in the ground in other areas of the garden!


And just because I think he's such a handsome fellow, the prince of the vegetable garden, a resident lizard (a Western Fence lizard?). This guy has made the vegetable garden his territory. I see him almost every time I'm in the garden. Here he's busy showing off doing push-ups to impress his girlfriends.

Wednesday, May 11, 2011

The Garden Update Continues

My love of chile peppers continues this year. There's never enough space in the vegetable garden for all the varieties that I want to grow so I put many of them in pots all around the house in the areas where the deer don't munch. These pots contain Pimento de Padron, Shishito, and Fushimi peppers, all of these are frying peppers meant to be harvested when green and still quite immature. The Padron peppers are a favorite around here and I've been growing them for a number of years. This pepper has converted many a green pepper hating friend into a lover of this particular pepper. Shishitos are fairly new in my garden. Last year I was given one little plant late in the season and got one small harvest from the plant. They were tasty so I decided to give them a larger trial this year. The Fushimis are completely new in my garden. I've lost track of how many other varieties that I've managed to get to transplantable size but one of these days I'll figure it out...


My most urgent garden task right now is to get all of this planted and the extras given away. The tomatoes got planted this past Sunday and I managed to persuade various friends to relieve me of all but 7 of the tomato plants. I've been getting the peppers into large pots around the garden and need to prepare a space in one of the main garden beds to receive the rest. I've got just a few little eggplant to plant out since I had miserable success getting them to germinate. and there's a few flower seedlings that will wait a week or two before I need to get them planted in a permanent spot.


A nice healthy young newly potted up Pimento de Padron.


And another newly planted and now truncated Pimento de Padron (dang it, those blasted rats!). At least there's a couple of shoots left to grow.


This mangy thing is an Aji de la Tierra chile pepper (C. baccatum) that is going on 3 years old. It spent its first year in the garden bed, then another year here in this pot just inside the garden gate, and this year it's going to stay in this pot but I'm moving it to a nice protected spot next to the house. This variety is a very late producer, so late that the chiles don't ripen before the first freeze hits in late November or early December. I've got a Manzano pepper next to the house that set peppers in January so I'm hoping that the Aji de la Tierra will be protected enough next to the house to ripen up some of its peppers this year. I'll post about that Manzano later once I've cleaned up that area...


Here's the Aji de la Tierra after a severe trim.


This is another baccatum pepper that I thought had completely died this winter. There wasn't a hint of green showing and then all of a sudden it started to sprout from the crown. It looks like it could make a good comeback. I lost the tag but I think it is an Aji Angelo, one fierce looking but very mild and flavorful little chile pepper.


Moving on to the vegetable garden, this bed was home to my overwintered brassicas, lettuce, chard, and spinach. Here you can see where I've cleared half of the bed to get it ready for tomatoes. The other half of the bed has some lovely volunteer Monticello poppies and the remains of the overwintered crops.


These are the amendments that are going into the bed. A mix of crab meal, humic acid, and sulfate of potash in the large bucket. The smaller container inside the bucket has 2 pounds of pulverized egg shells and the other container has a granulated turkey poop based fertilizer.


I never have understood why so many gardeners put their calcium amendment into the planting hole when planting their tomatoes. By the time the plants need the calcium to prevent blossom end rot the plant roots will have grown far beyond the planting hole and out of reach of the calcium. I spread all the amendments, including the eggshells over the bed and turn them into the soil.


Tomato planting is nearly done, all I need are some stakes to secure the cages.


There's one small planting of beets in this bed. These are Golden beets from Renee's Seeds (the best variety of golden beets that I've tried so far) and Chioggia beets.


Next to the beets are the bolting Golden Chard plants from last year. I've been gradually removing these plants and giving them to the chickens. They have to go soon to make room for peppers and eggplants. In the foreground is the Ear of the Devil lettuce that looked so beautiful through the winter. I'm letting them bolt so that I can collect the seeds.


The volunteer Monticello poppies are blooming before the planted patch.


I never did get around to properly thinning the poppy patch so it's quite crowded and the plants are shorter than last year. These should start blooming any day now.


On the left in the photo below are the few January sown Super Sugar Snap peas that just produced my first harvest of snap peas this season. The poppies are on the right. The nasty rust infested garlic is in the foreground.


And more nasty rust infested garlic here. It's such a mess. I don't think I'll bother with garlic next season, those rust spores are all over the garden and there is nothing I know of that will effectively treat garlic rust in a home garden. *Sigh*


That's the latest on the vegetable garden, next up is a Caper update.

Monday, May 9, 2011

Harvest Monday - May 9, 2011 and An Additional Update

Here's the highlights of the harvests for the last two weeks:

The largest single harvest of fava beans was this Saturday, I filled a basket with 33 pounds of them and only stopped because the basket was full, and it was getting cold and foggy, and I was tired. Sunday I harvested an additional 15 pounds. The main entertainment for Sunday evening was peeling all those beans (lubricated with a couple of glasses of good wine). We netted a little over 9 pounds of peeled beans from those 48 pounds of pods. Most of the beans will be frozen but I have my eye on a recipe for deep fried artichoke bottoms topped with smashed favas from Yotam Ottolenghi's book Plenty (he has a nearly identical recipe on the Guardian website). And my husband has picked out a soup recipe from Saveur magazine made with fresh favas, leeks, garlic, potatoes, and more good stuff.


I harvested the first sugar snap peas from the few plants that I planted at the start of the year. A six week head start over the main planting of the same variety of snap peas didn't net much of a head start on the the harvests, the first peas from the main planting will be ready in a few days. Now I know that such a head start doesn't really provide much of a benefit so I probably won't bother with extra-early peas again.


This is the basketful of pea shoots that I harvested from the plants shown in my previous post. I had to trim off some of the tough bottom stems but that still left enough to make a nice salad for two that I topped with fava beans sauteed with green garlic and some pan roasted very fresh Monterey Bay wild salmon.


Here's the harvest totals for the last two weeks:

Piracicaba broccoli - 9.5 oz.
Fava beans - 67 lb., 13 oz.
Green Garlic - 1 lb., 1 oz.
Super Sugar Snap peas - 11 oz.
Snow Pea Shoots - 13.2 oz.

The total harvests for the past two weeks were - 71 lb.
The harvests for the year so far total - 114 lb., 3 oz.

Harvest Monday is hosted by Daphne on her blog Daphne's Dandelions, head on over there to see what other garden bloggers have been harvesting lately.

 - - - - - - -

And now for a little more update about the garden.

Here's the fava bed. This year I planted one entire bed with favas. The bed is about 25 X 5 feet and I planted 4 rows of beans spaced 18 inches apart so that about 60 plants, actually more like 50 plants accounting for beans that didn't germinate and losses to a gopher. One side of the bed is planted with Extra Precoce Violetto and the other with Extra Precoce Bianco beans, the seeds for which came from gourmetseed.com.


A closeup of a bunch of beans that are ready to harvest. I really like both of these varieties of favas, they are extra early as their name states, they produce plants with multiple stems that don't get too tall although they do tend to flop over when the beans get heavy or in wet and windy weather. Last year it seemed that the purple seeded (when dry) beans were a bit earlier than the white seeded ones but this year I don't detect any difference.


Both varieties produce nice long beans each containing about 5 to 7 seeds, as you can see below. The pods are easier to shuck than the short tight pods of the minor types of favas and the beans are delicious, either roasted in the pod or shelled and peeled (or not peeled as you may prefer).


I slipped a few early Treviso type raddichio plants into one corner of the fava bed that the gophers oh so conveniently cleared for me (yeah...). This is just an experiment to see how well they might do as a spring crop, the best time to sow them is late summer so that they mature in the fall and early winter since cold weather is supposed to produce the reddest color. They are starting to produce loose heads now so I'm hoping to get something decent for my efforts.


Now I've got to get out to the garden before the day slips away from me. More updates to come...

Saturday, May 7, 2011

A Bit of a Garden Update

Let's take a look at the bed that I blogged about on April 12. Things were taking off then and it's interesting to see how very much they've grown in less than a month.

Here you can see the Piracicaba broccoli plants are filling in their space and the Calabrese broccoli plants have been planted out. Beyond the broccoli plants are Pixie Baby cabbages and Napa cabbages and at the far end of the bed is a patch of chamomile that volunteered this winter. The Super Sugar Snap peas have climbed well above their rat protective covering to the top of the trellis and are in full bloom.


Another view of the Super Sugar Snap peas. I'm trying the Super Sugar Snap peas this year because they are resistant to powdery mildew. The pretty purple snap peas that I tried last year were beautiful to begin with but seemed to have absolutely no PM resistance and were an awful mess well before the harvest should have ended. I haven't detected any powdery mildew in these plants yet.


The Oregon Giant snow peas never got rat protection but are doing fine. I guess the rats found something tastier to munch on by the time I got these planted out, or perhaps all the traps that I set and the work of Zeke The Rodenator (see the sidebar) finally culled their numbers. Hmm, come to think of it, I bet that the Great Horned owls that were hanging around here for a while helped as well. I decided to try this variety of snow pea after I was offered free seeds in a media kit from Renee's Garden. I had been thinking of trying a new variety of snow pea this year anyway, that powdery mildew problem again, when the media kit came along. The kit was a great deal, they would send me up to 18 different packets of seeds - vegetables, herbs, and/or flowers - for free, all I have to do is trial the seeds and either report back to them or send them a link to any blog posts about the plants. Renee's Garden is a local seed company and I've been buying their seeds for years, I've always been a fan so it was a no-brainer to jump at the opportunity to try more of the varieties that they have to offer. You'll be seeing more about my efforts with the trial varieties in future posts. Anyway, the plants are growing very nicely, are coming into bloom, and no signs of PM so far...


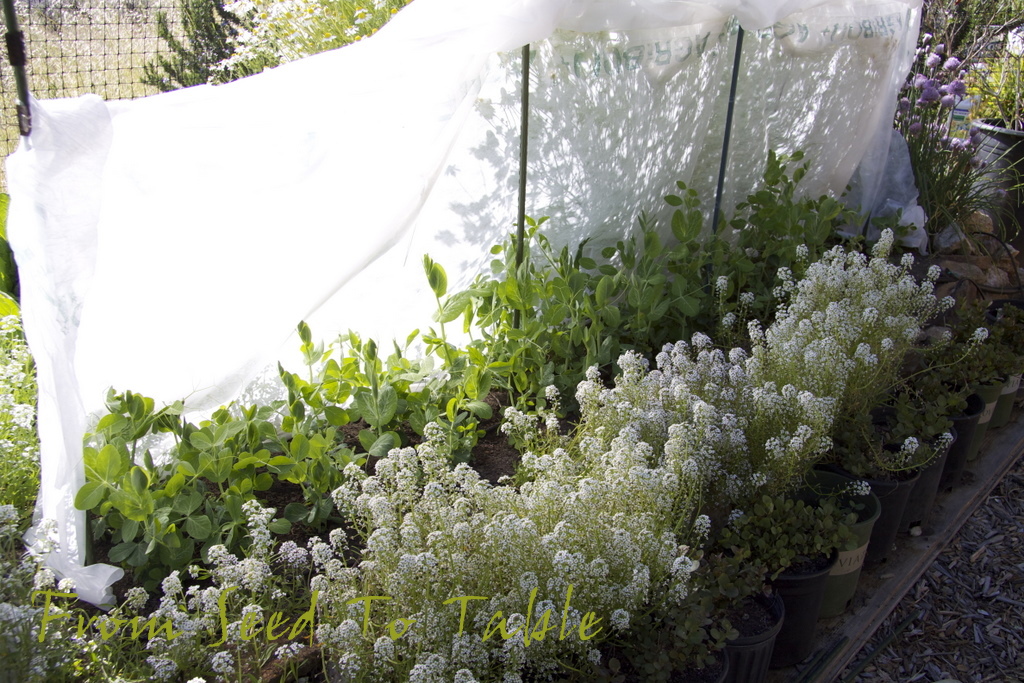
A third type of pea that I'm growing this year is for pea shoots. Here's my little patch with the rat protection opened up.


A close-up of a plant that has been harvested 3 or 4 times and is somewhat past being ready to be harvested again.


And here's some of the plants immediately after the harvest. One reason why I've decided to keep these plants covered, other than for rat protection, is that I don't know if these are resistant to powdery mildew and if they aren't I hope that keeping them covered will protect them from getting infected.


The volunteer chamomile is in full bloom now and on a warm sunny day the air becomes perfumed with their fragrance - it smells like a cup of tea! (By the way, the original plants were grown from seeds that came from Renee's Garden).


Something that I can't capture in a photograph is the cloud of beneficial insects that buzz around these plants. The wasps that lay their eggs in and on aphids have been enjoying the blossoms and repaying me by taking care of a lot of the aphids that are finding the nearby cabbages, there's more aphid mummies than live aphids on many of the plants.


Pixie Baby cabbages (another Renee's selection but not from the trial packets) in the foreground and chinese cabbages behind.


Some of the Pixie cabbages are nearly ready to harvest.


The Piracicaba broccoli is producing the first small main heads.


The Calabrese broccoli is about a big as the Piracicaba was a month ago, it'll be interesting to see how big they will be in a month


I'll be harvesting Golden chard soon. The water bottle cloches behind the chard are covering up a failed attempt to get some more Yu Choy going. I got great germination of direct sown seed and then the sow bugs started to munch. I covered up the seedlings that were left and then we had a heat wave that cooked the remaining seedlings. Oh well, I'll try to get more started in paper pots in a protected spot, that worked for the first crop and in the meantime I have some lettuce seedlings that can go into this space.


Here's the blossoms on my first planting of Yu Choy, the beneficial insects are enjoying these flowers too.


The Florence fennel in showing signs of making "bulbs".


Their lacy greens are a pretty addition to the garden and look nice next to the volunteer California Poppies (please ignore the weed!).


And finally, over in a corner next to the pea shoots, garden chives (yet another selection from Renee's, I told you I like them!), in full bloom.


That's it for this part of the garden, more updates to come, one of these days...