Tuesday, January 29, 2019

Growing Year Round In My Carmel Valley Vegetable Garden - Part 2

It's going to take me a while to get through this series about my year round vegetable garden because I need to devote some time to getting my garden in shape rather than sitting in front of the computer. You'll see the mess that my garden has become in my next planned post.

So, on to year 2 in the 4 year rotation.

Year 2

Here's an outline of the various vegetables in a bed in the second year.
  • Legumes
    • Favas, peas, and chickpeas in winter and spring.
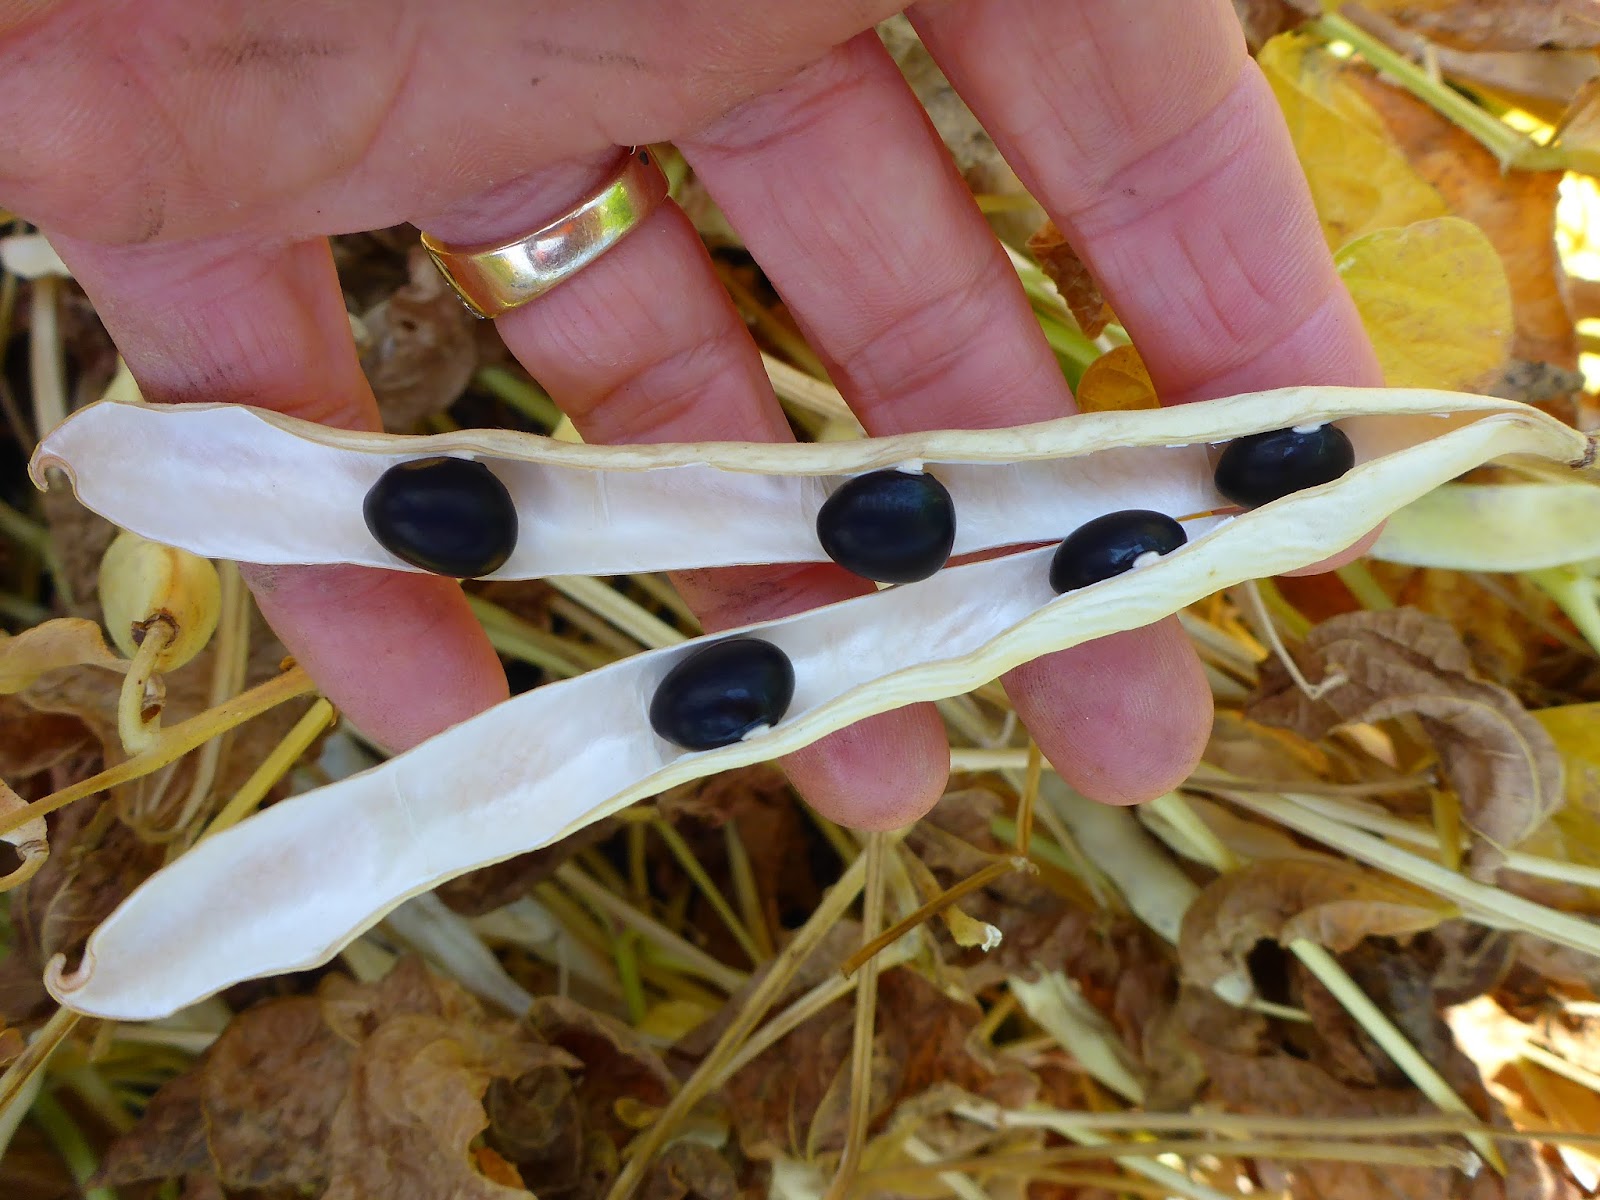
    • Bush beans and pole beans from late spring through fall
    • Peas from late summer to the end of the year
  • Corn
    • Field corn (not sweet) from summer into fall
  • Alliums
    • Garlic and bunching onions planted in fall
    • Scallions any time
  • Brassicas
    • Broccoli or other brassicas planted in the fall and early winter
  • Vegetables for winter harvests
    • Spinach, peas, winter radishes, carrots, beets, lettuces, etc.

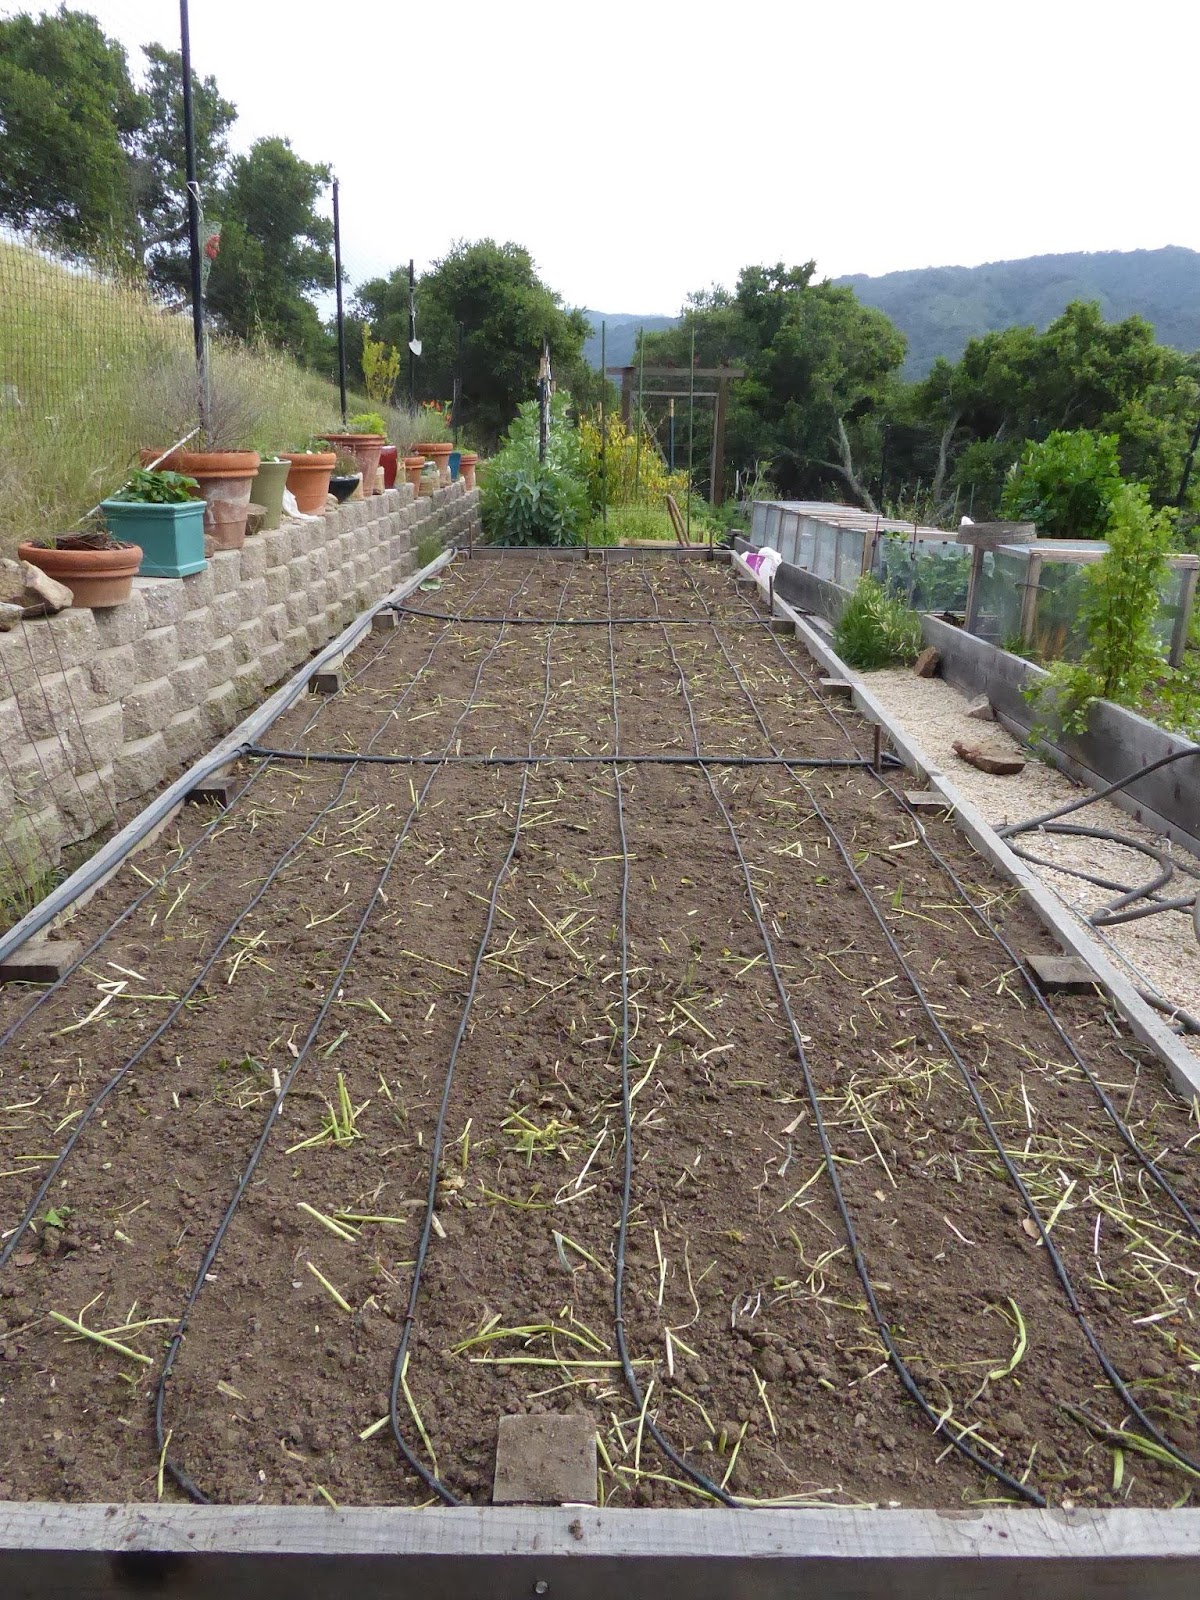
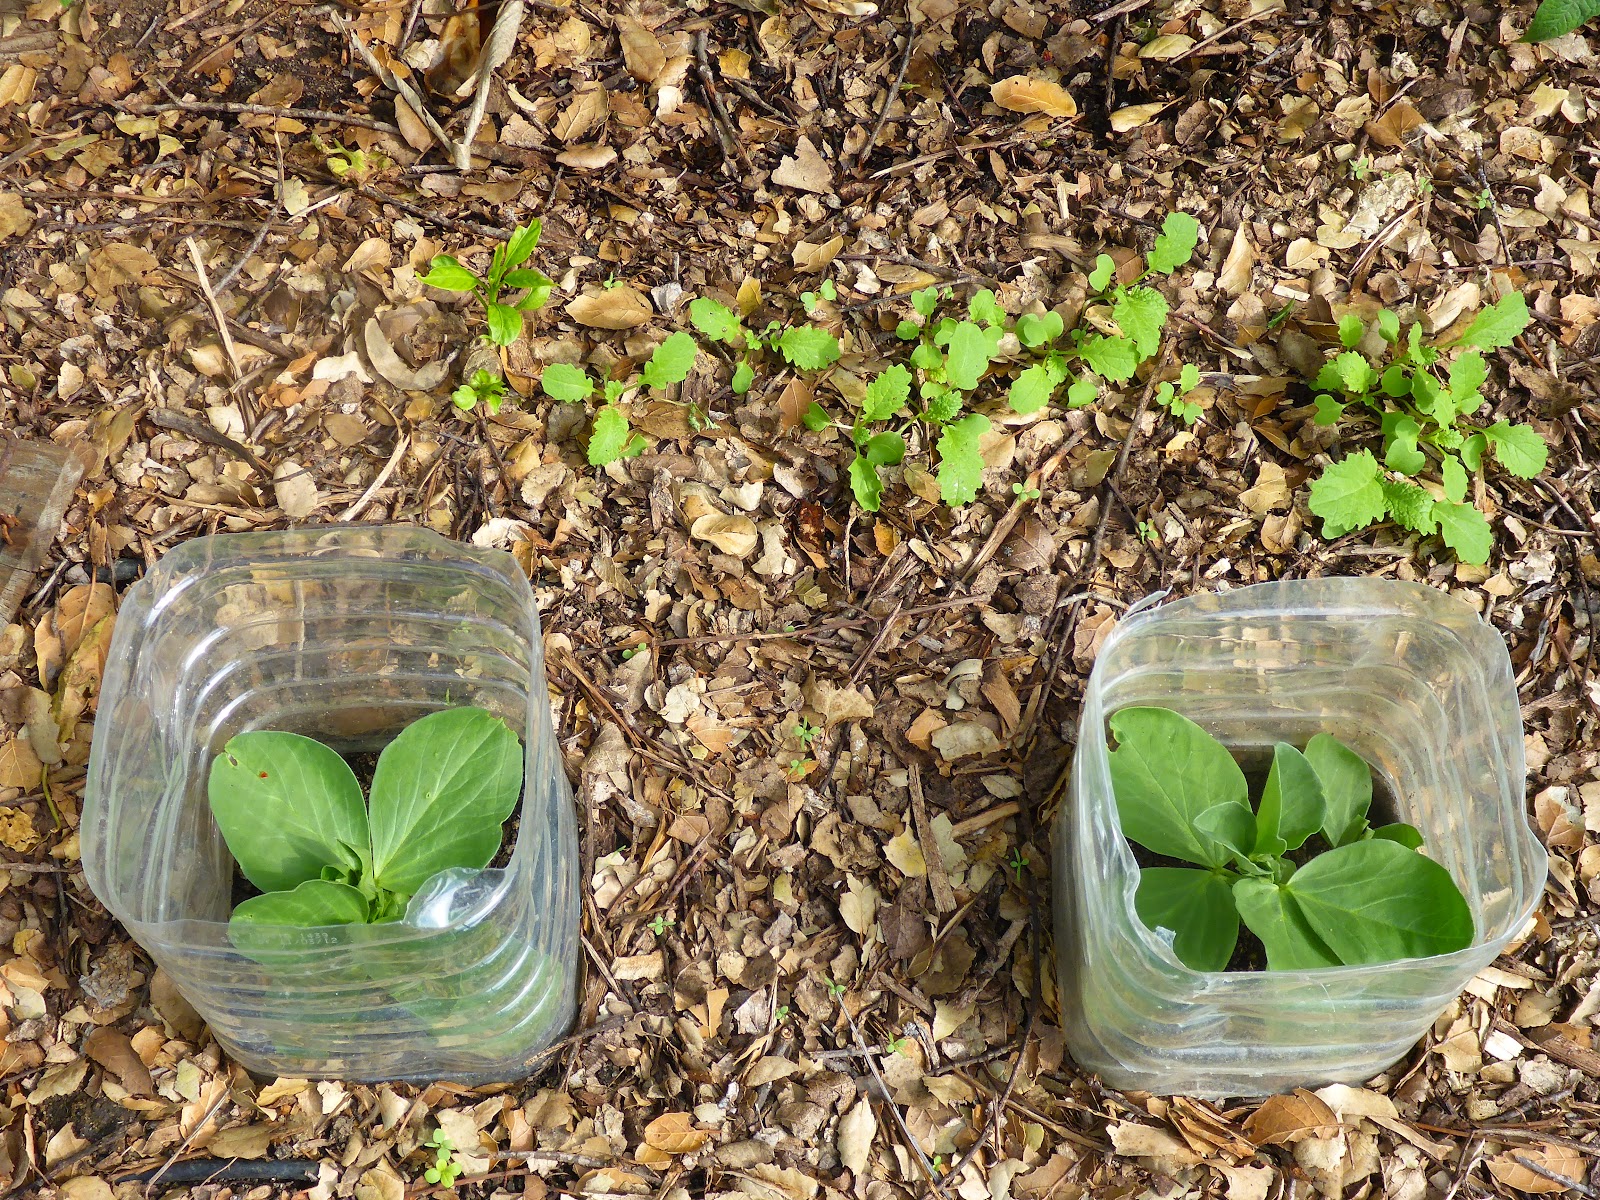
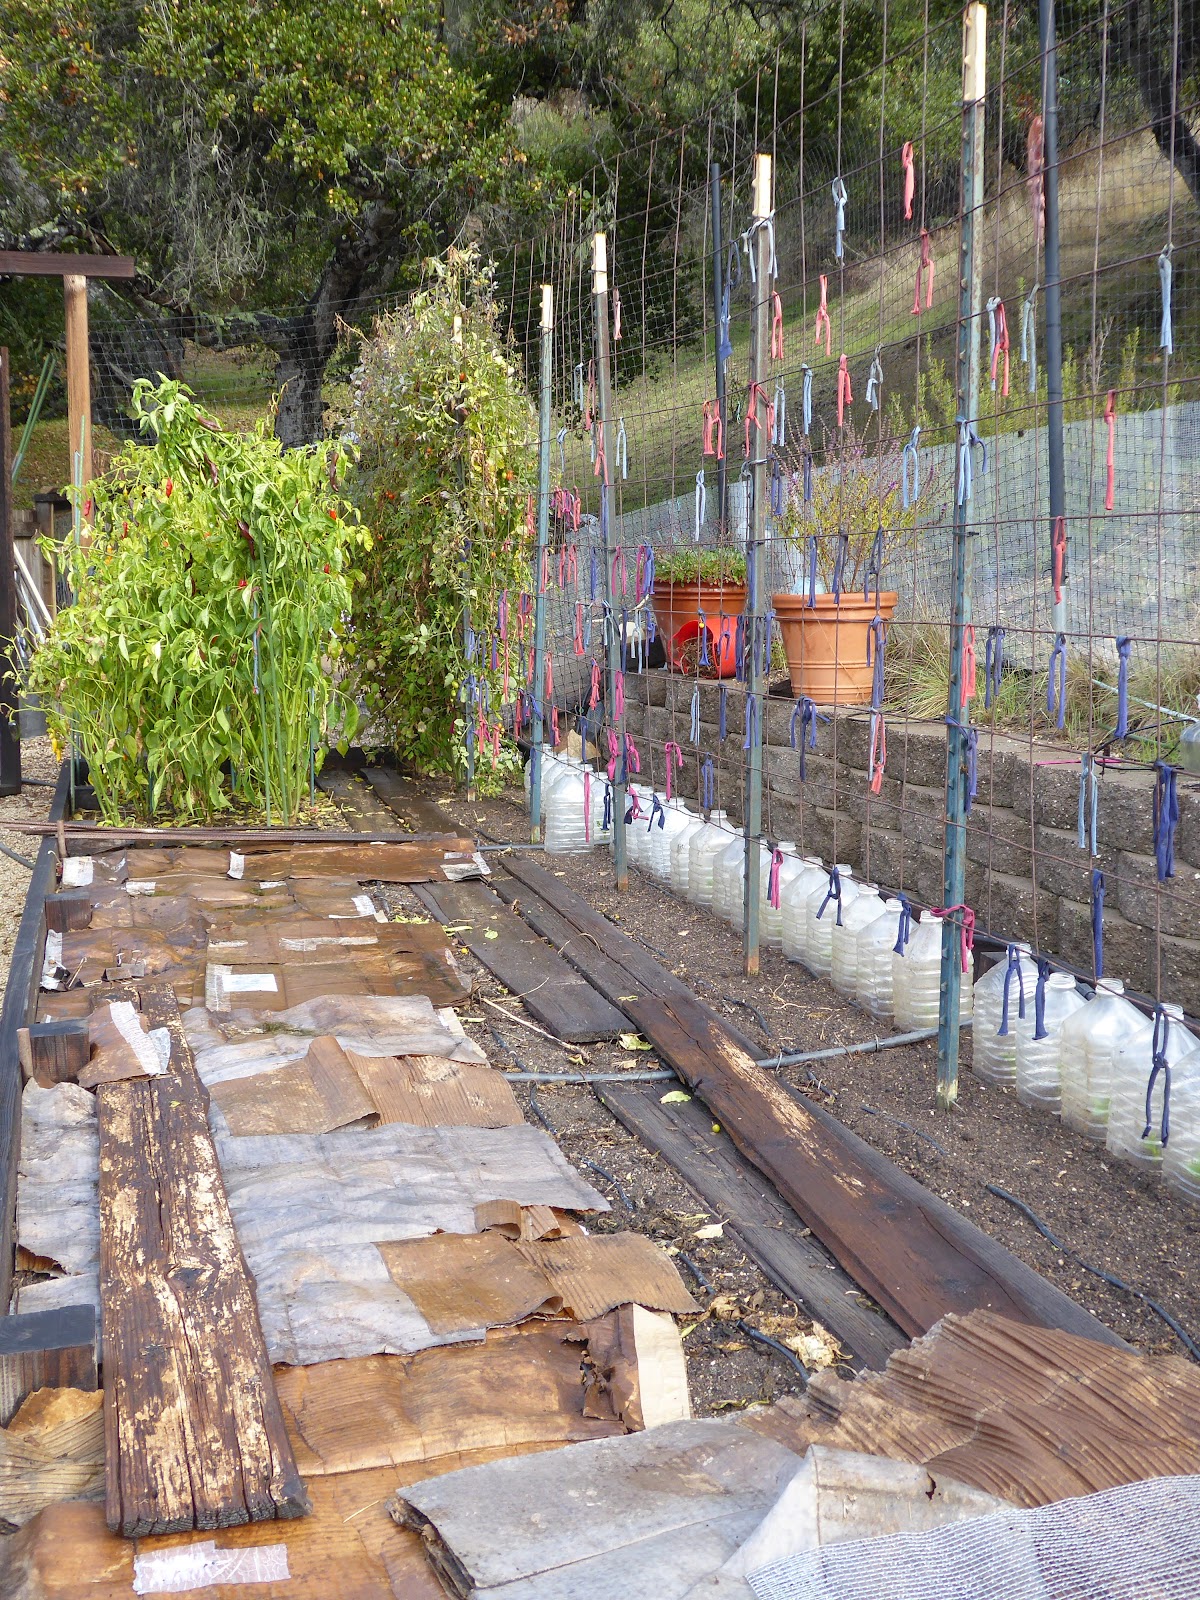
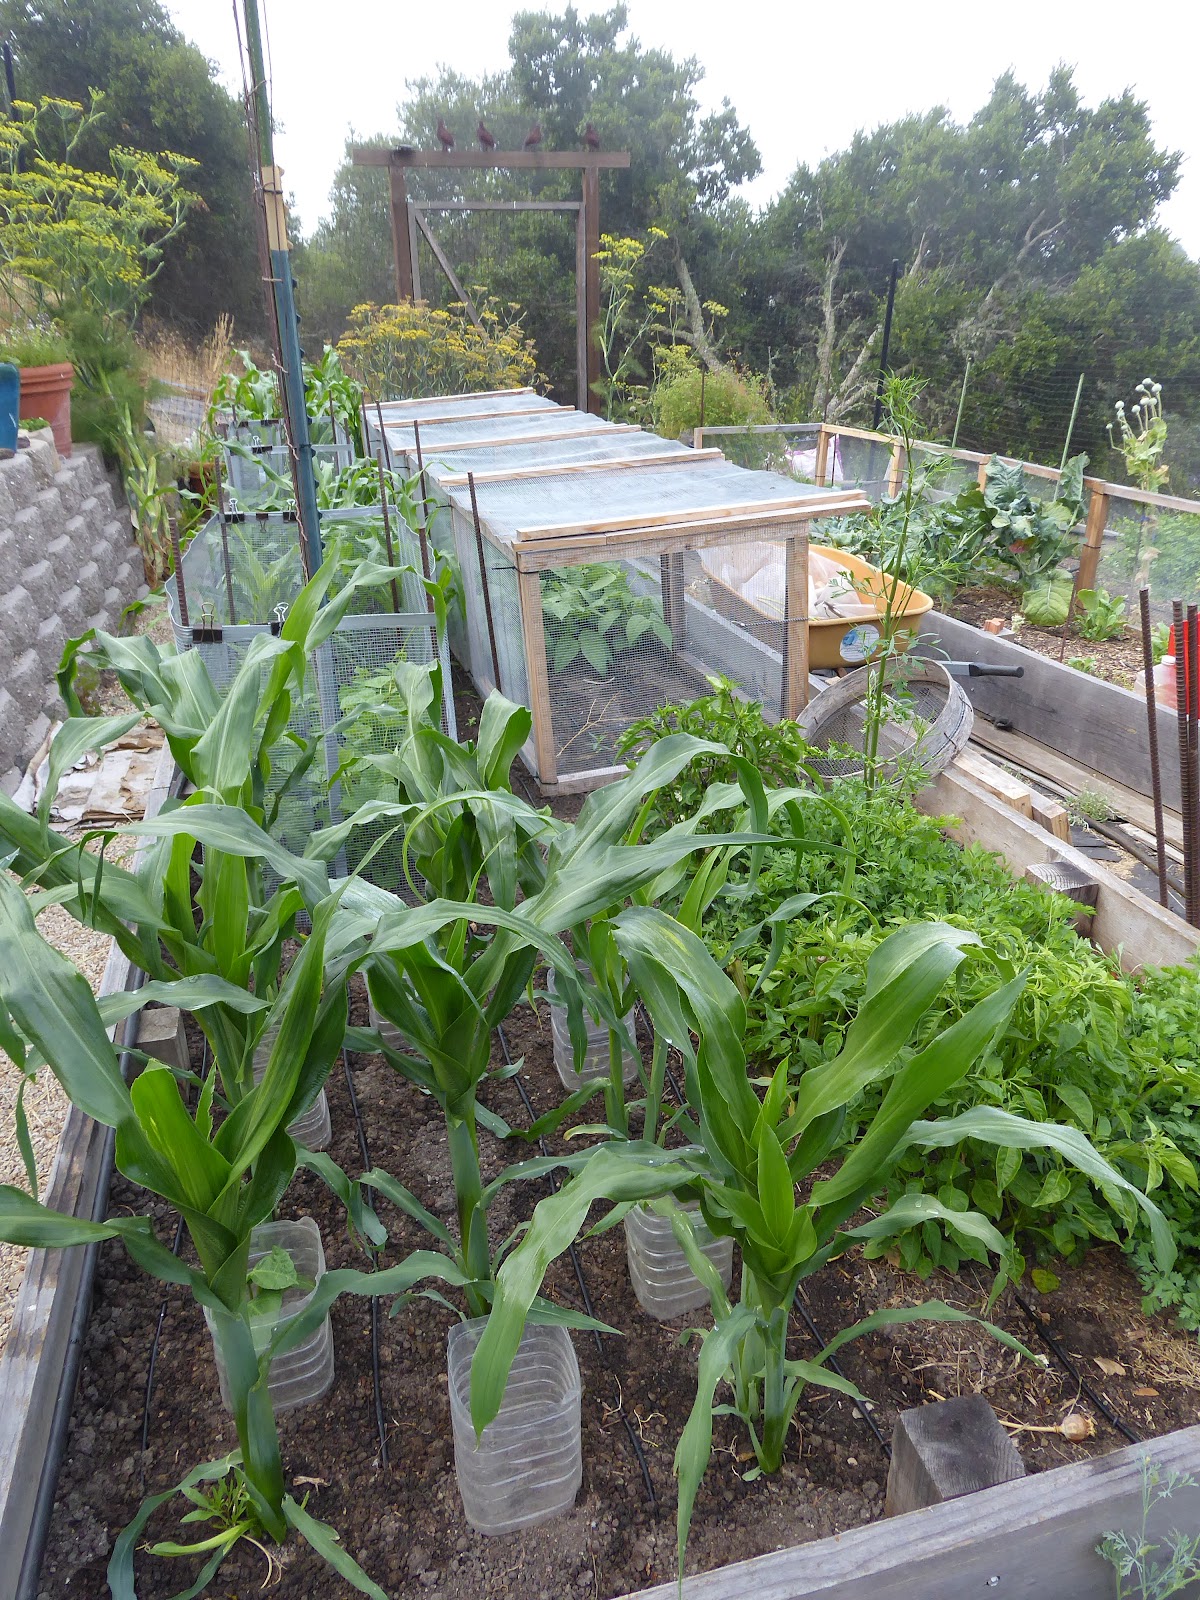
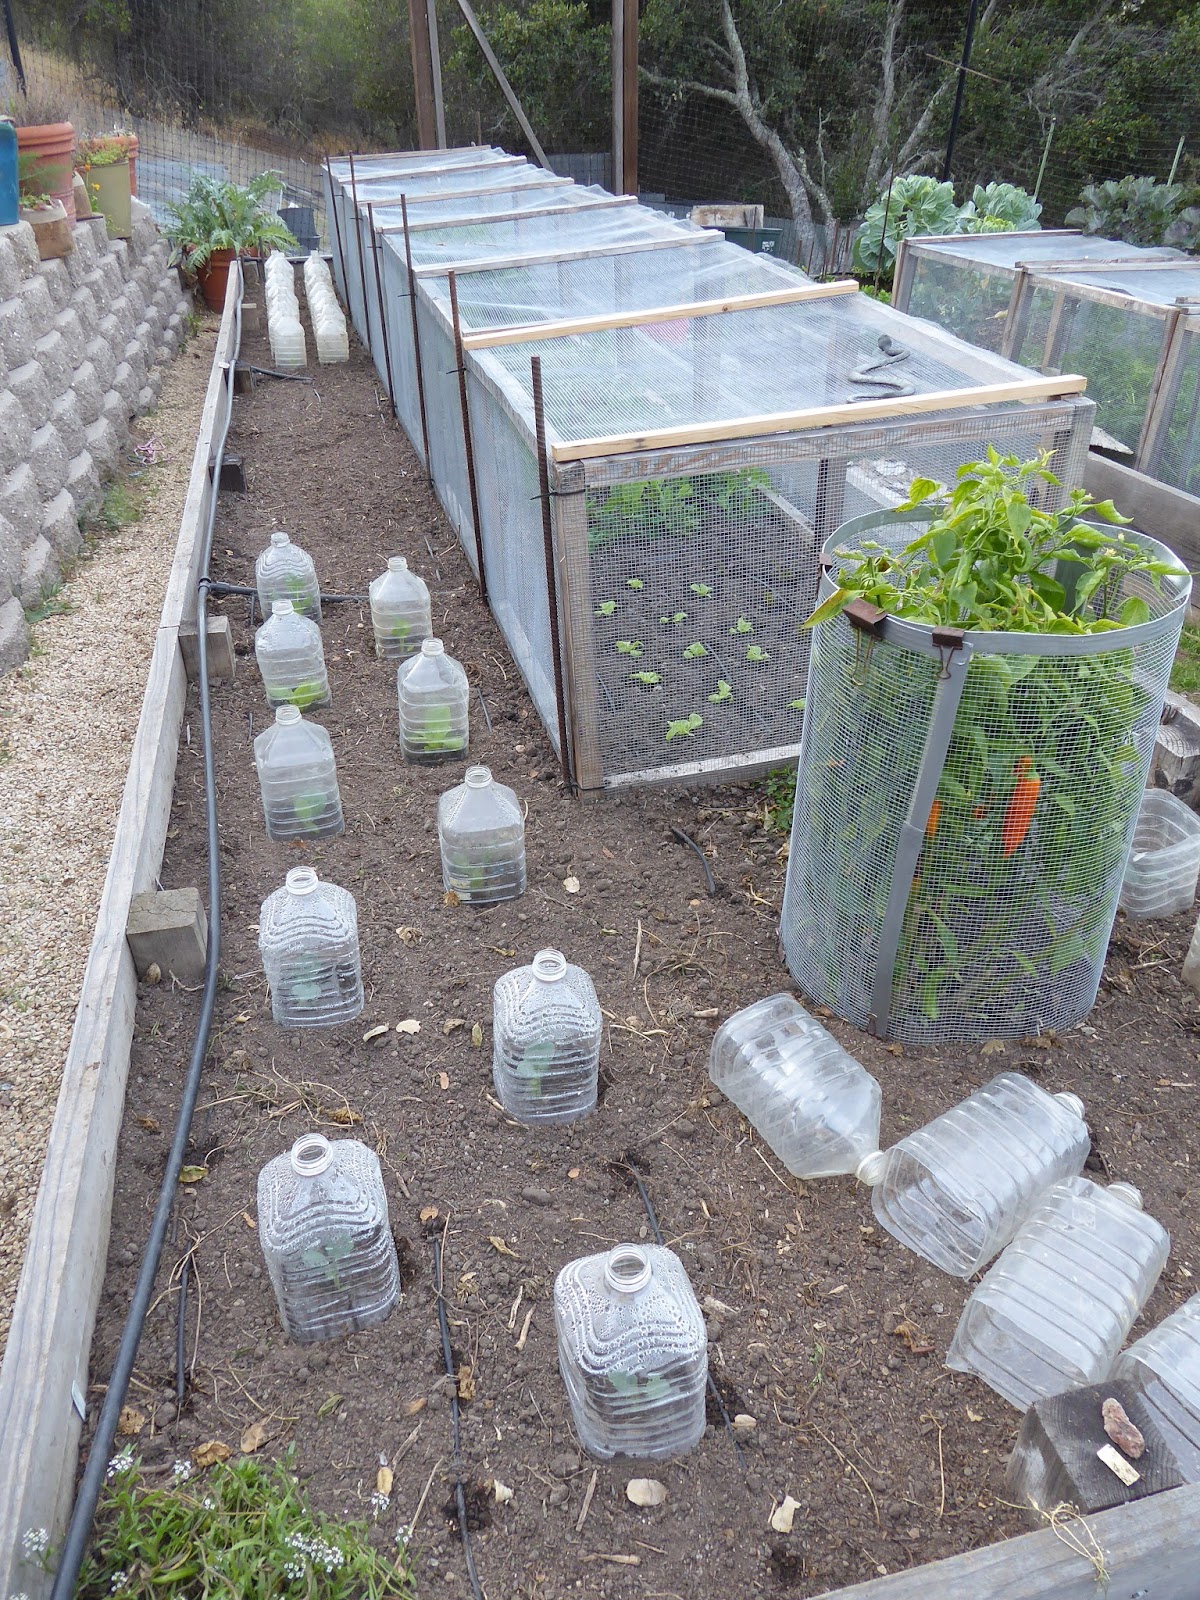
If I haven't planted favas before the end of the previous year I still have time to get them into the garden. For late started favas I'll sow them in paper pots indoors to speed up germination but I usually just sow the seeds directly in the garden. After I cut the tomatoes down from the trellis I plant favas along the length of the trellis and cover the seedlings with cloches made from 1-gallon plastic water bottles with the bottoms cut off. The cloches protect the seedlings from rain, frost, birds, and insect pests such as sow bugs and cutworms.

January
I may keep some cold hardy pepper plants in the bed to harvest late ripening peppers and then allow them to grow for a second year if they survive the winter. I plan for this when I put the pepper plants into the garden, I know from experience which plants are late producers and likely to survive through the winter so I put them together in one corner of the bed.

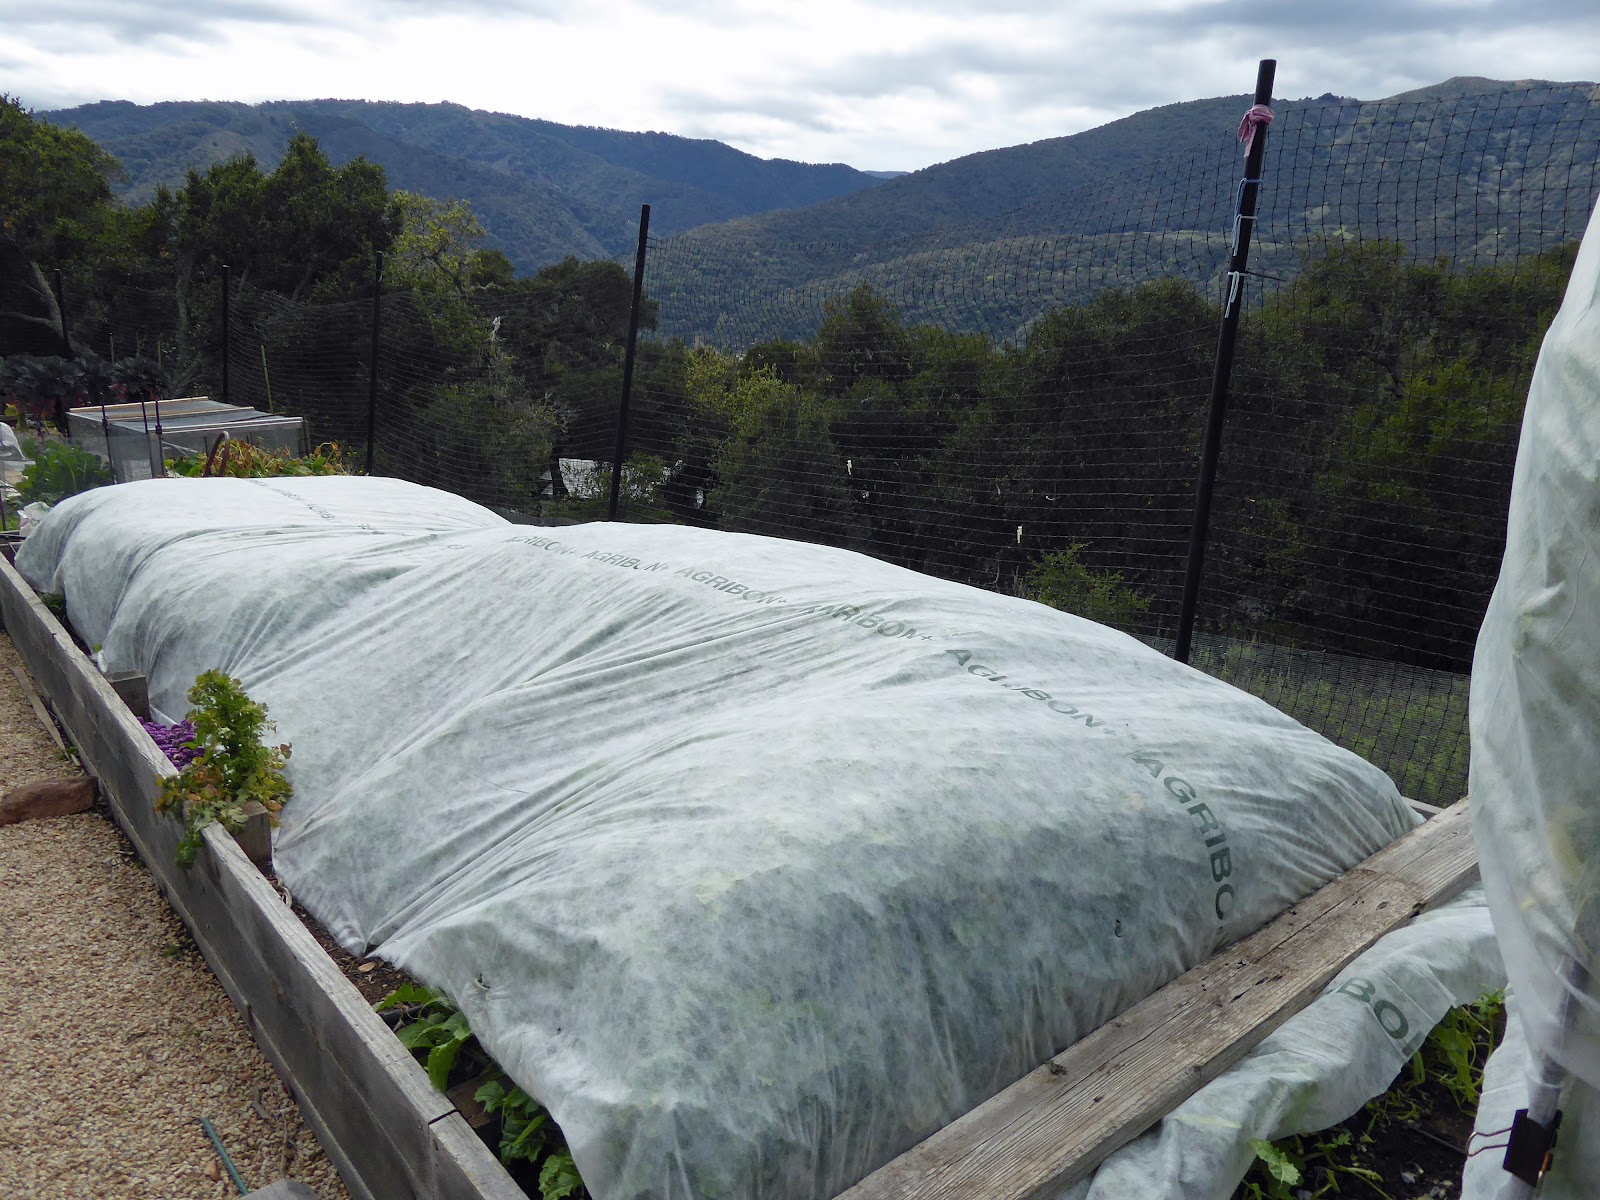
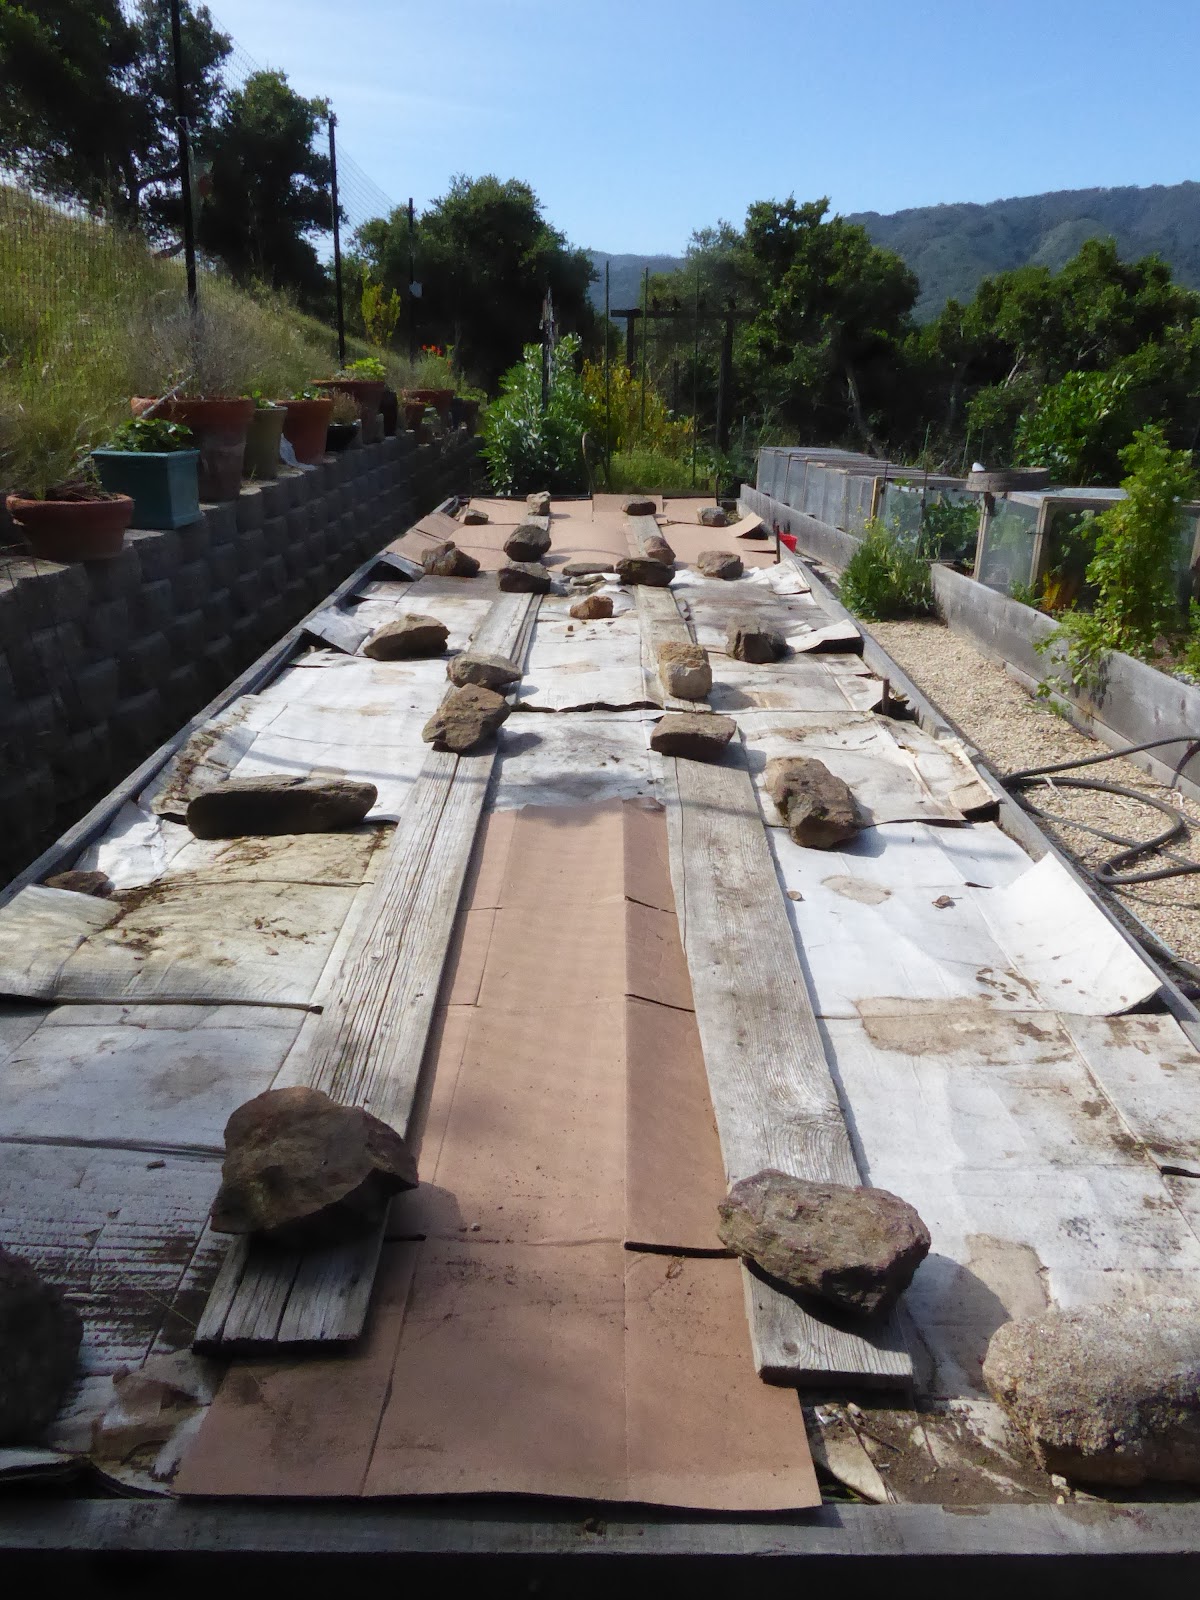
The young fava plants are a favorite snack for the birds so I usually cover them with a mesh fabric that allows light and air and rain to reach the plants. Micromesh has worked well and is sturdy enough to last a few years. (Don't buy from Amazon, it's totally overpriced, shop around for much better deals).


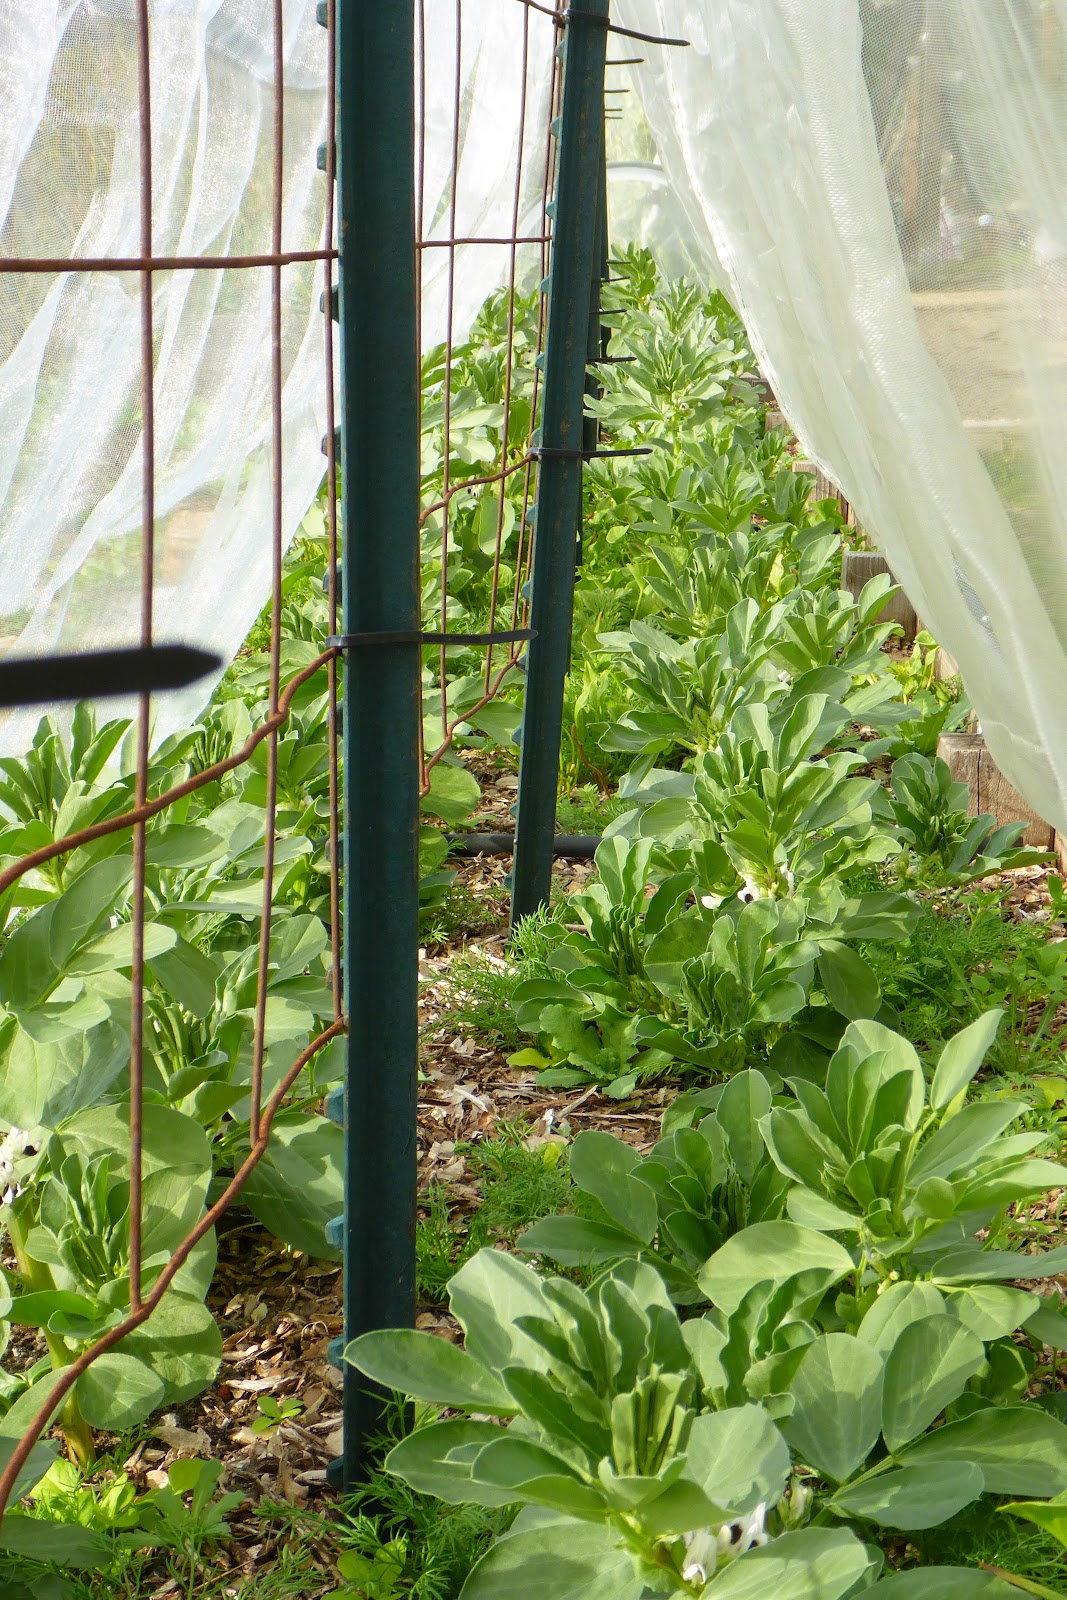
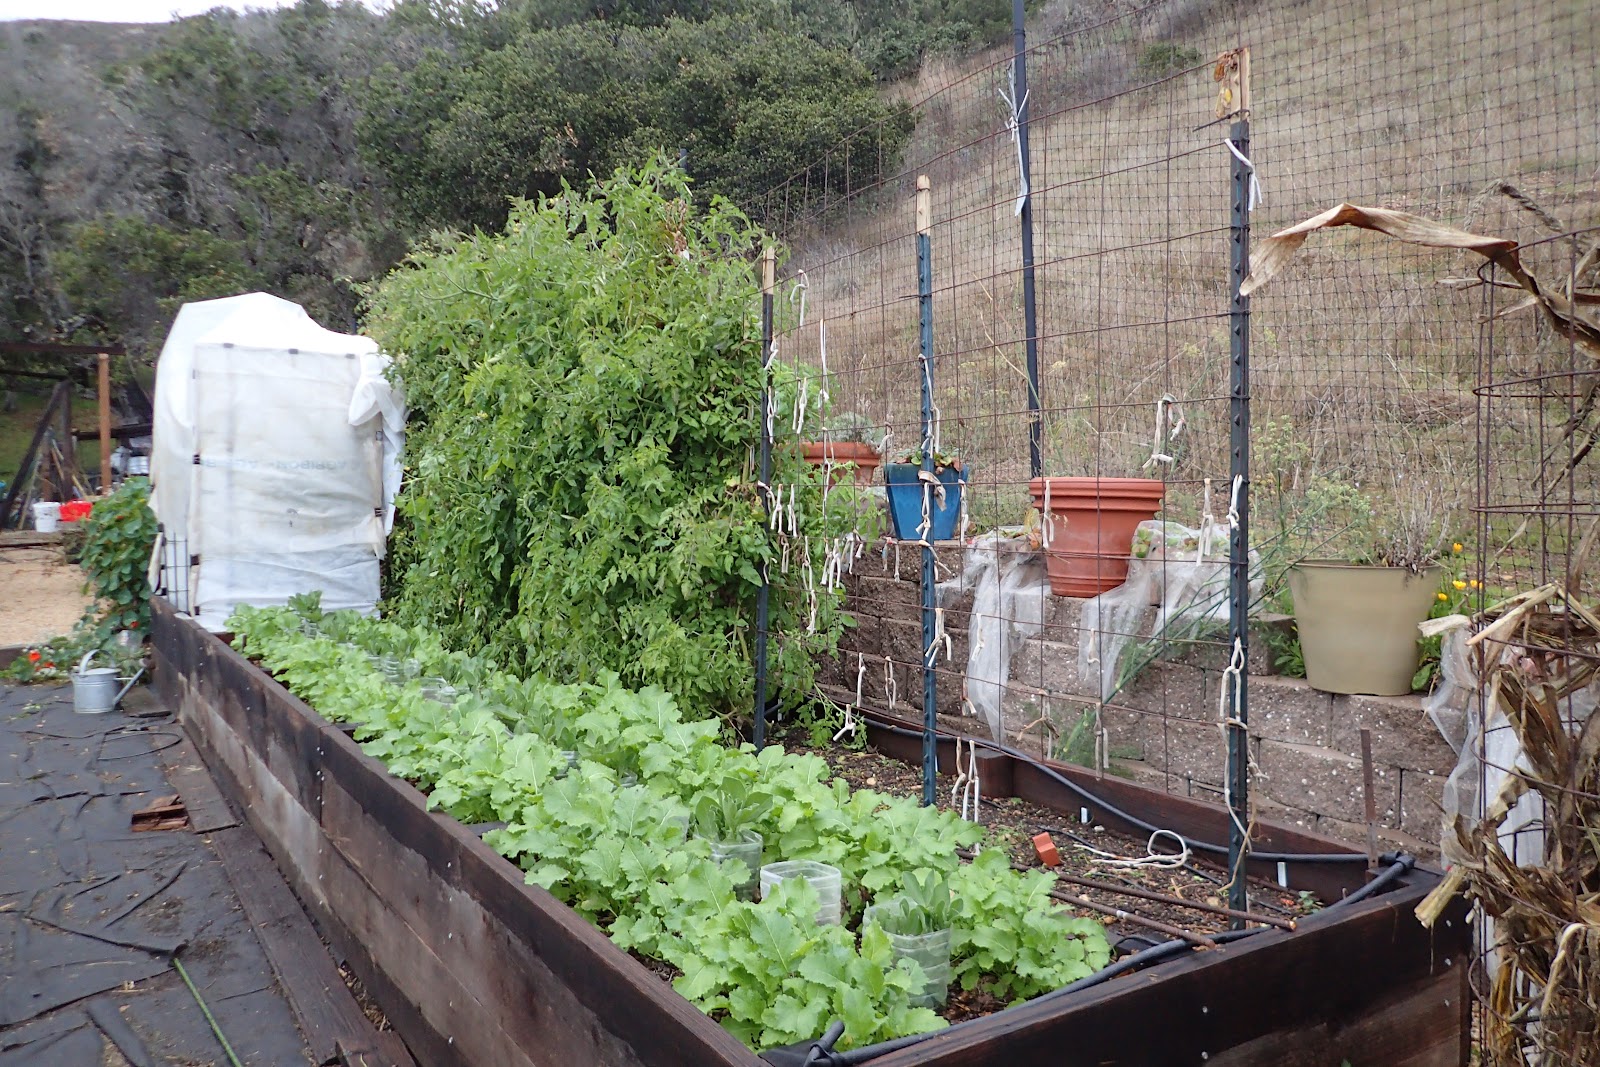
The trellis is handy not just for tying the floppy mature bean laden plants onto but also to provide support for the fabric.


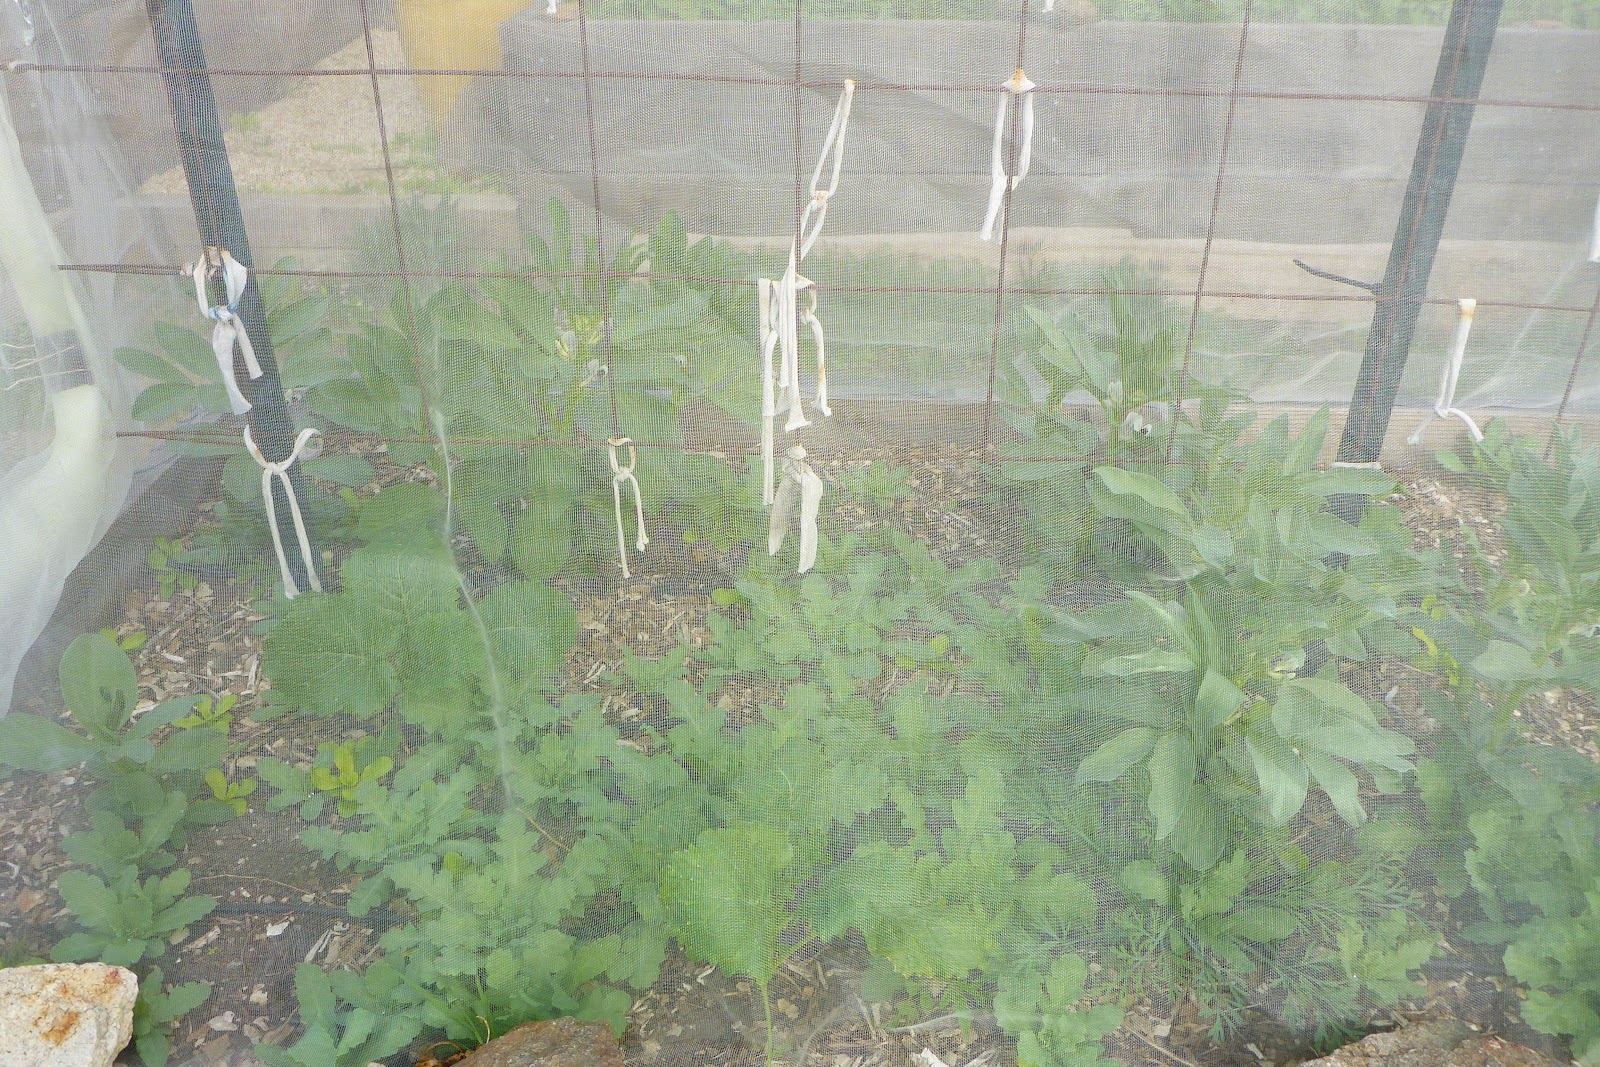
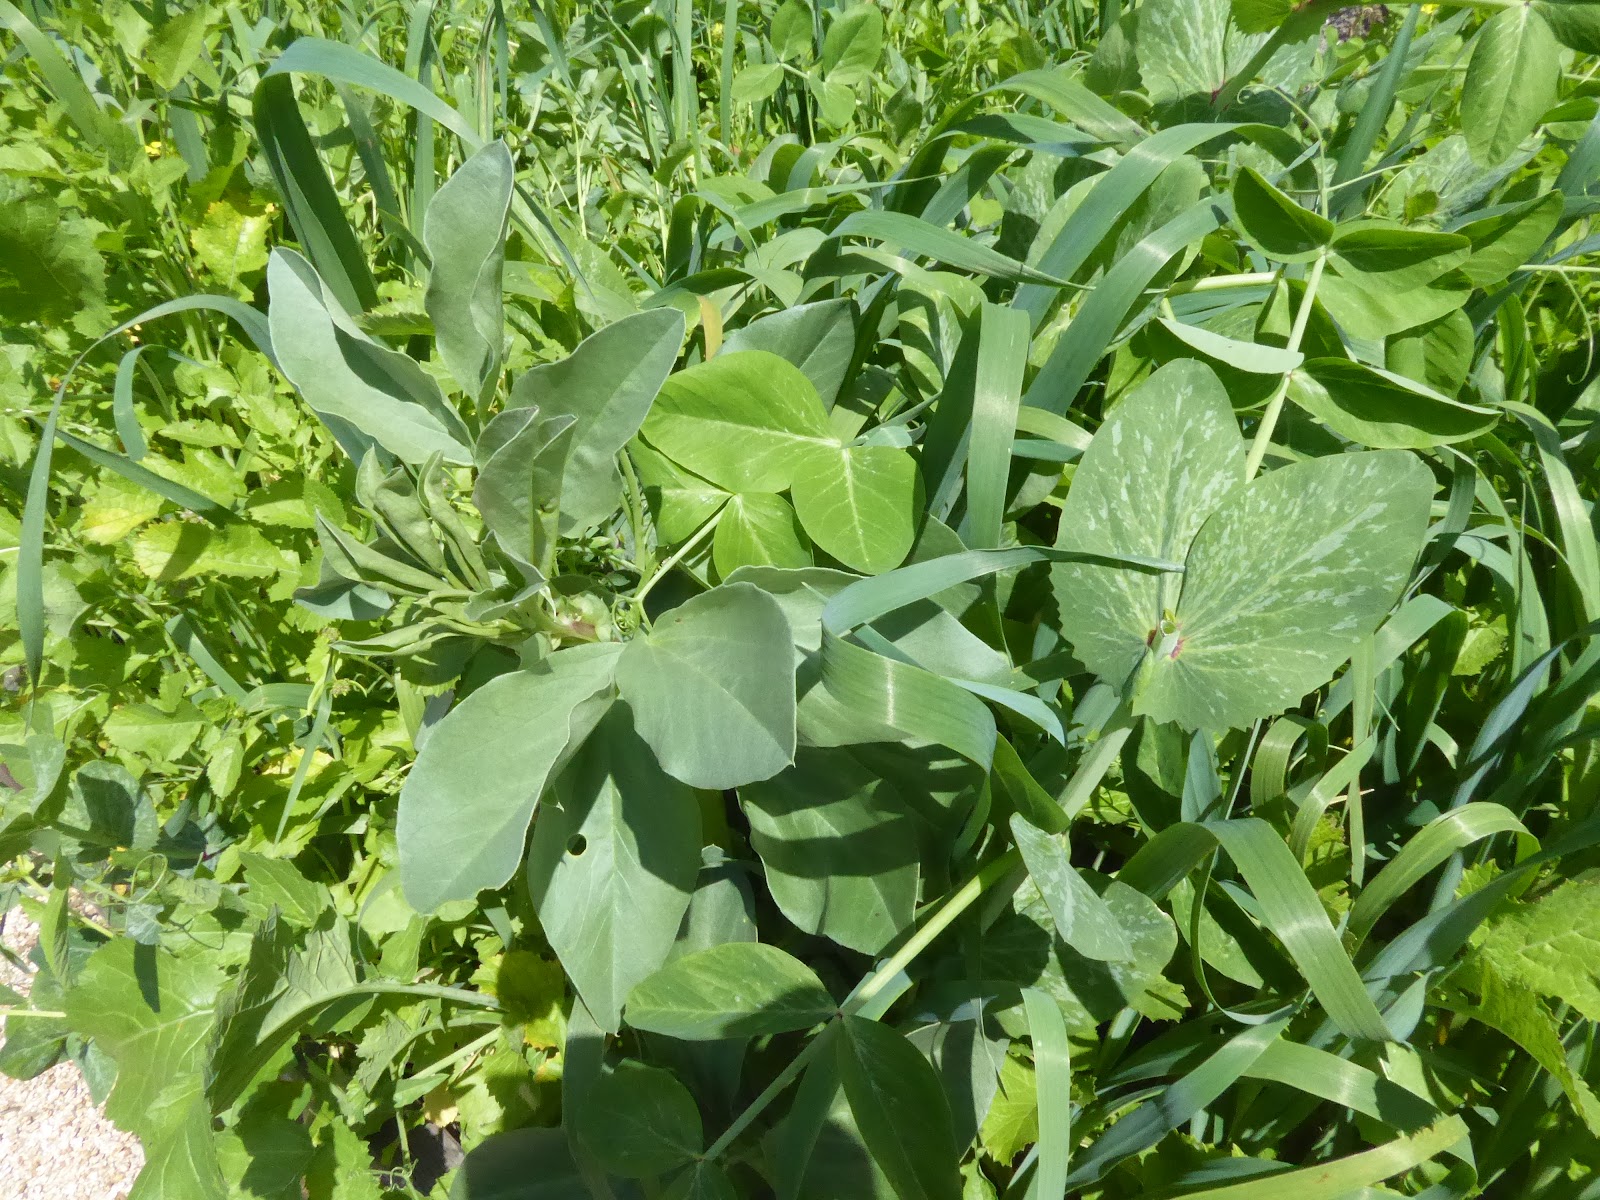
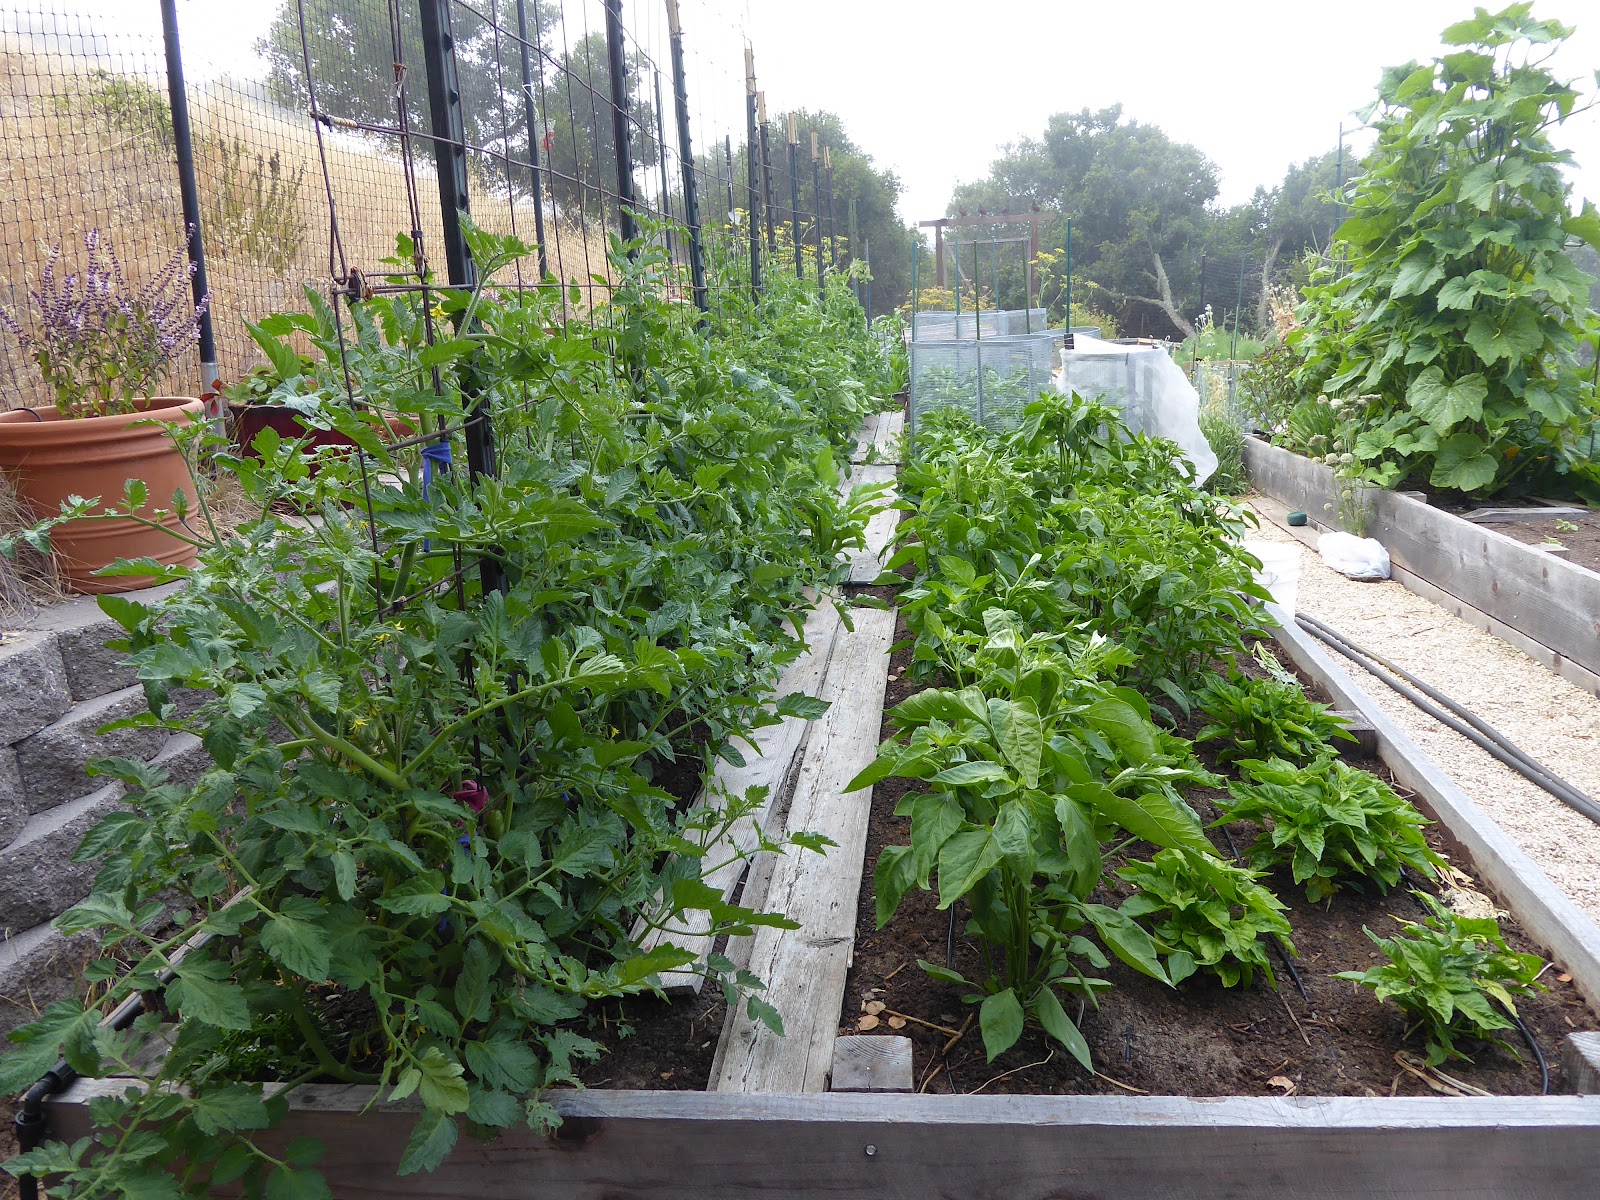
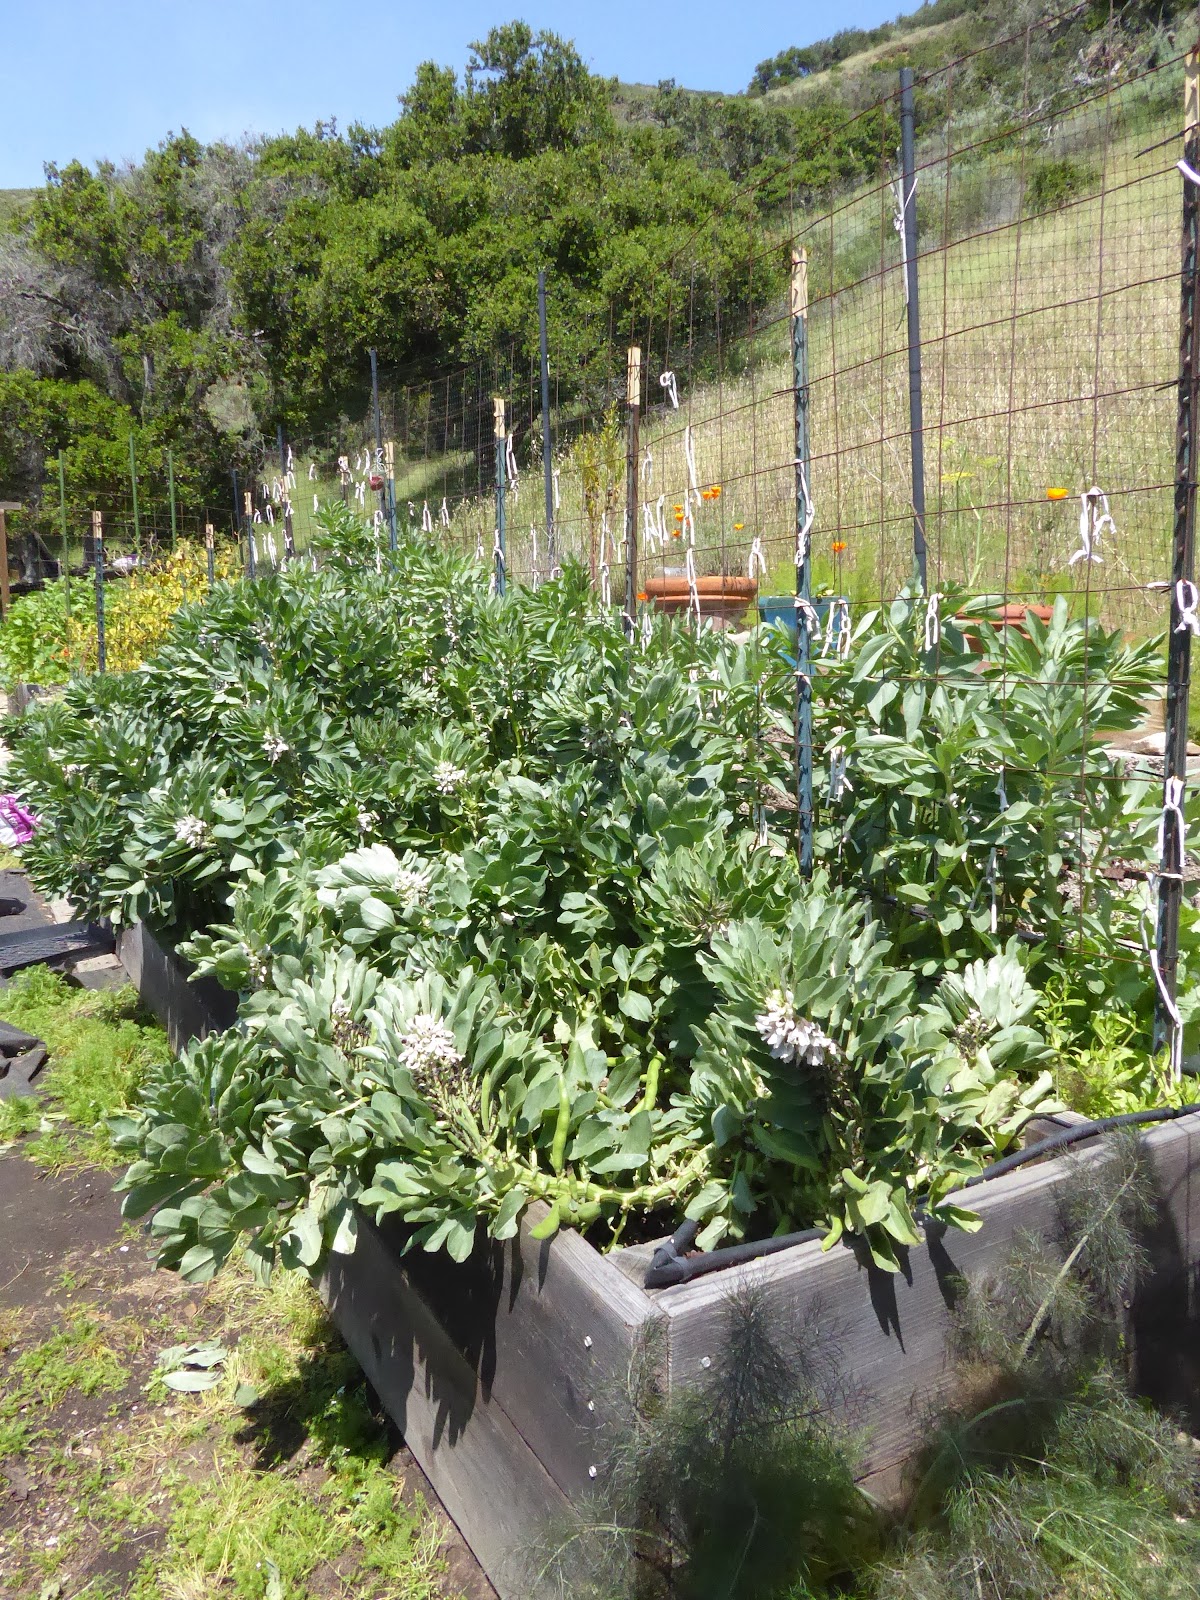
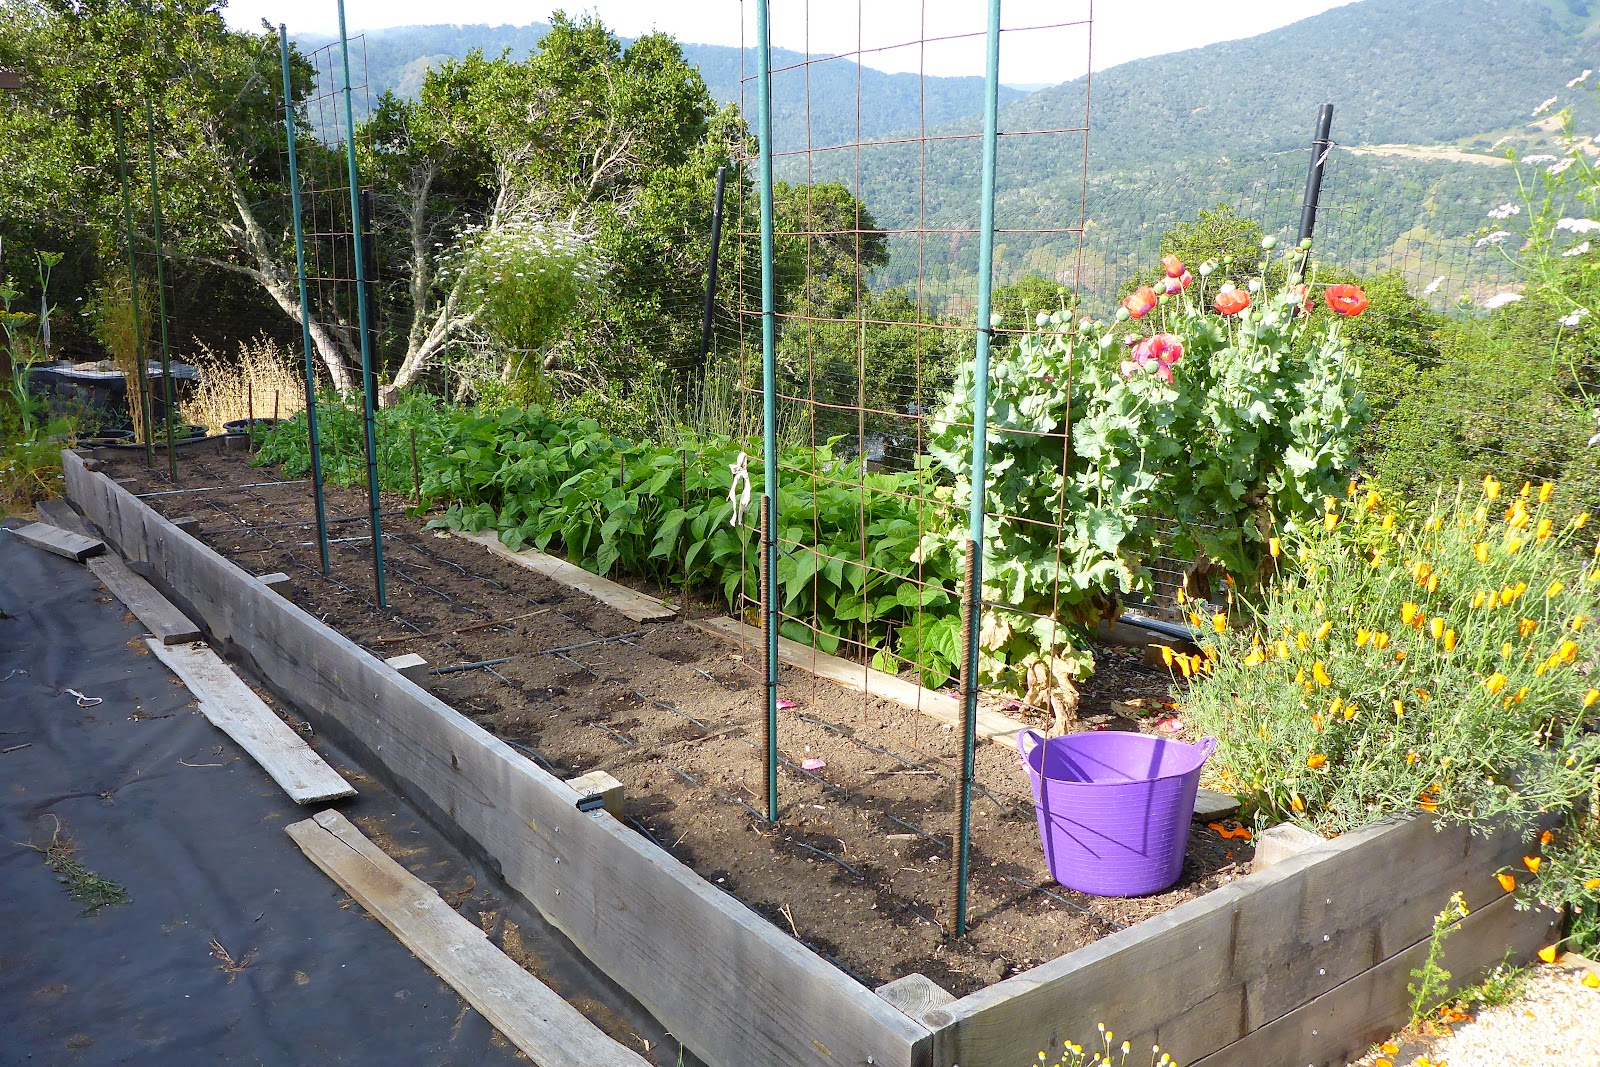
I devote all or most of the north side of the bed to the tall growing favas and have experimented with various other things on the south side of the bed. In the photo below I allowed mostly flowers and a few volunteer vegetables to grow.


One year when the south side of the bed was available early I put in a supposedly low growing variety of favas which flopped all over that side of the bed. We love our favas but that year there were simply too many but I couldn't bring myself to pull them out while they were still producing beans. I thought they would finish producing early but it turned out not to be the case so I didn't make the best use of the space that year. But still, growing anything is better for the soil than having nothing growing and favas are certainly great for the soil.


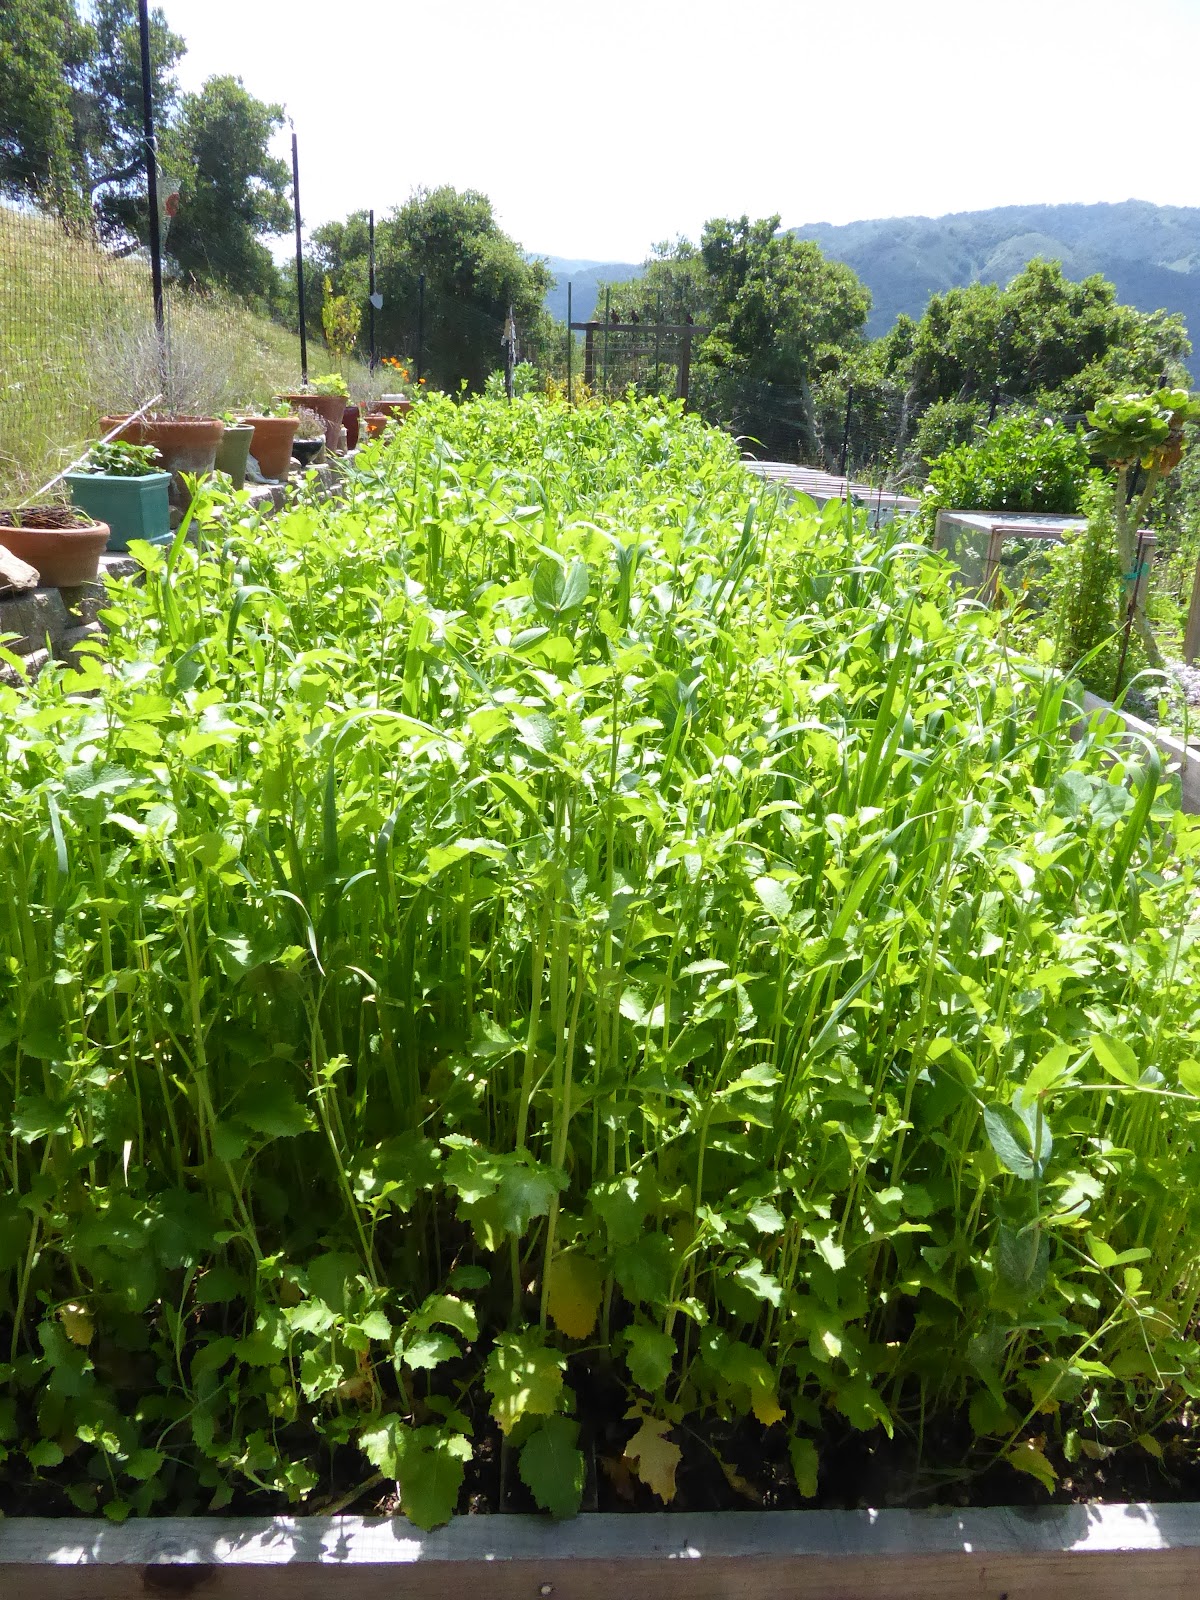
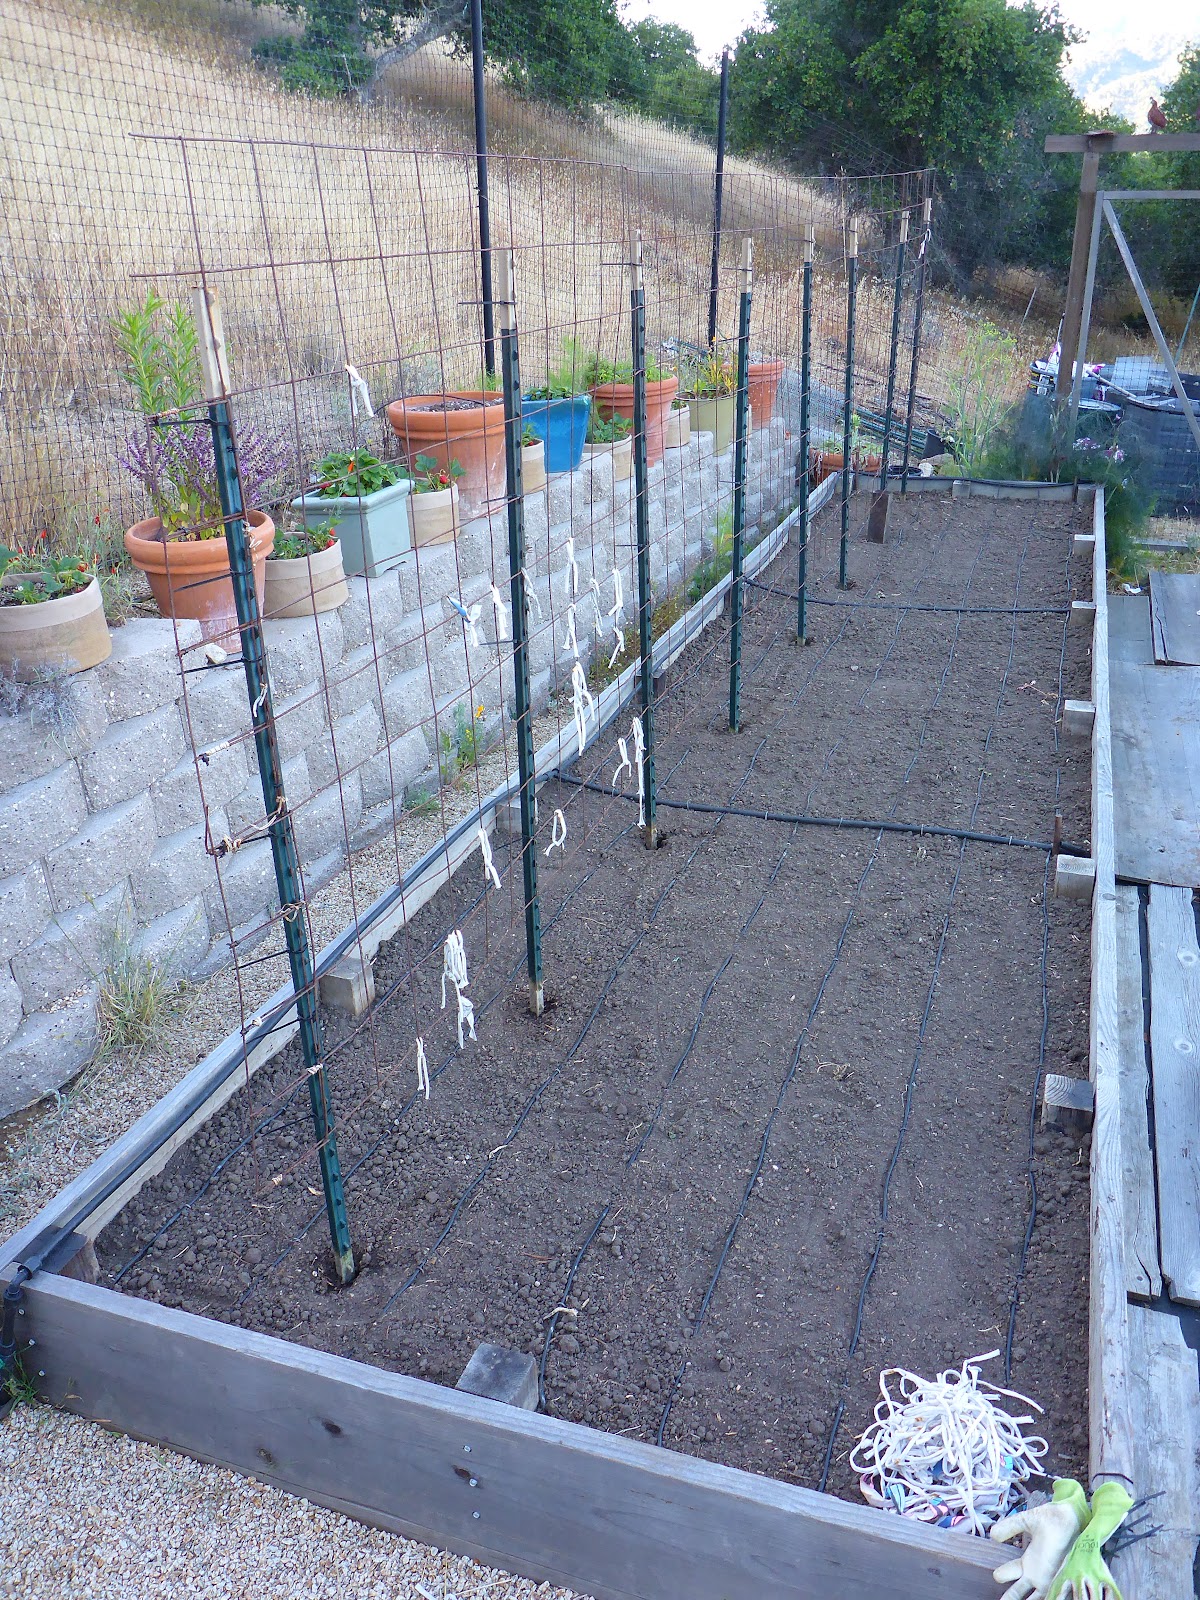
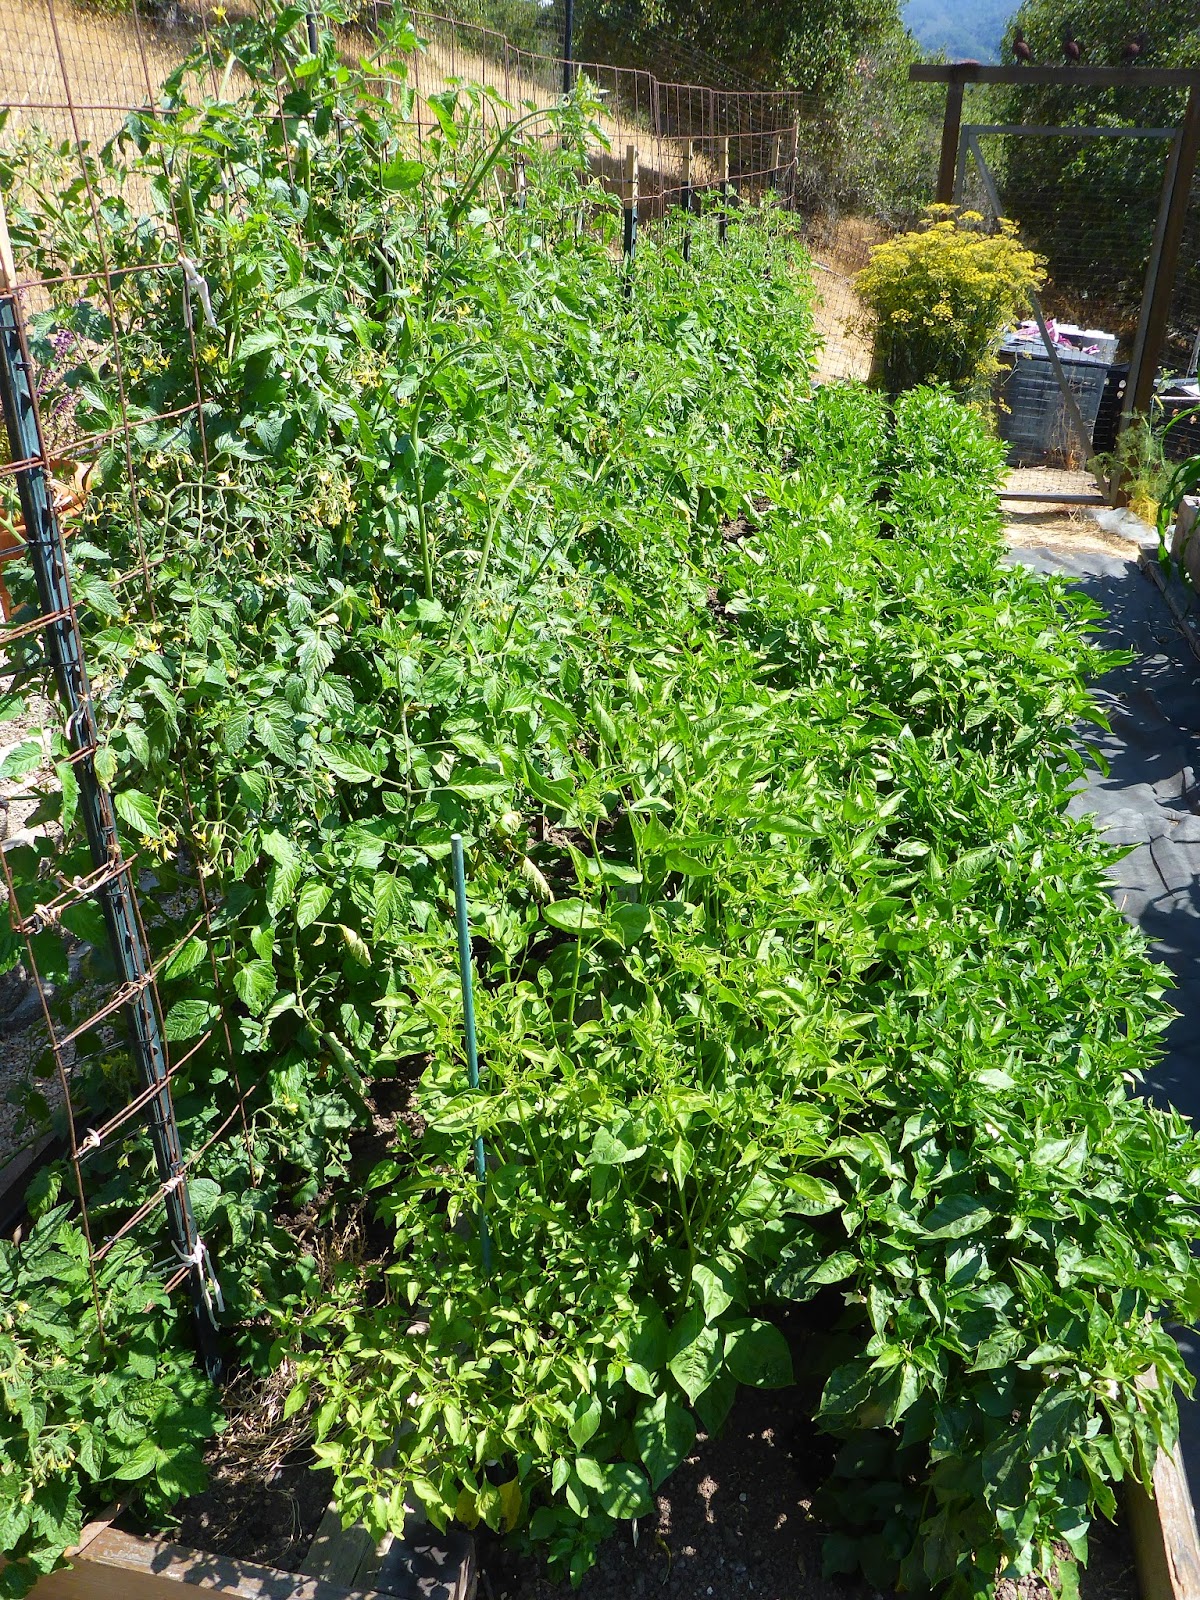
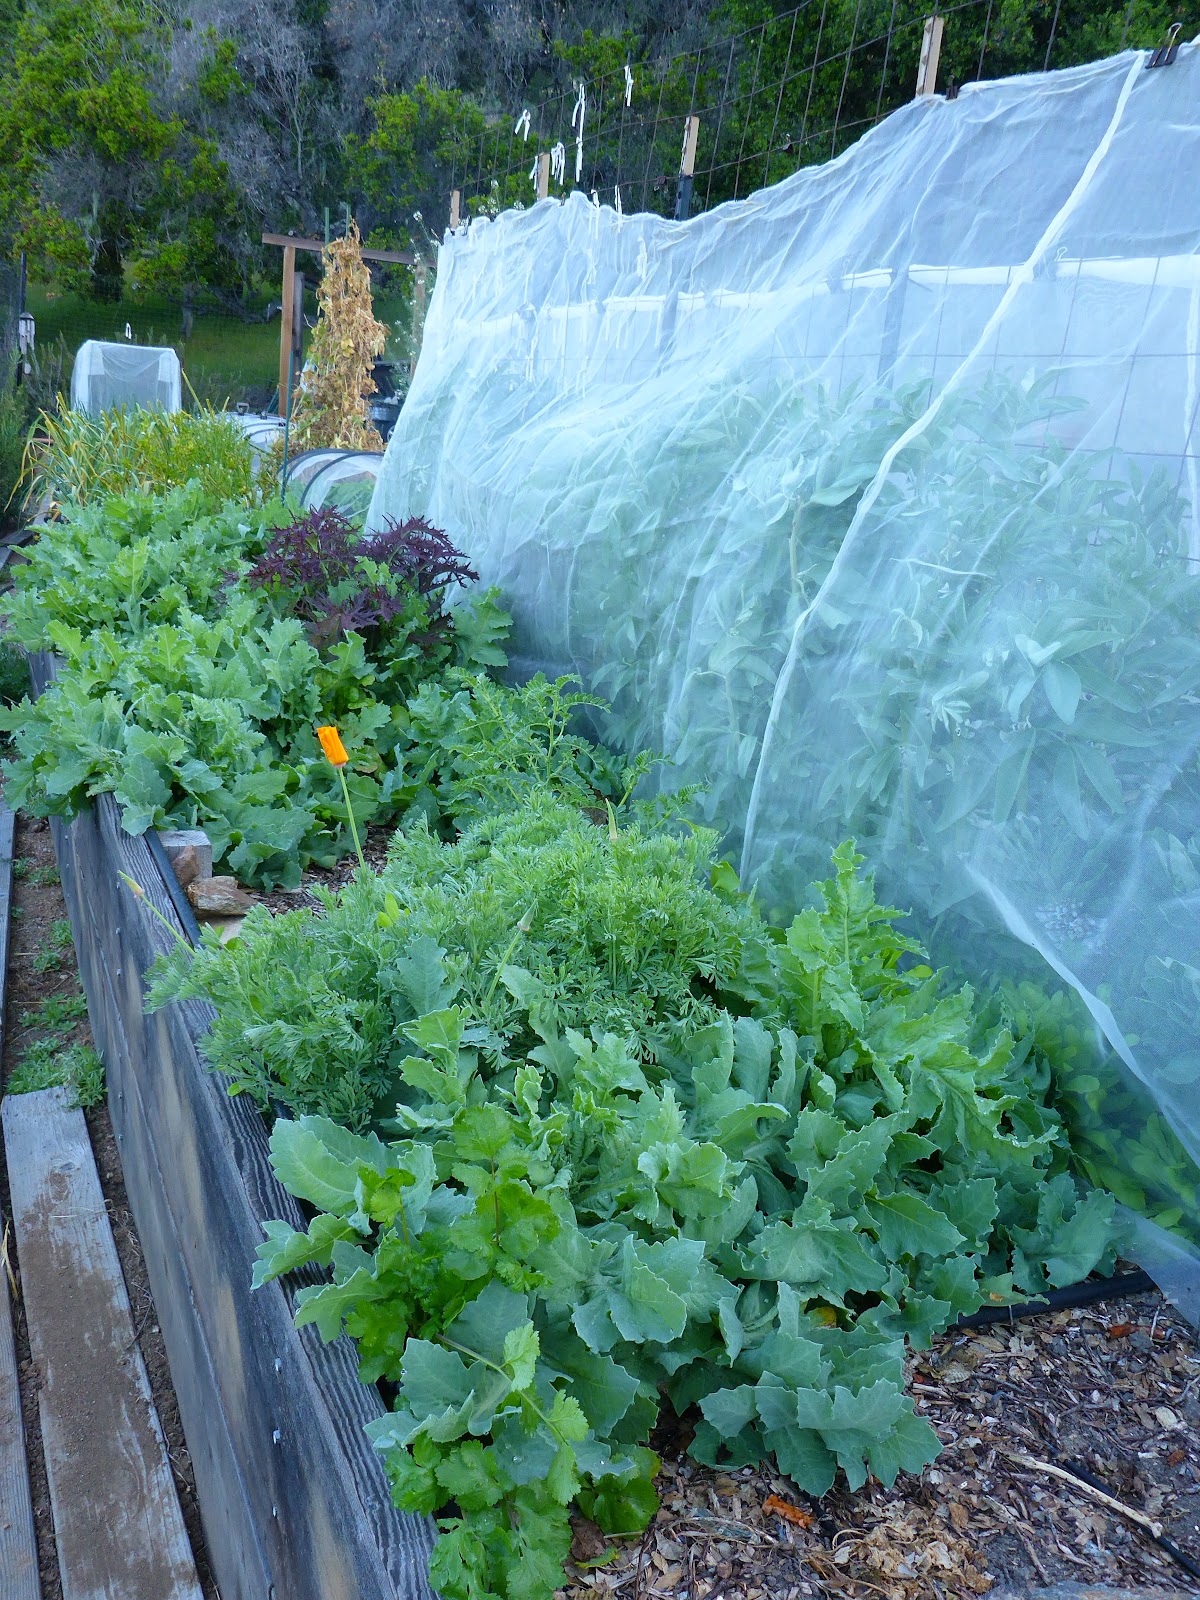
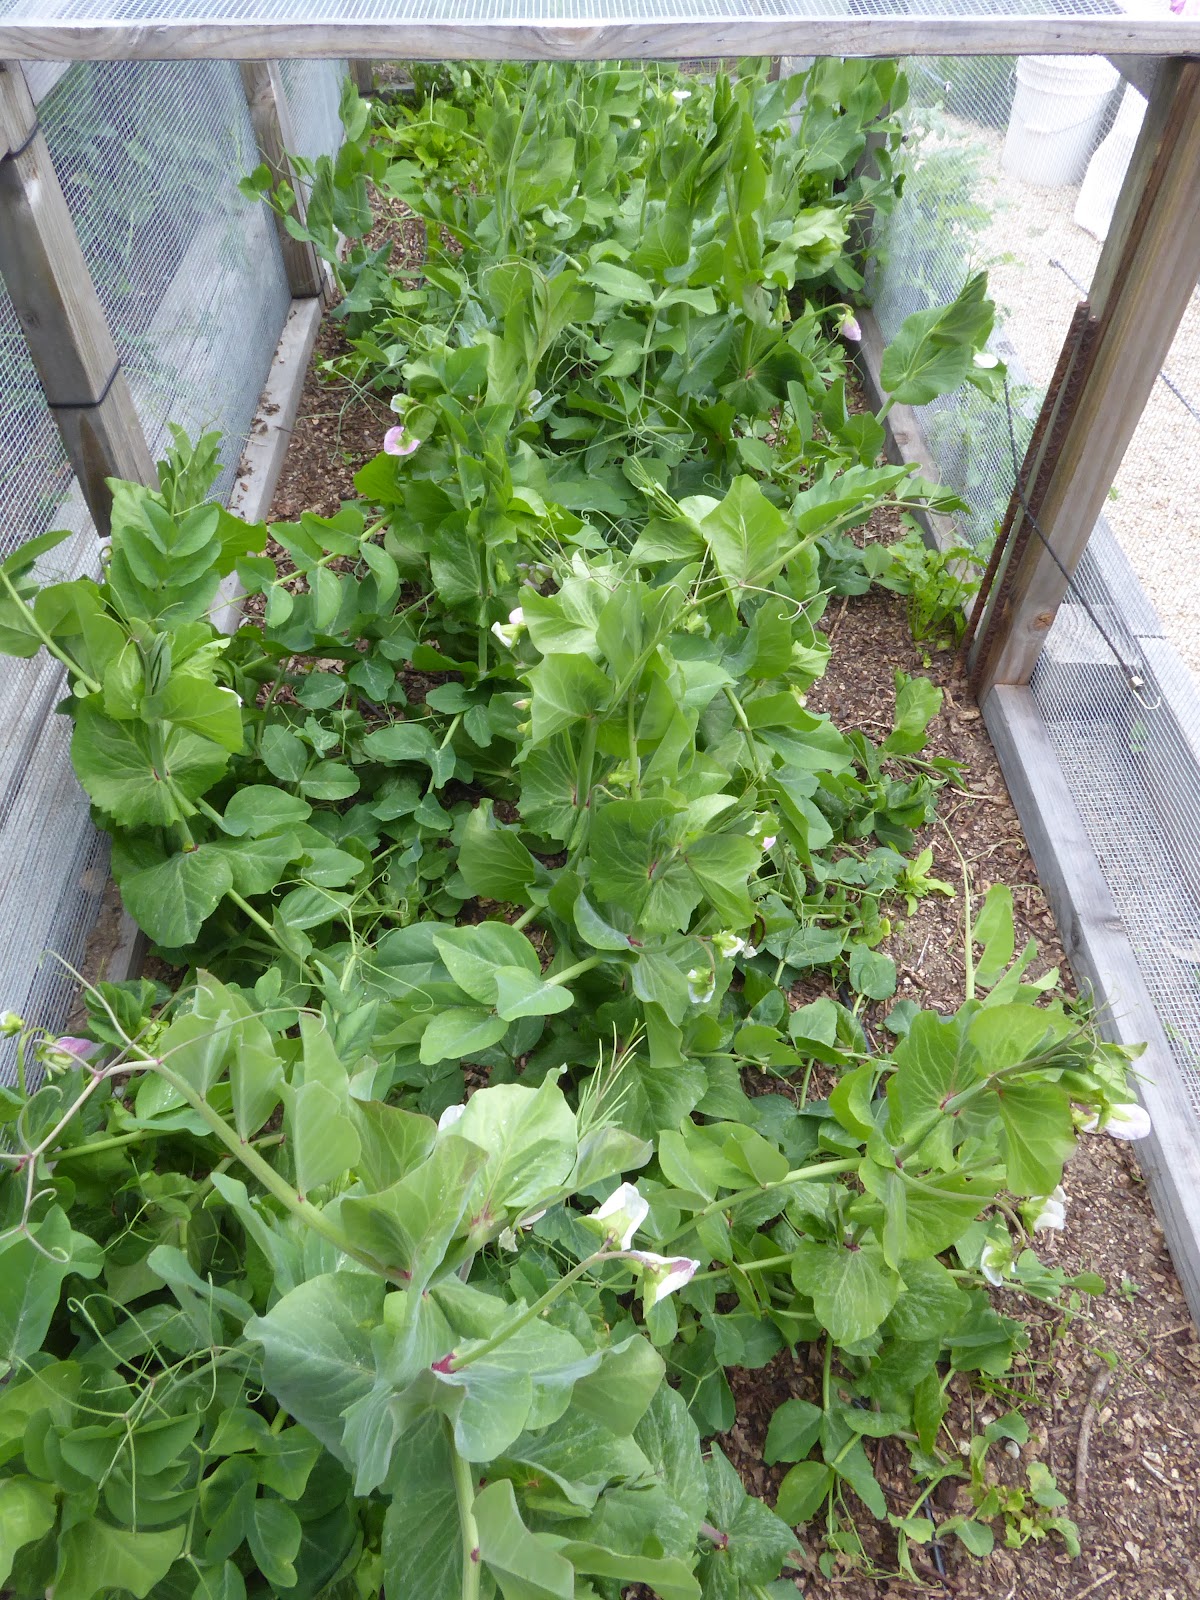
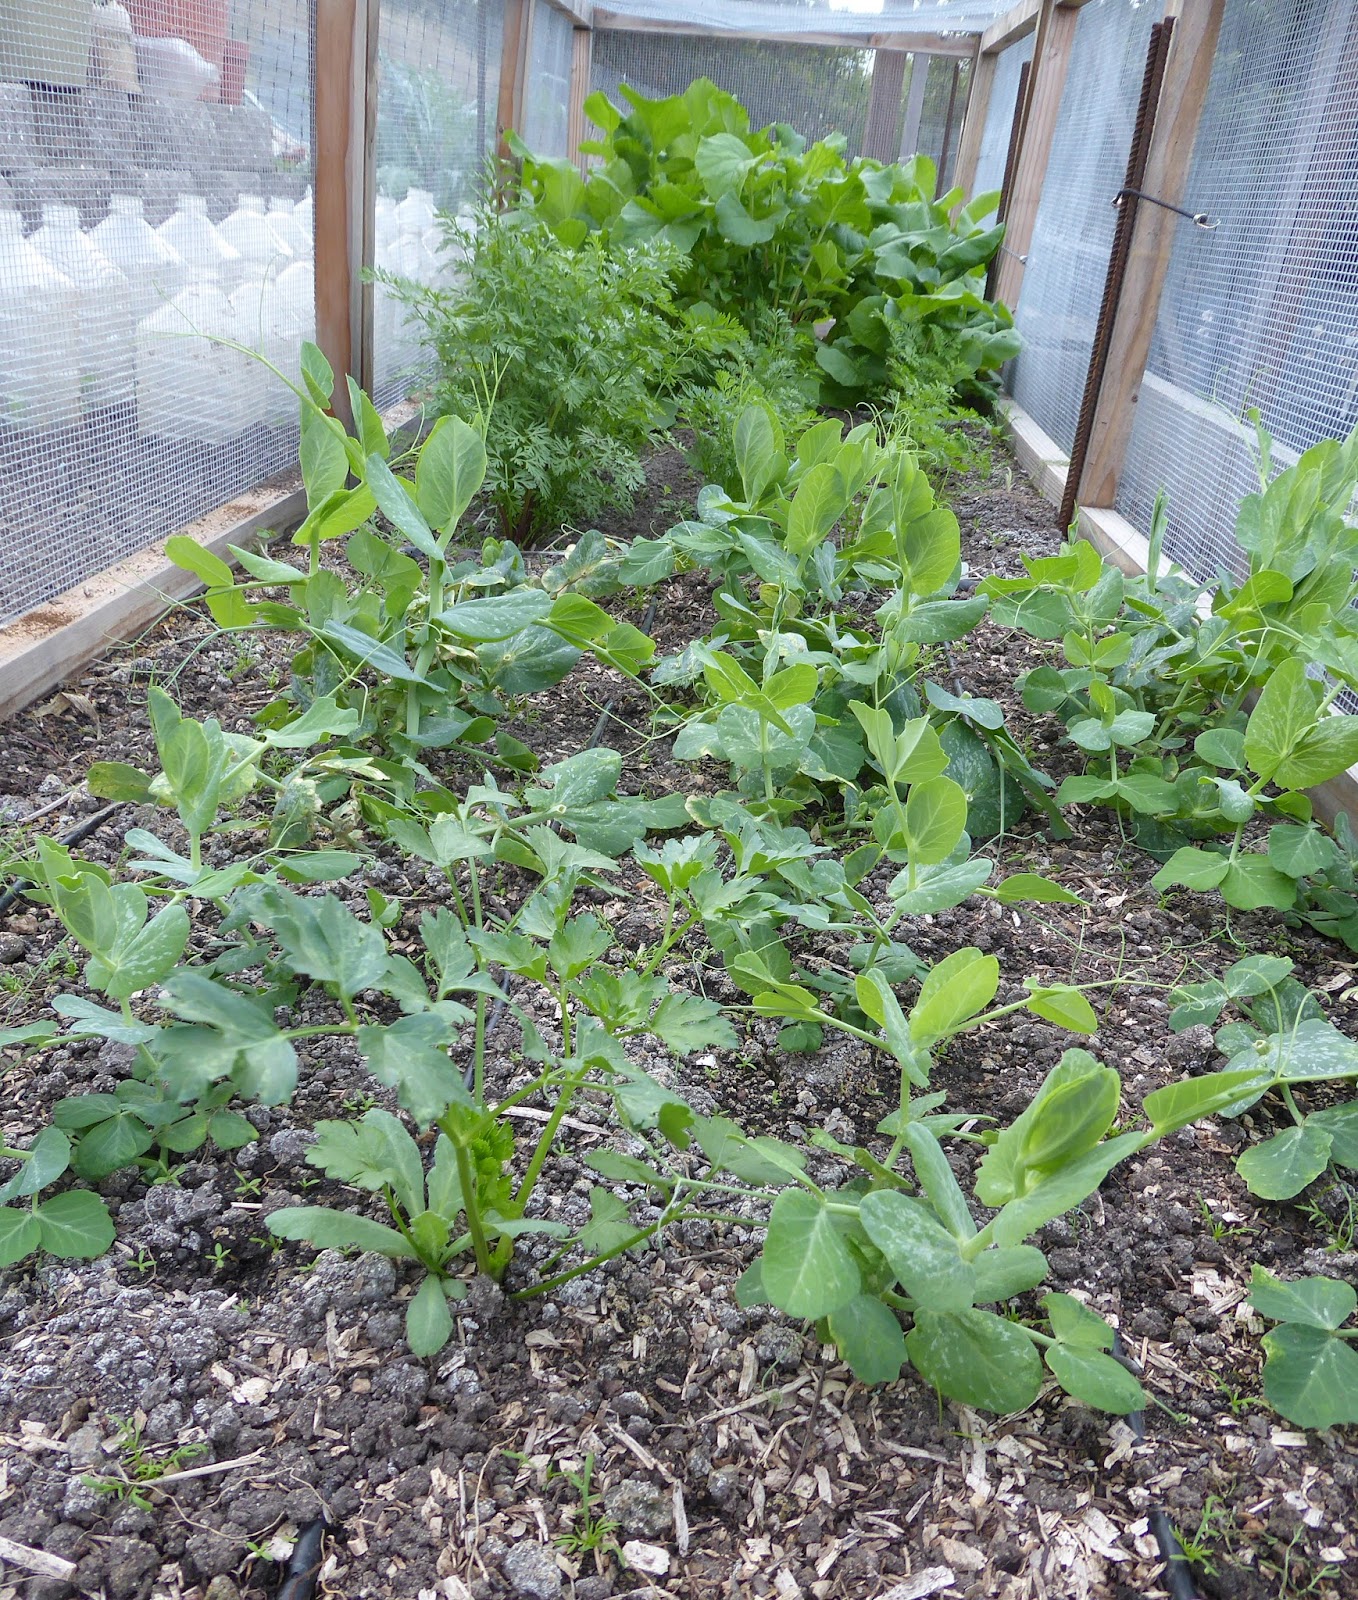
The arrangement that I've settled on lately is to grow peas on the south side of the bed. Note the flash tape instead of fabric, the flash tape was unusually effective at deterring the birds that year.


I have to grow peas inside a cage these days because the local rodent population has boomed and peas are definitely something that the damned critters like to eat. When the plants are young I harvest the tender shoots a few times which has the added benefit of forcing the vines to produce side shoots so I get more peas per plant.


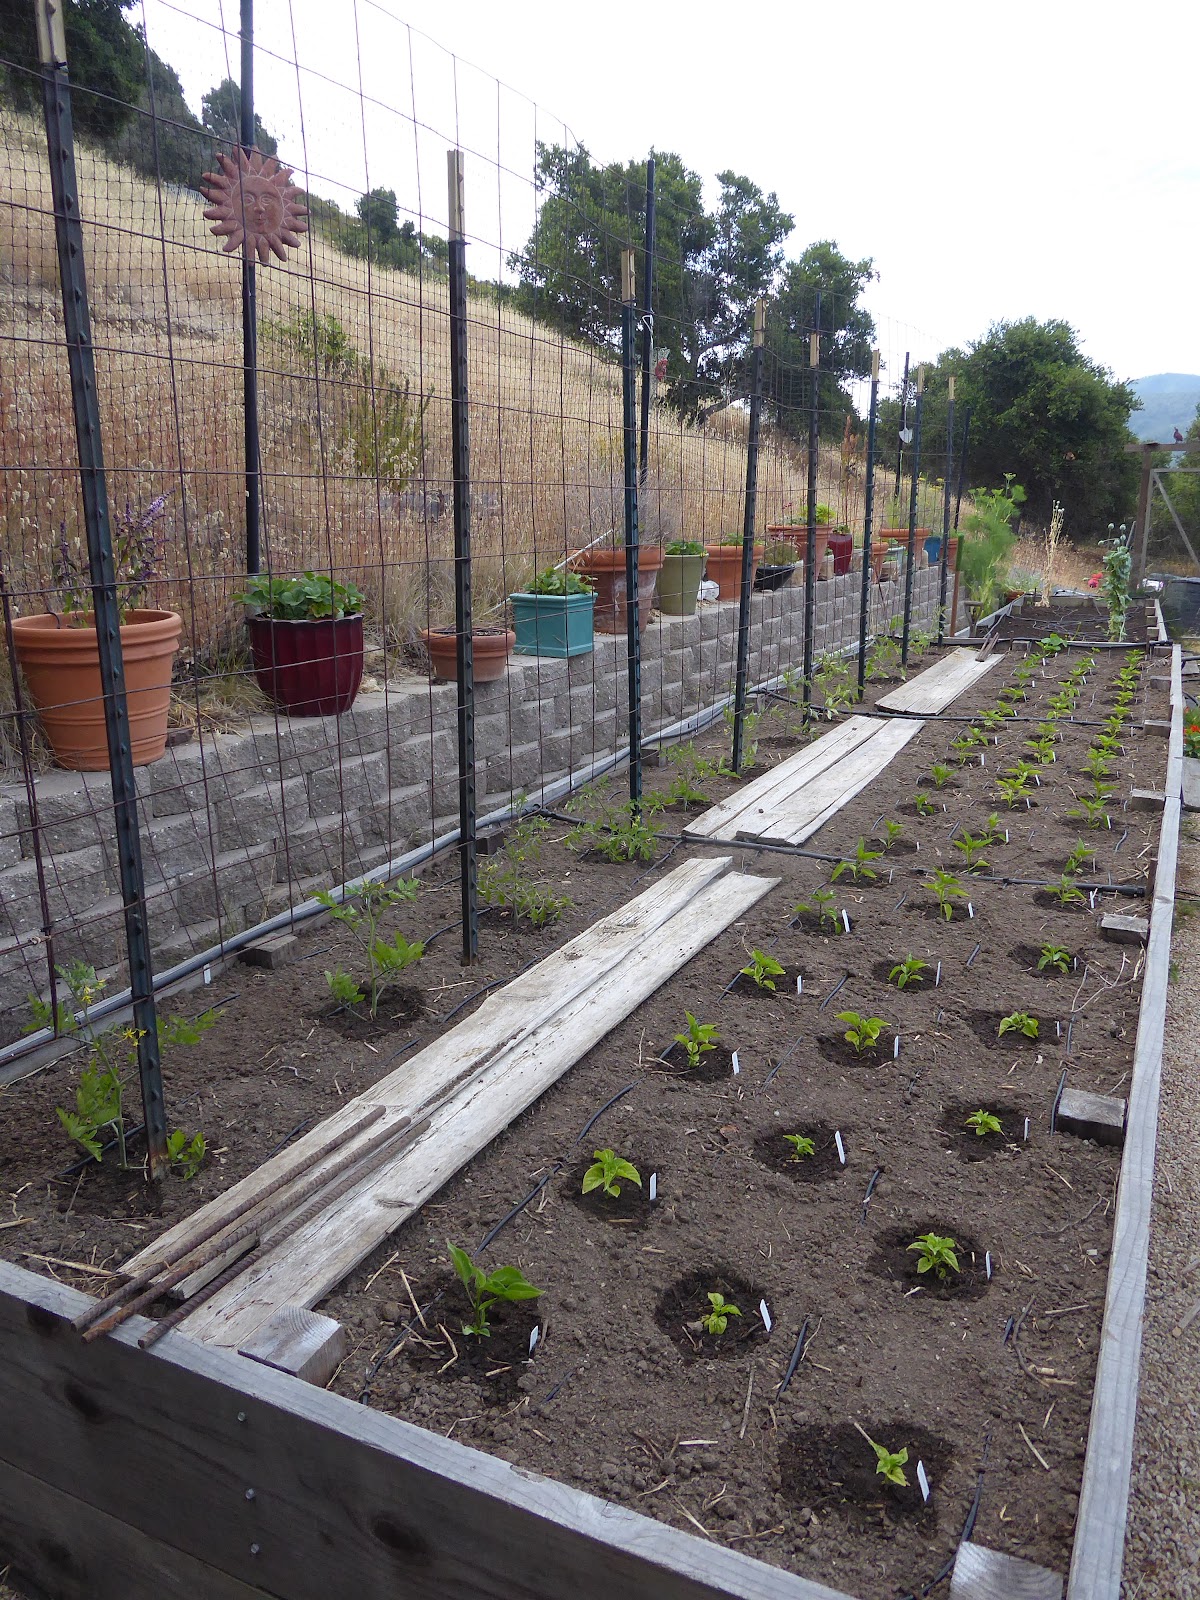
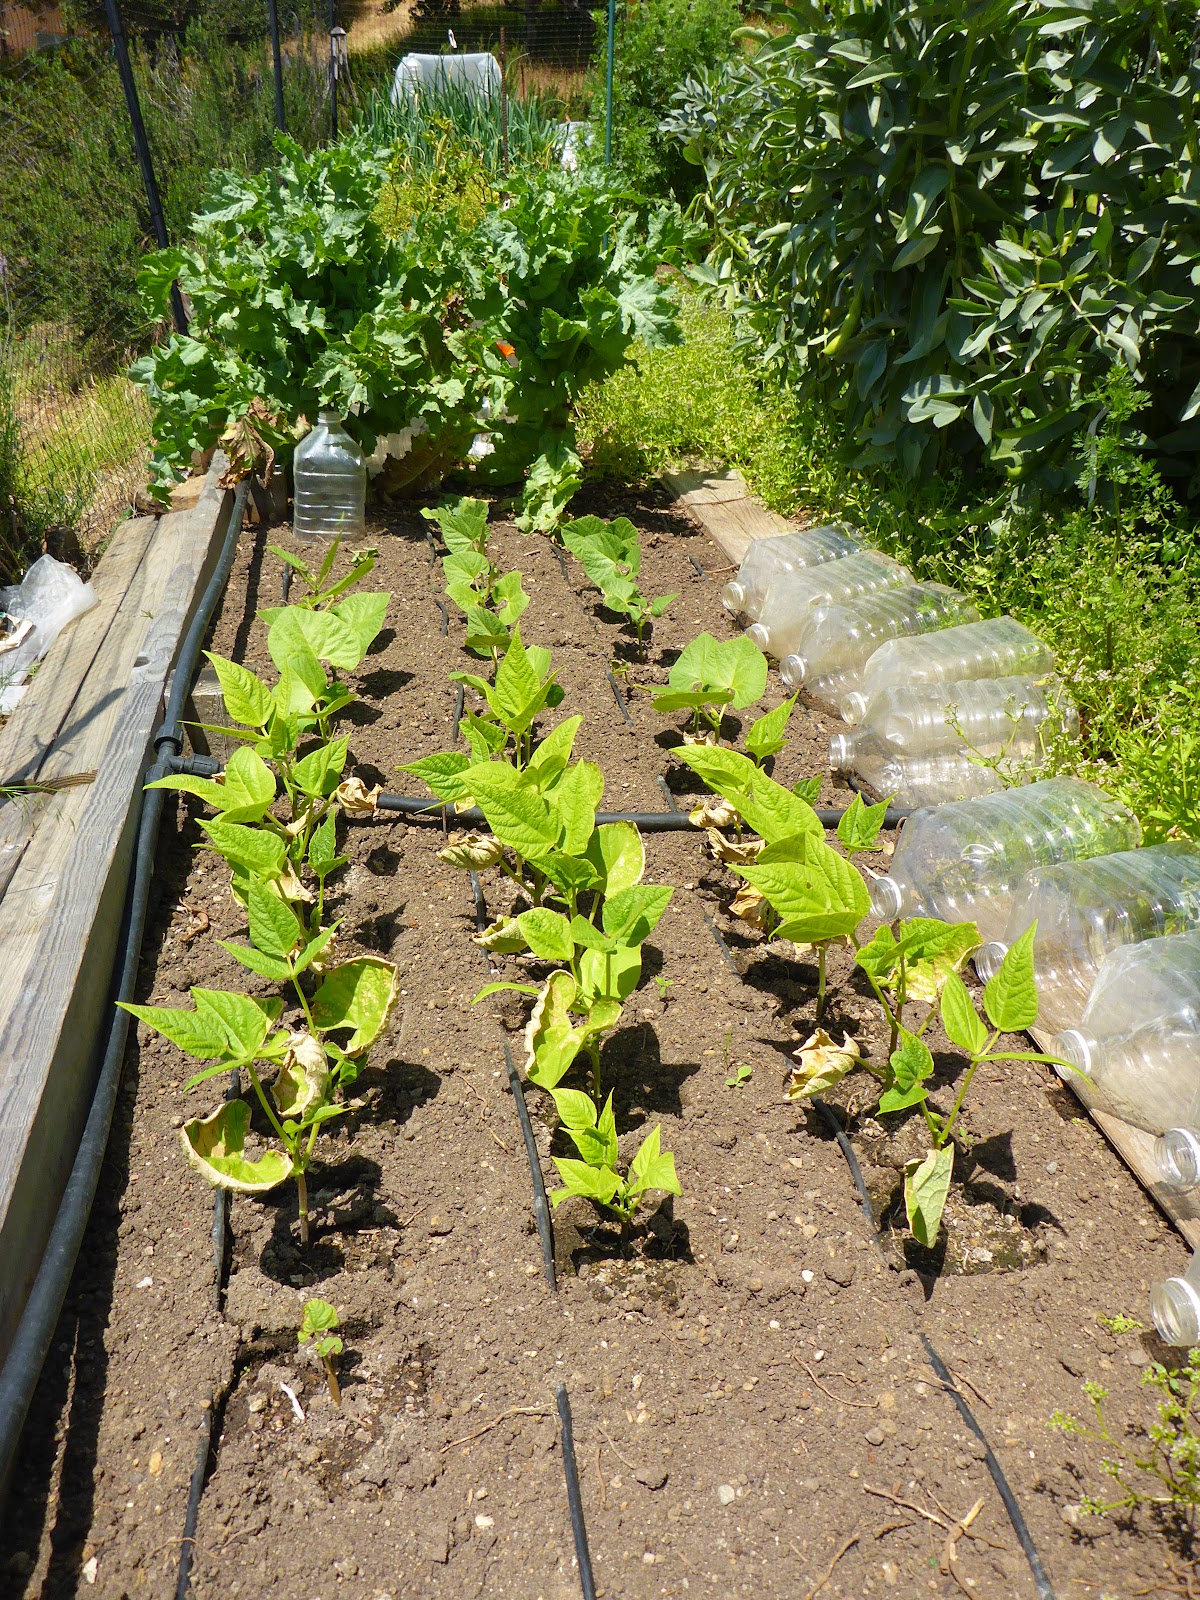
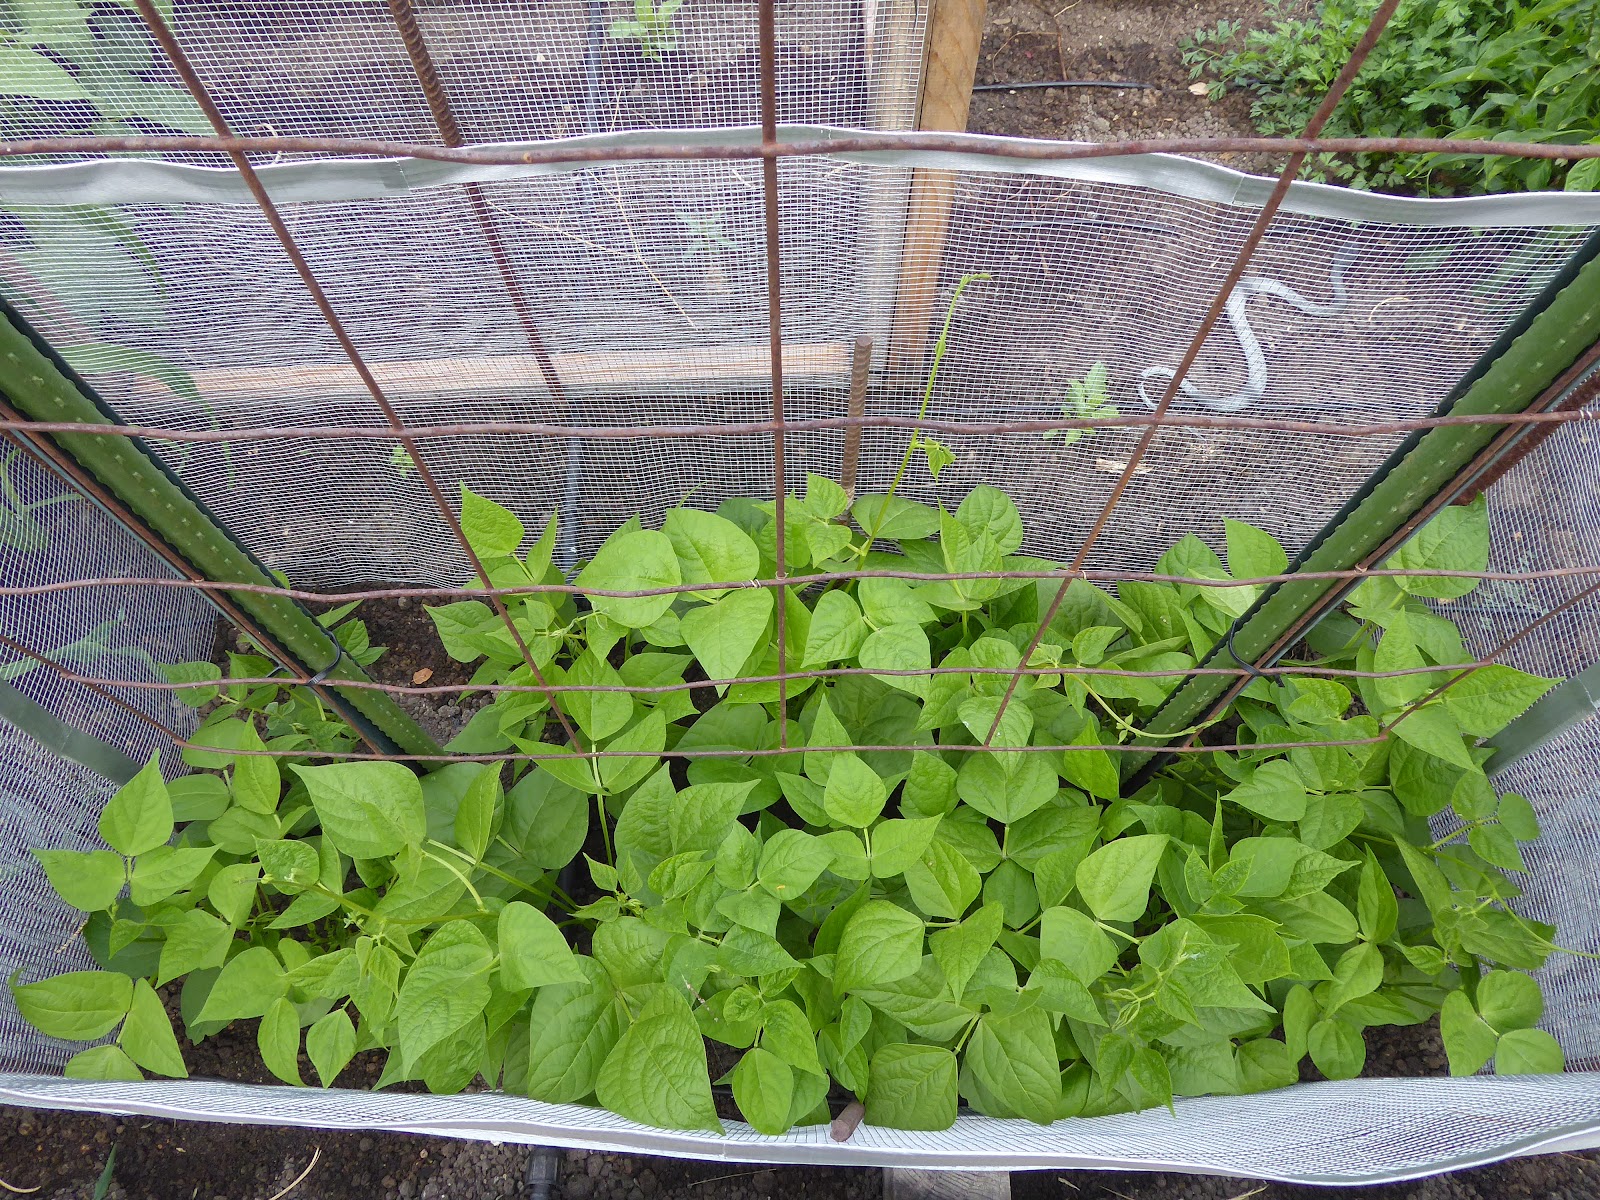
I can start putting bush beans into the south side of the bed in mid to late April. Again, I sow them in paper pots to start them indoors.


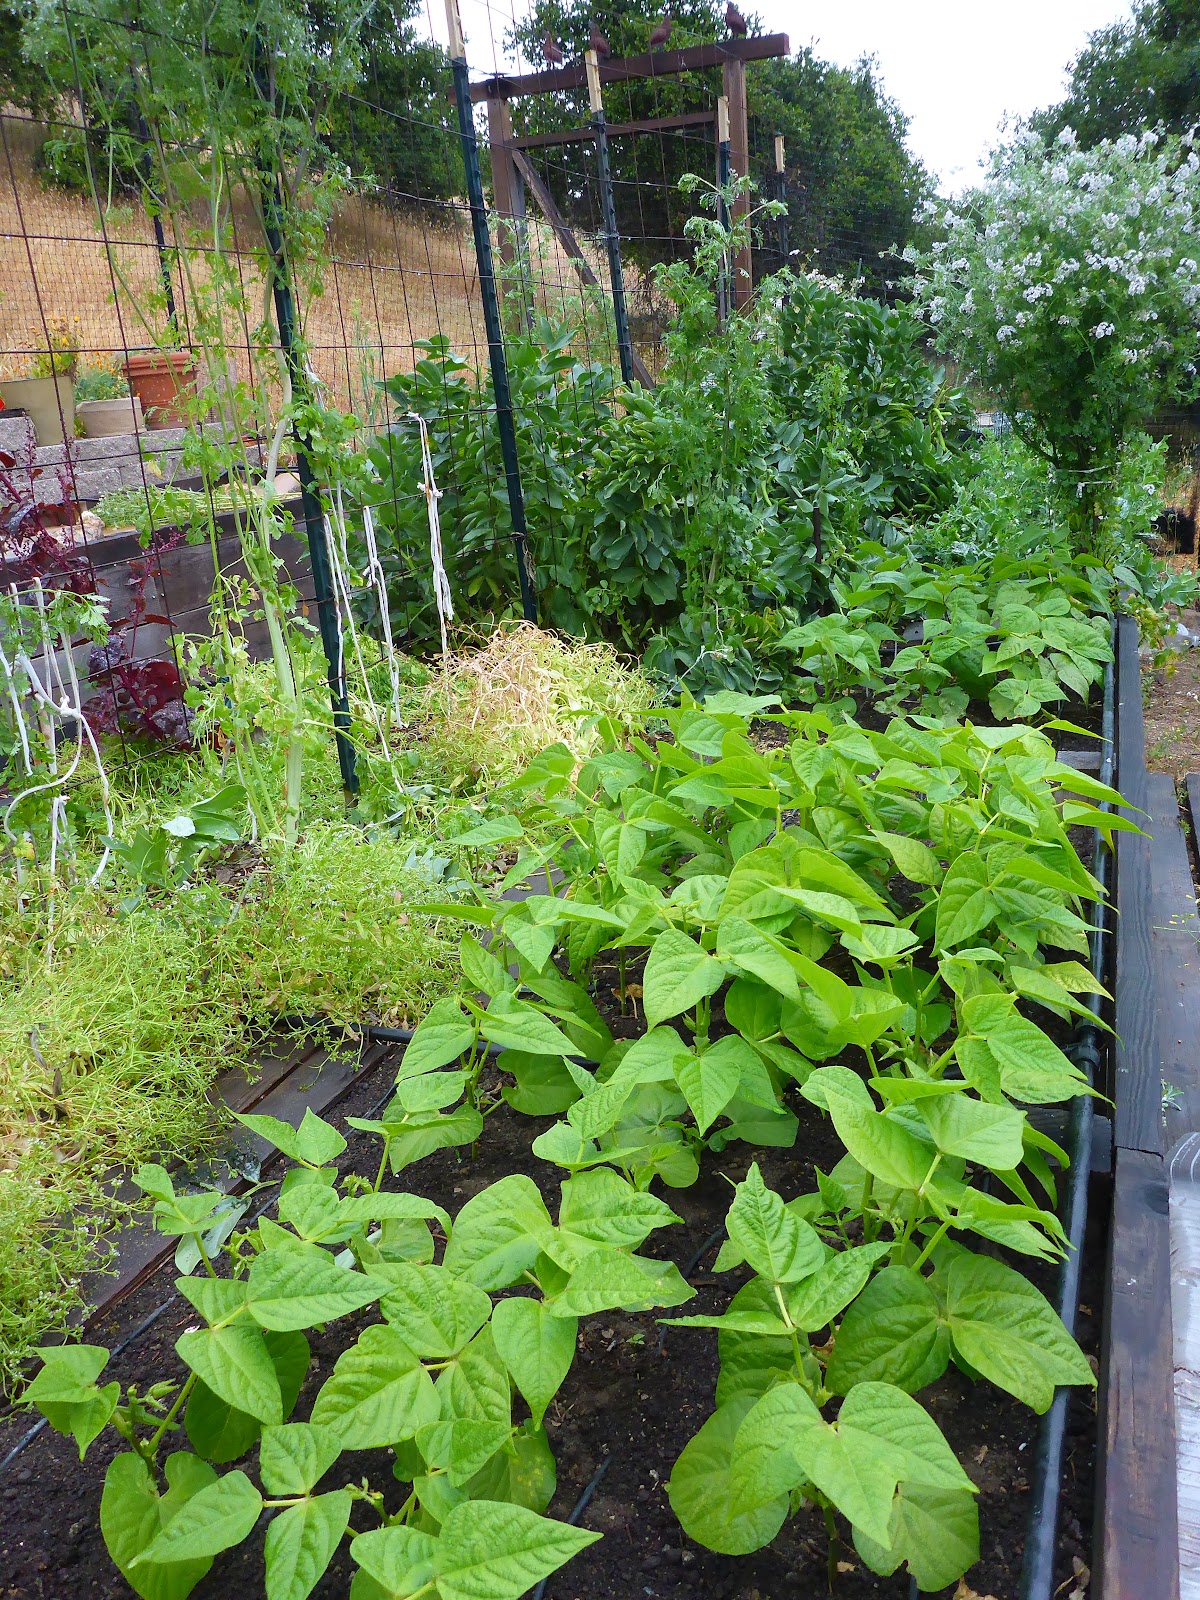
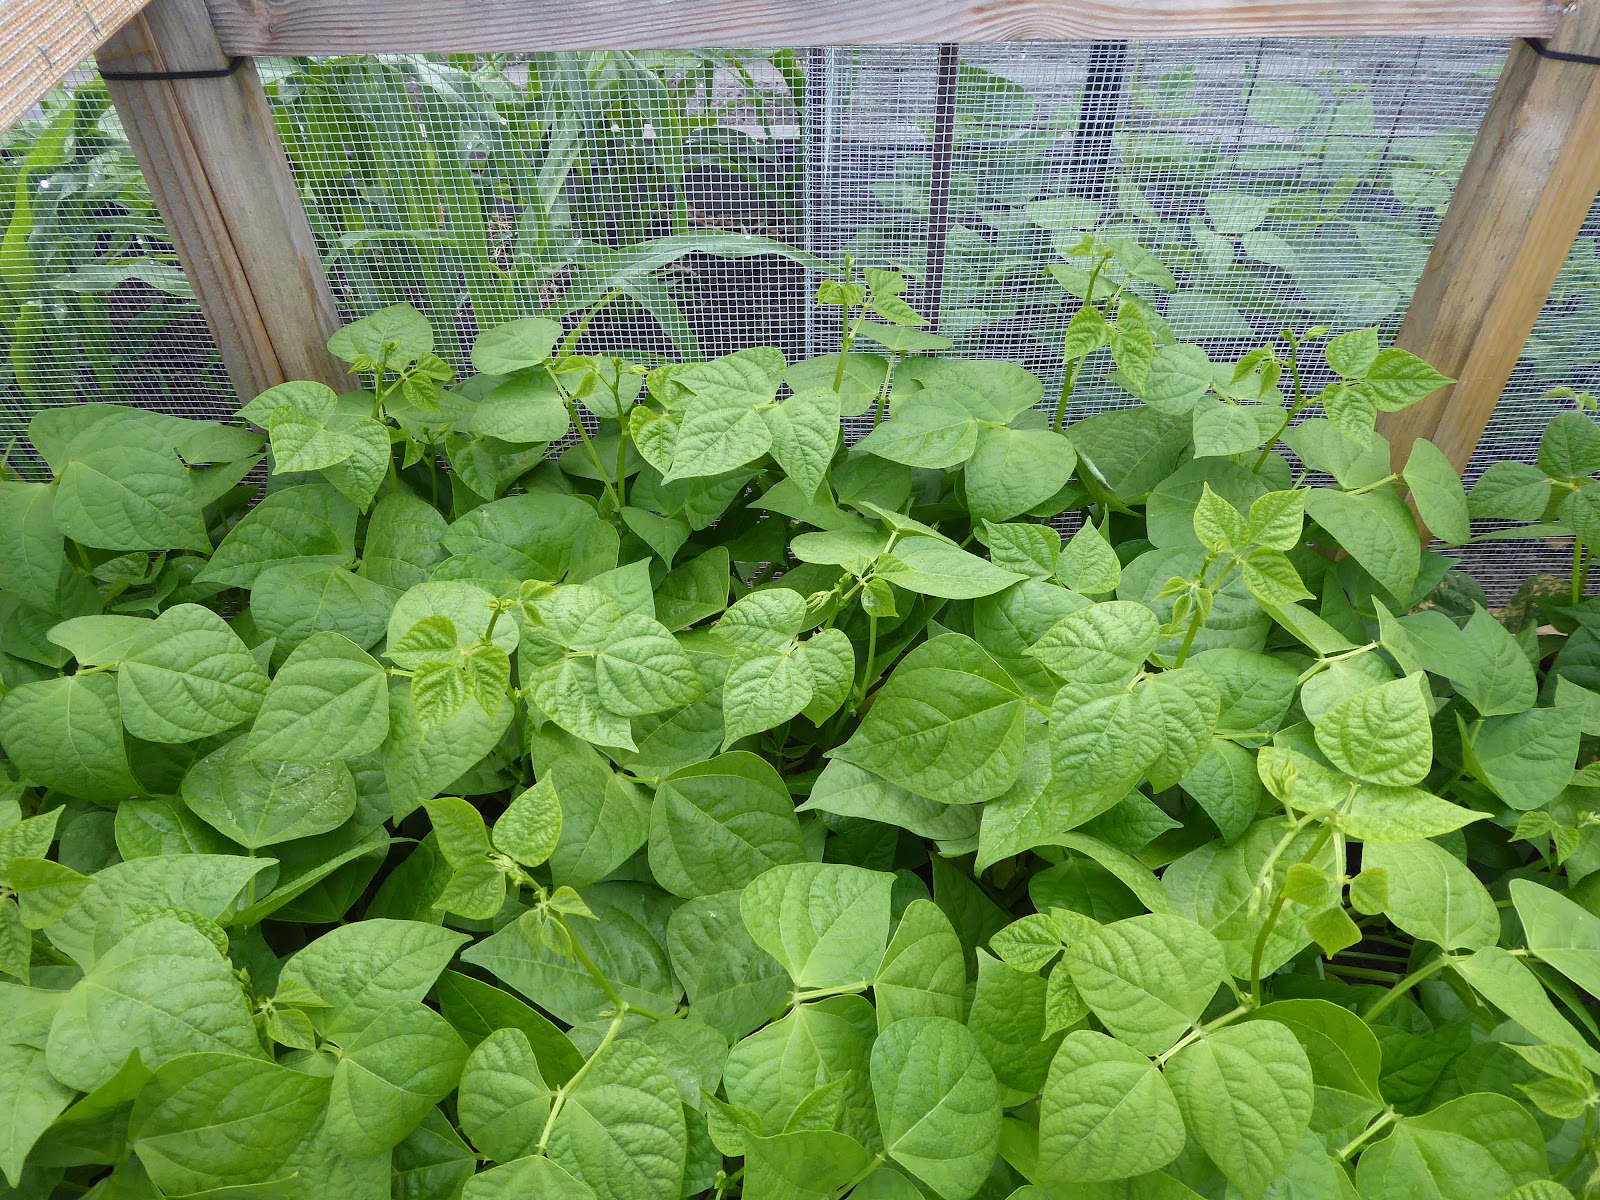
If the weather is less than ideal I'll cover the bean seedlings with cloches. I learned to not keep them under the cloches for too long because the foliage becomes tender and the plants may suffer once they are uncovered. There's also a risk that they will fry on an unexpectedly sunny and warm day. The ones show below recovered as you can see in the next photo.

May 9
The fava beans produce mature but not dry pods in April and May. I grow an early producer called Extra Precoce Violetto aka Extra Precoce A Grano Violetto (Extra Early Purple Seeded) that gives up its last fresh beans by the end of May which allows me to move the trellis out of the bed and into the bed where the tomatoes are planted at the end of May. If I want to harvest dry fava beans or seeds I would have to leave the plants in place for a few more weeks.

May 24
I put up a few smaller trellises to support pole beans and in the spaces between the bean trellises I sow corn. Oftentimes I allow flowers to volunteer in the beds or I plant them if I don't have other plans for the spaces.

June 10
The flowers attract a lot of pollinators and other beneficial insects. Poppies attract a lot of bees, but I also allow fennel and cilantro to bloom to attract tiny wasps that lay their eggs in or on aphids. Sweet alyssum is also a favorite of mine for attracting a wide variety of beneficial insects such as hover flies whose larva are voracious consumers of aphids. One extra benefit to allowing fennel and cilantro to bloom is that the seeds are delicious too, fresh fennel and coriander seed is far more flavorful than what you buy in the store.


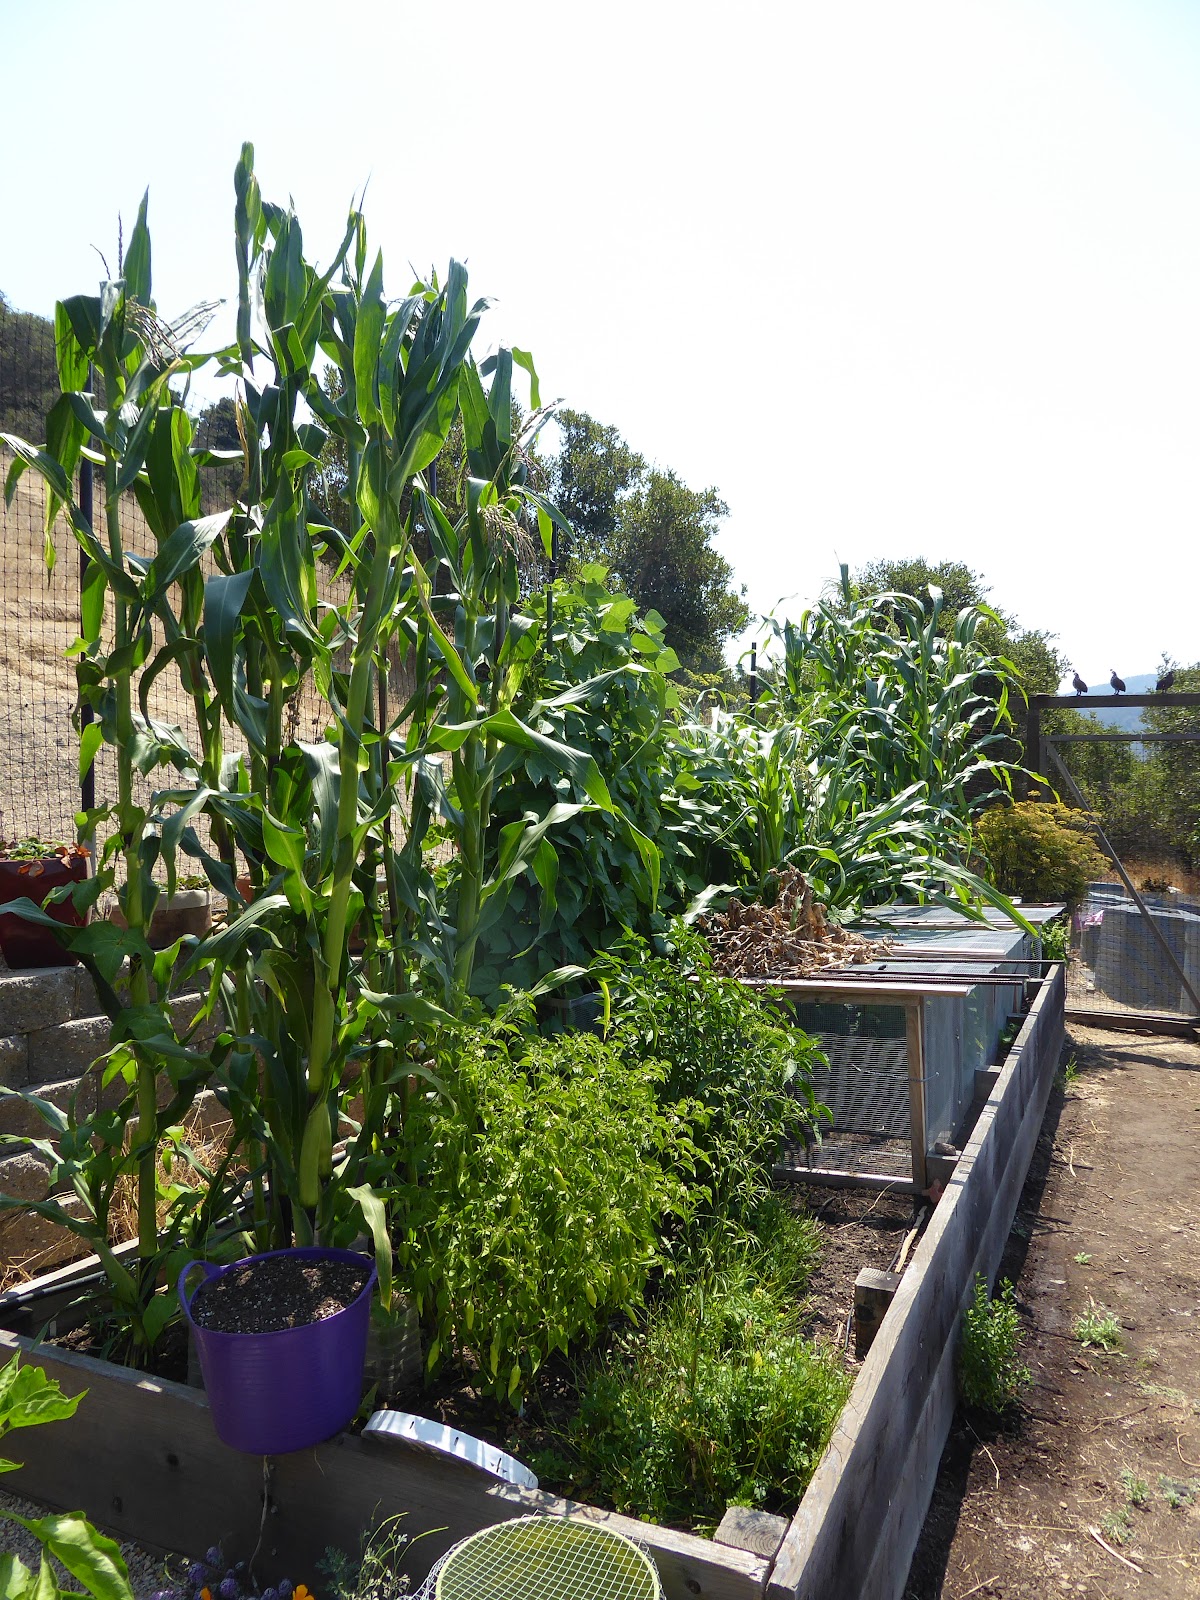
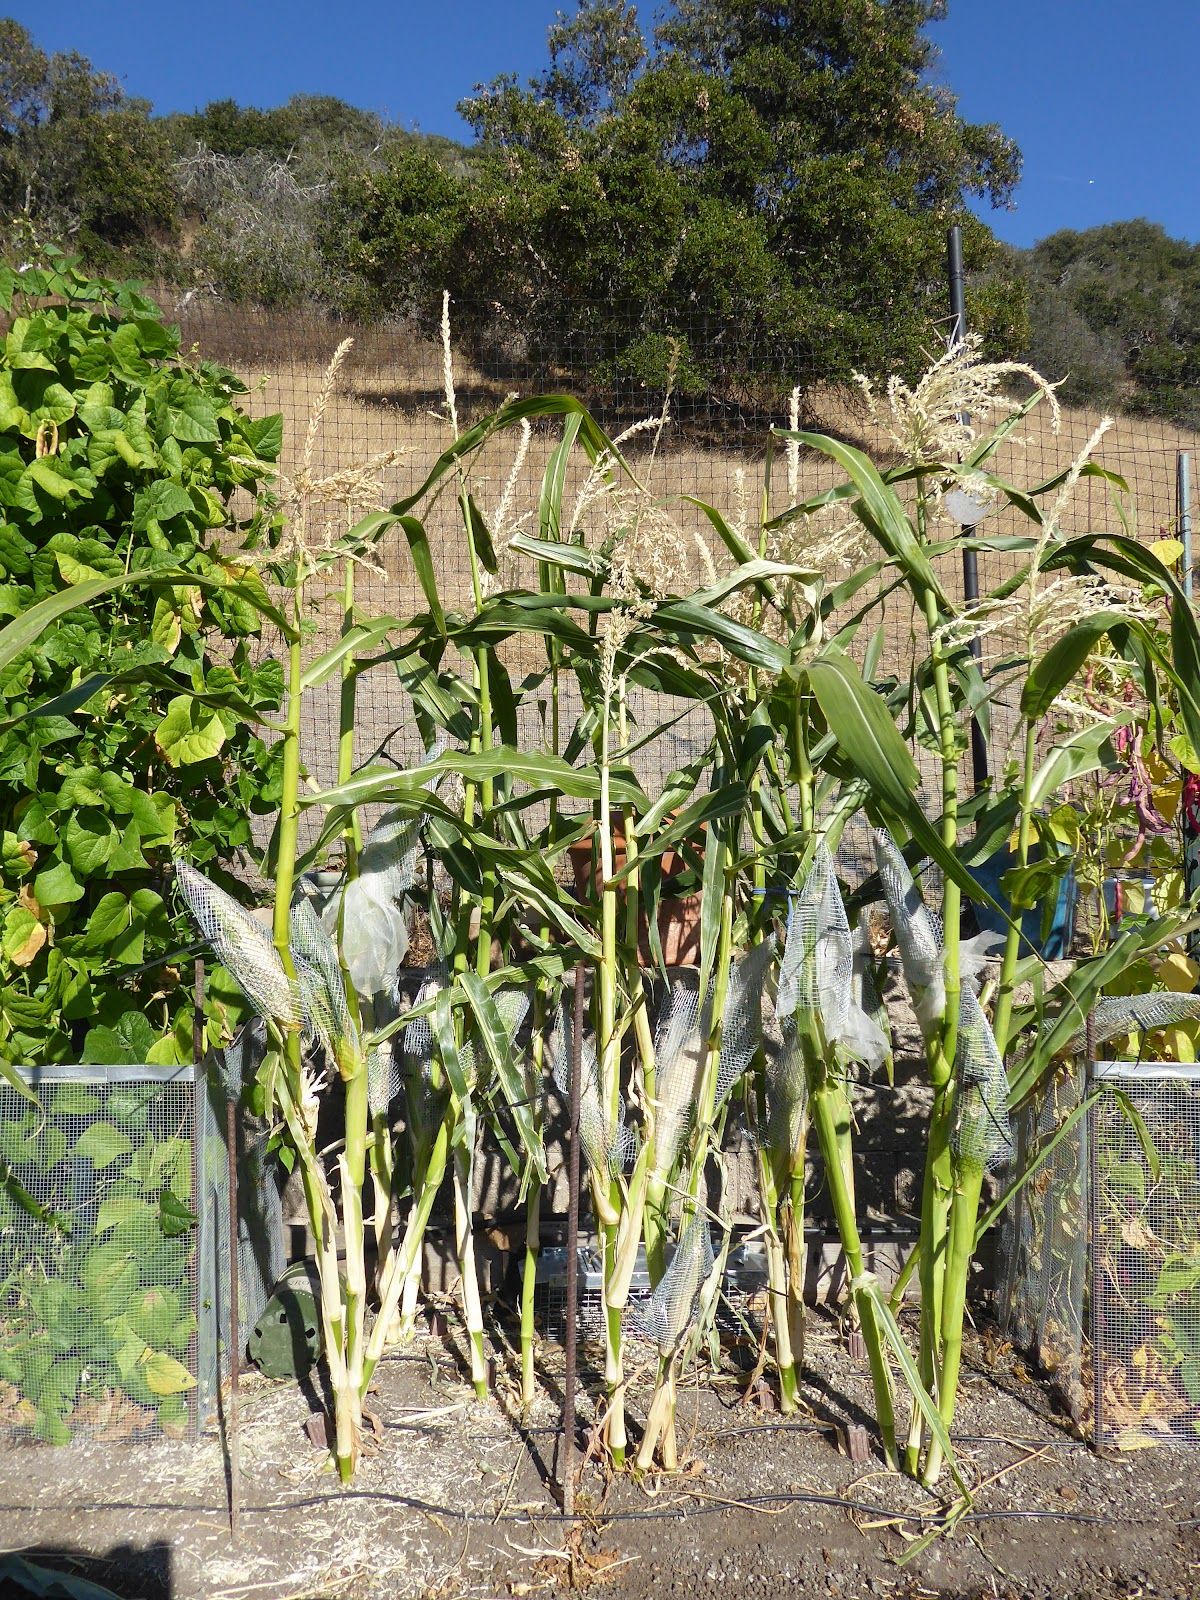
By mid July the corn has taken off.

July 14
The pole beans have started to climb.

July 14
Bush beans have become a new fave with the rodents the last couple of years so I grow them in cages now too. The rodents were starting to get into the pole beans in 2017 so I didn't grow those in 2018 because I couldn't come up with an effective way to protect them.

July 14
Mid August the corn is developing ears and the beans are setting. There's a few overwintered pepper plants growing in one corner.

August 20
By the end of September the dry beans are maturing...

September 29
and the corn is ripening.

September 29
Damned Rodents! That year I was able to deter them by wrapping each individual ear in row cover fabric.


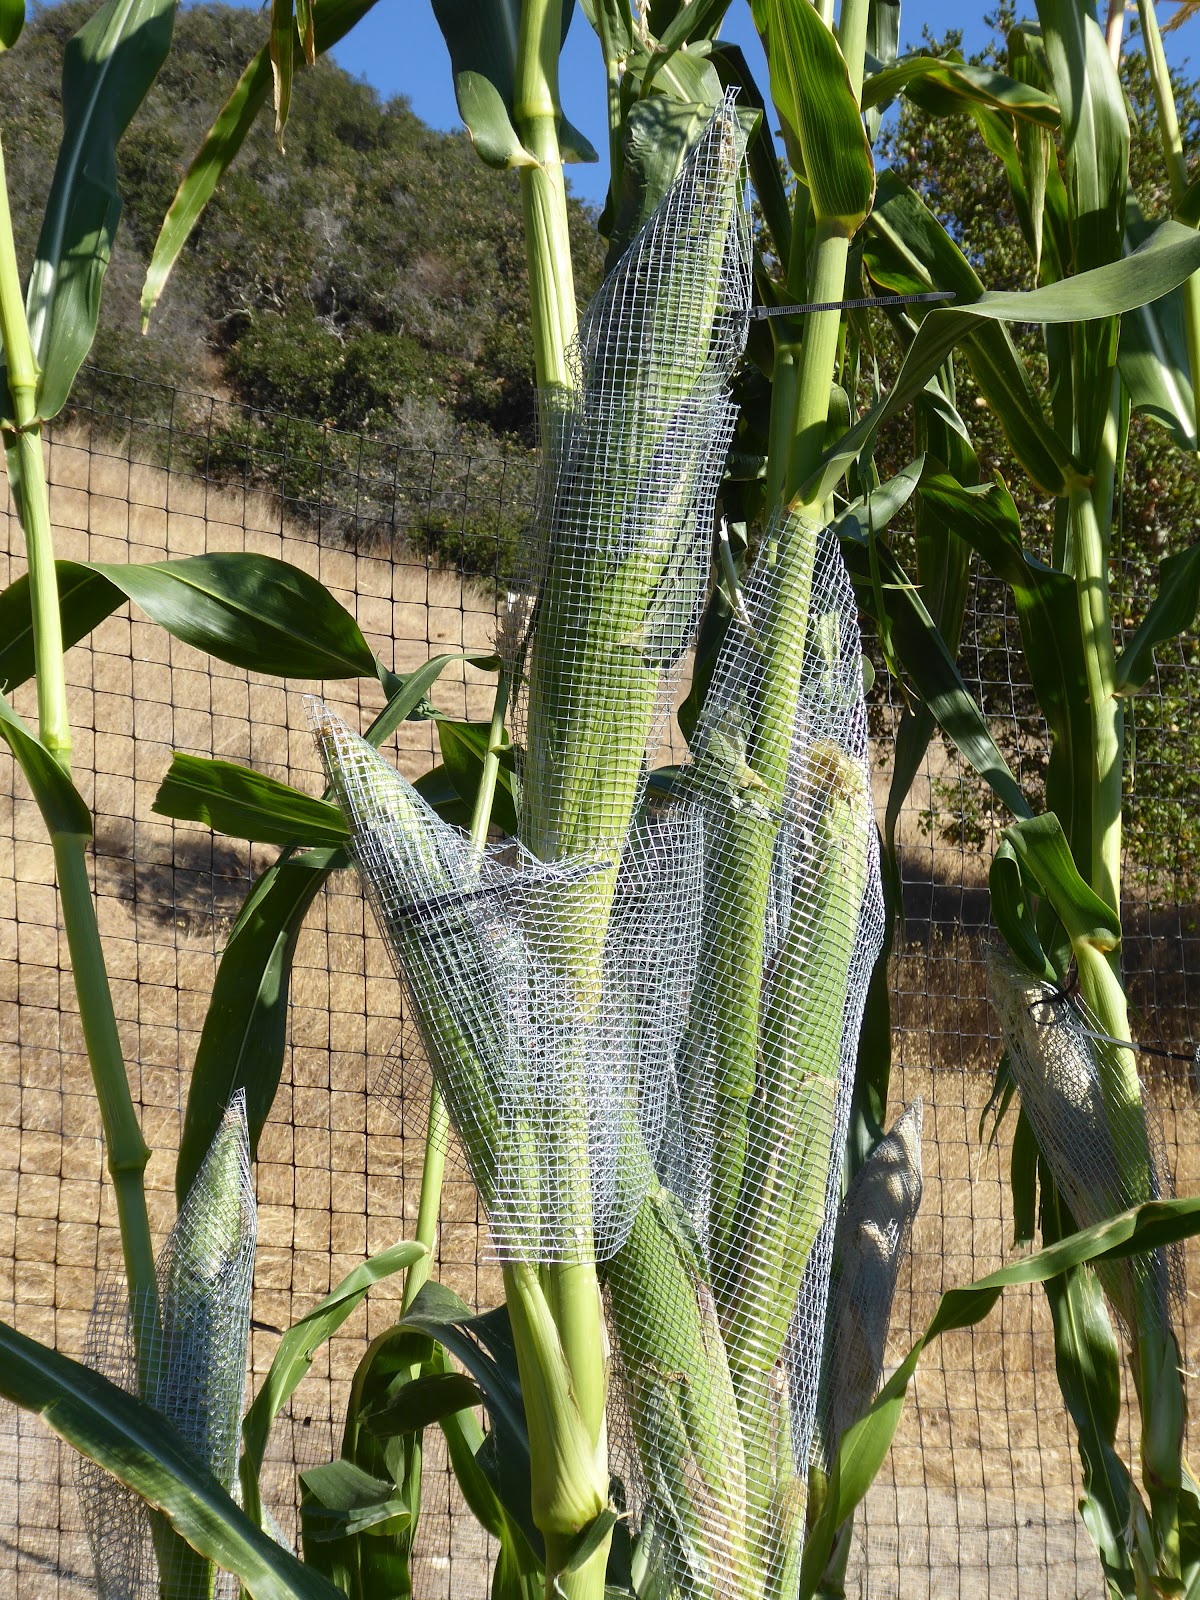
The next year the rodents learned to chew right through the fabric and eat the corn. They can't chew through hardware cloth. I skipped growing corn the next year (2018) and will skip corn again in 2019.


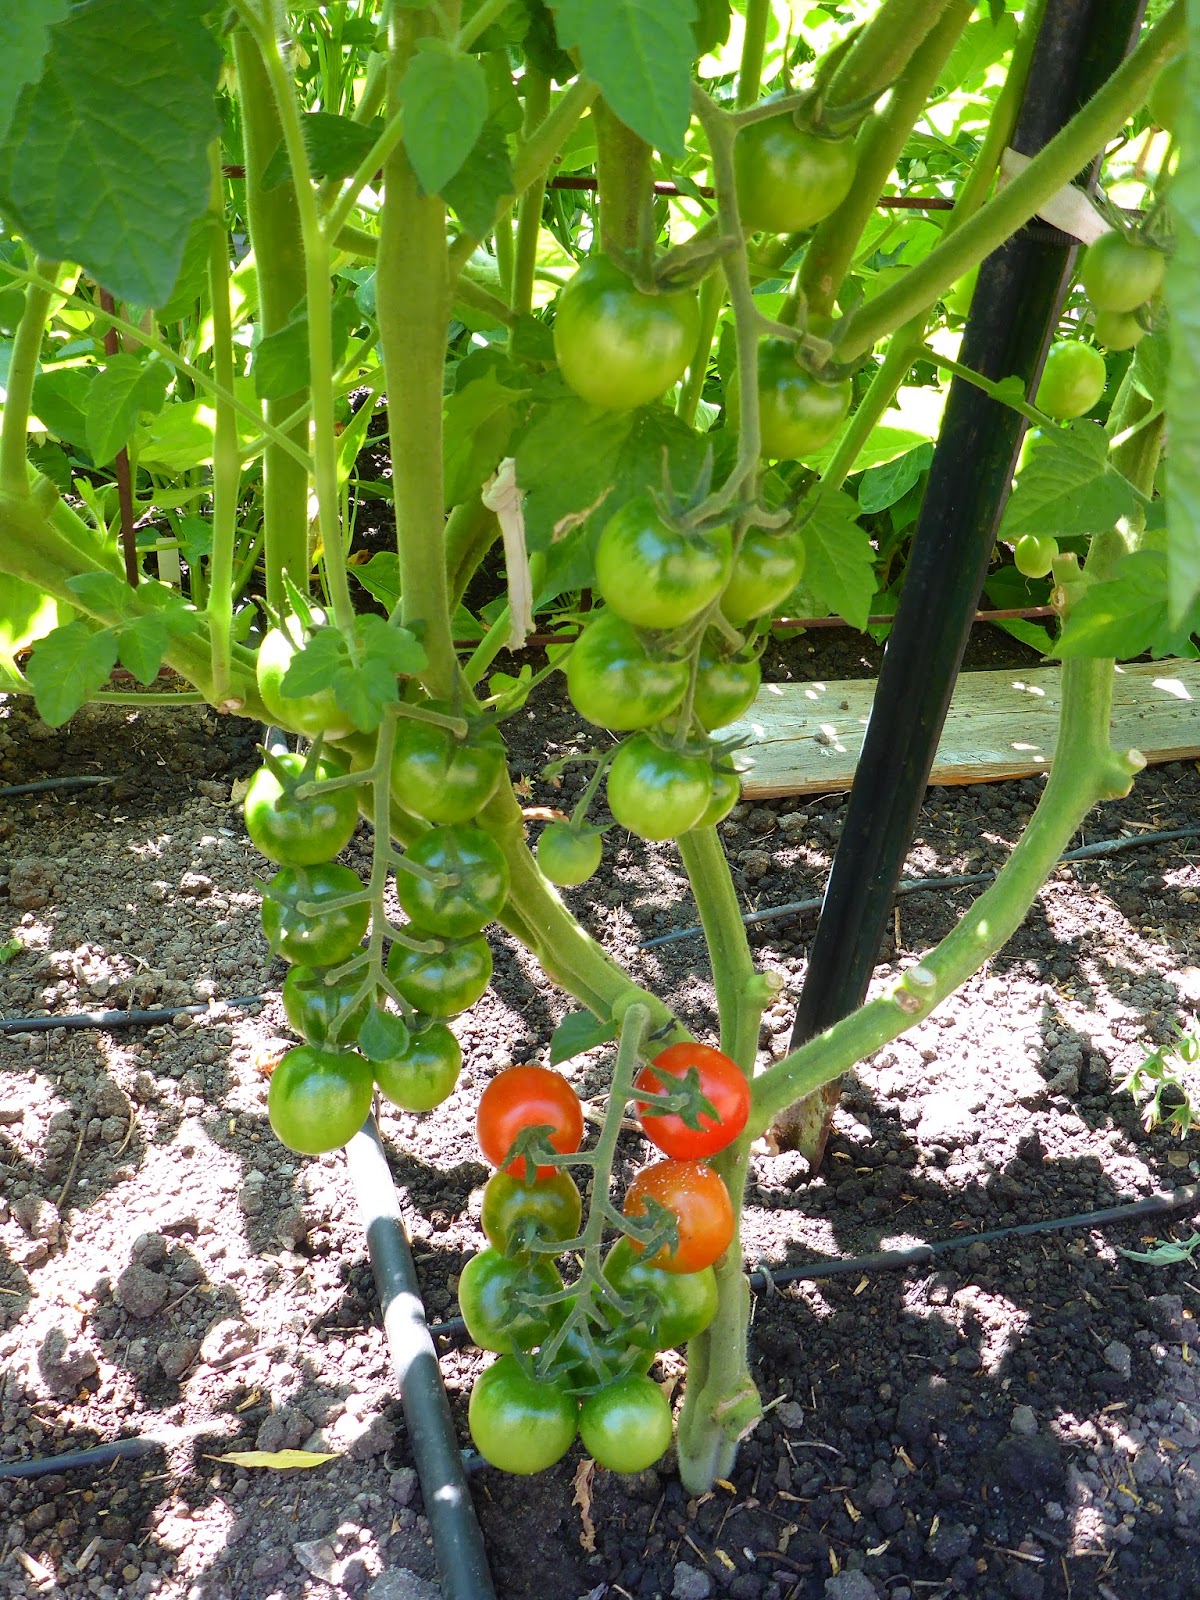
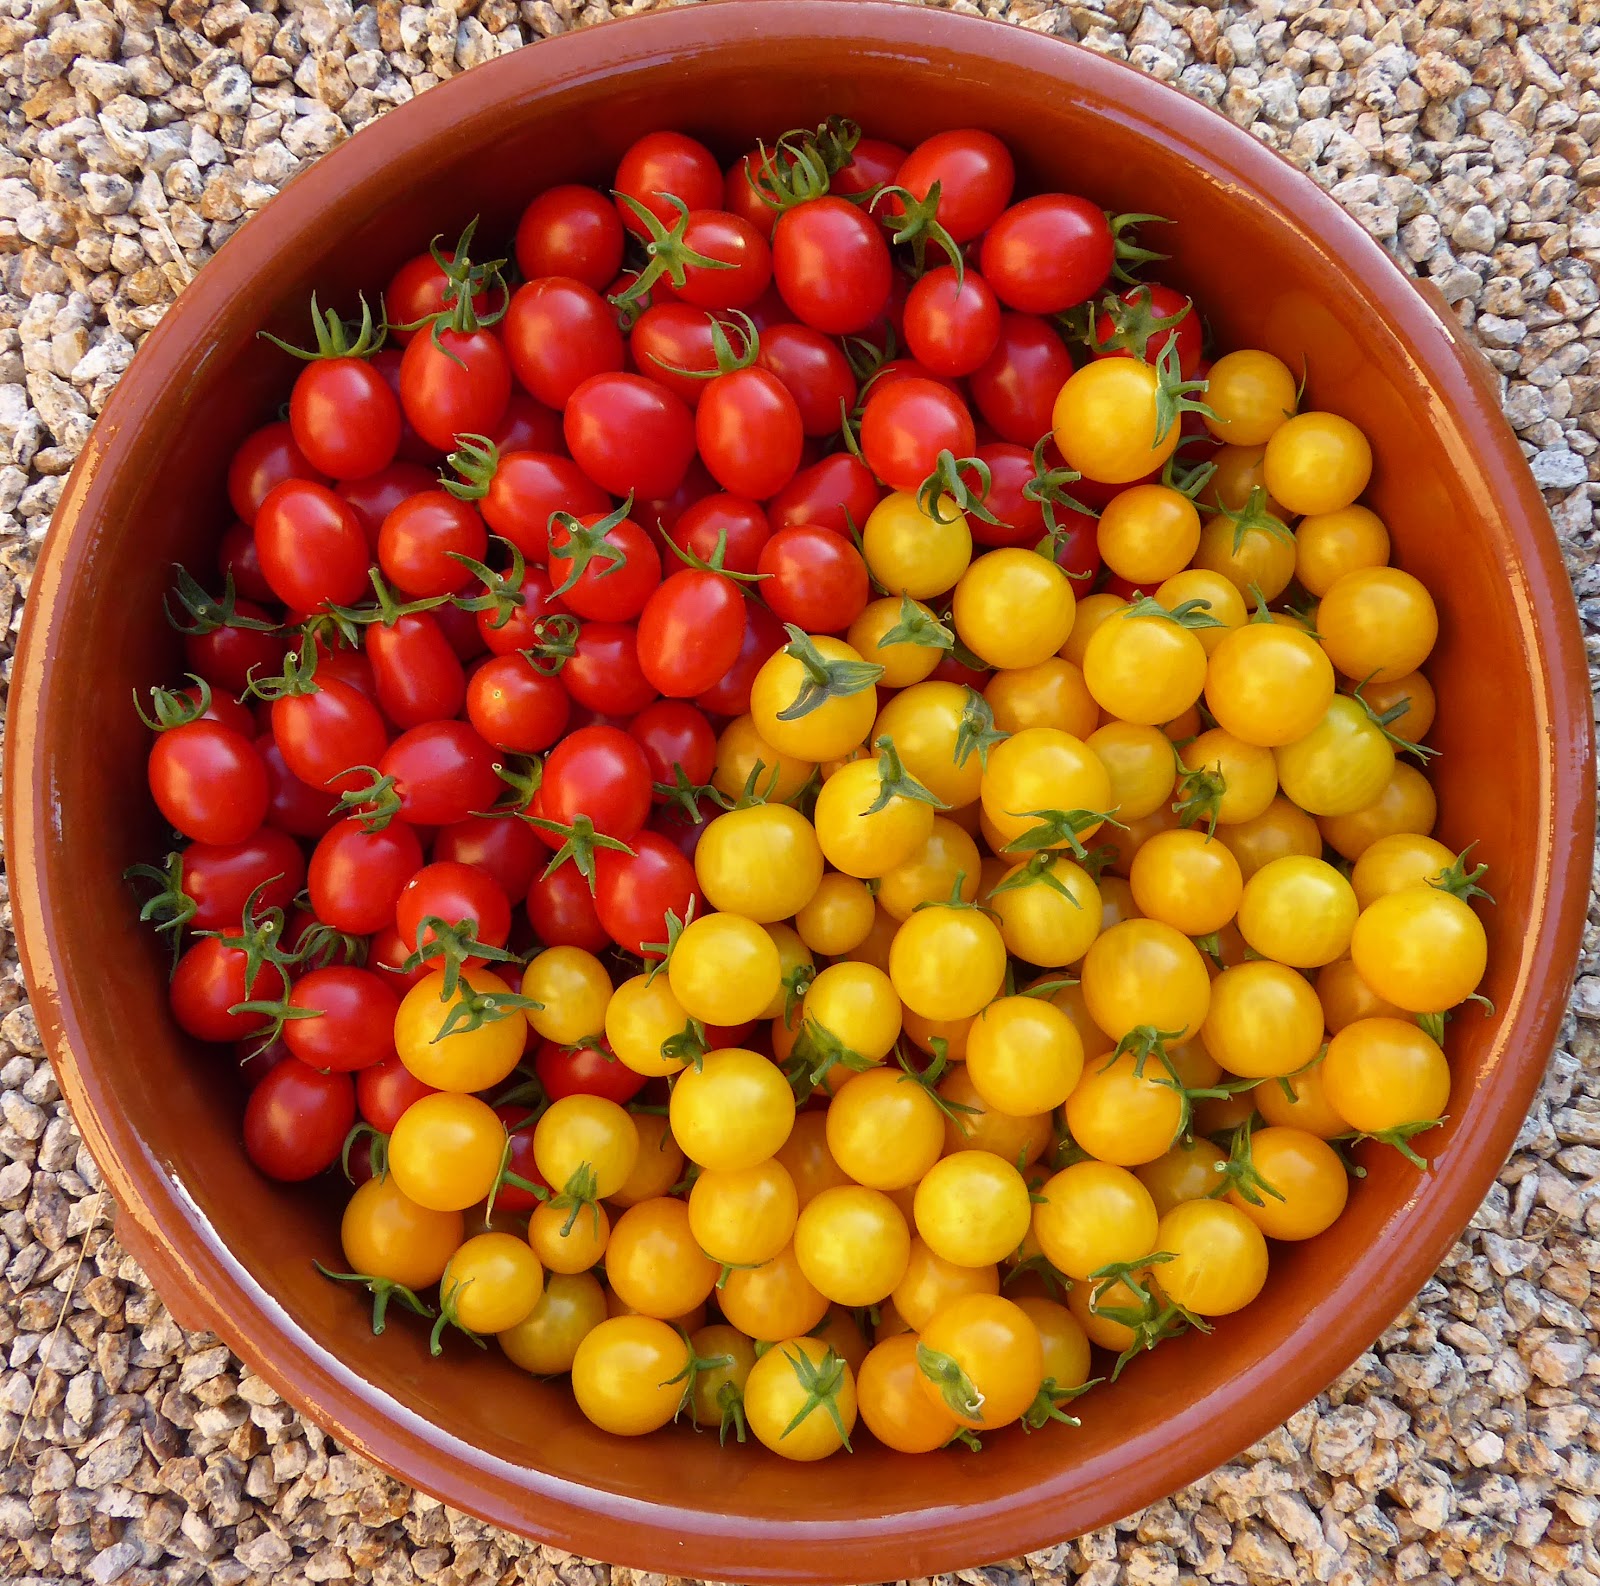
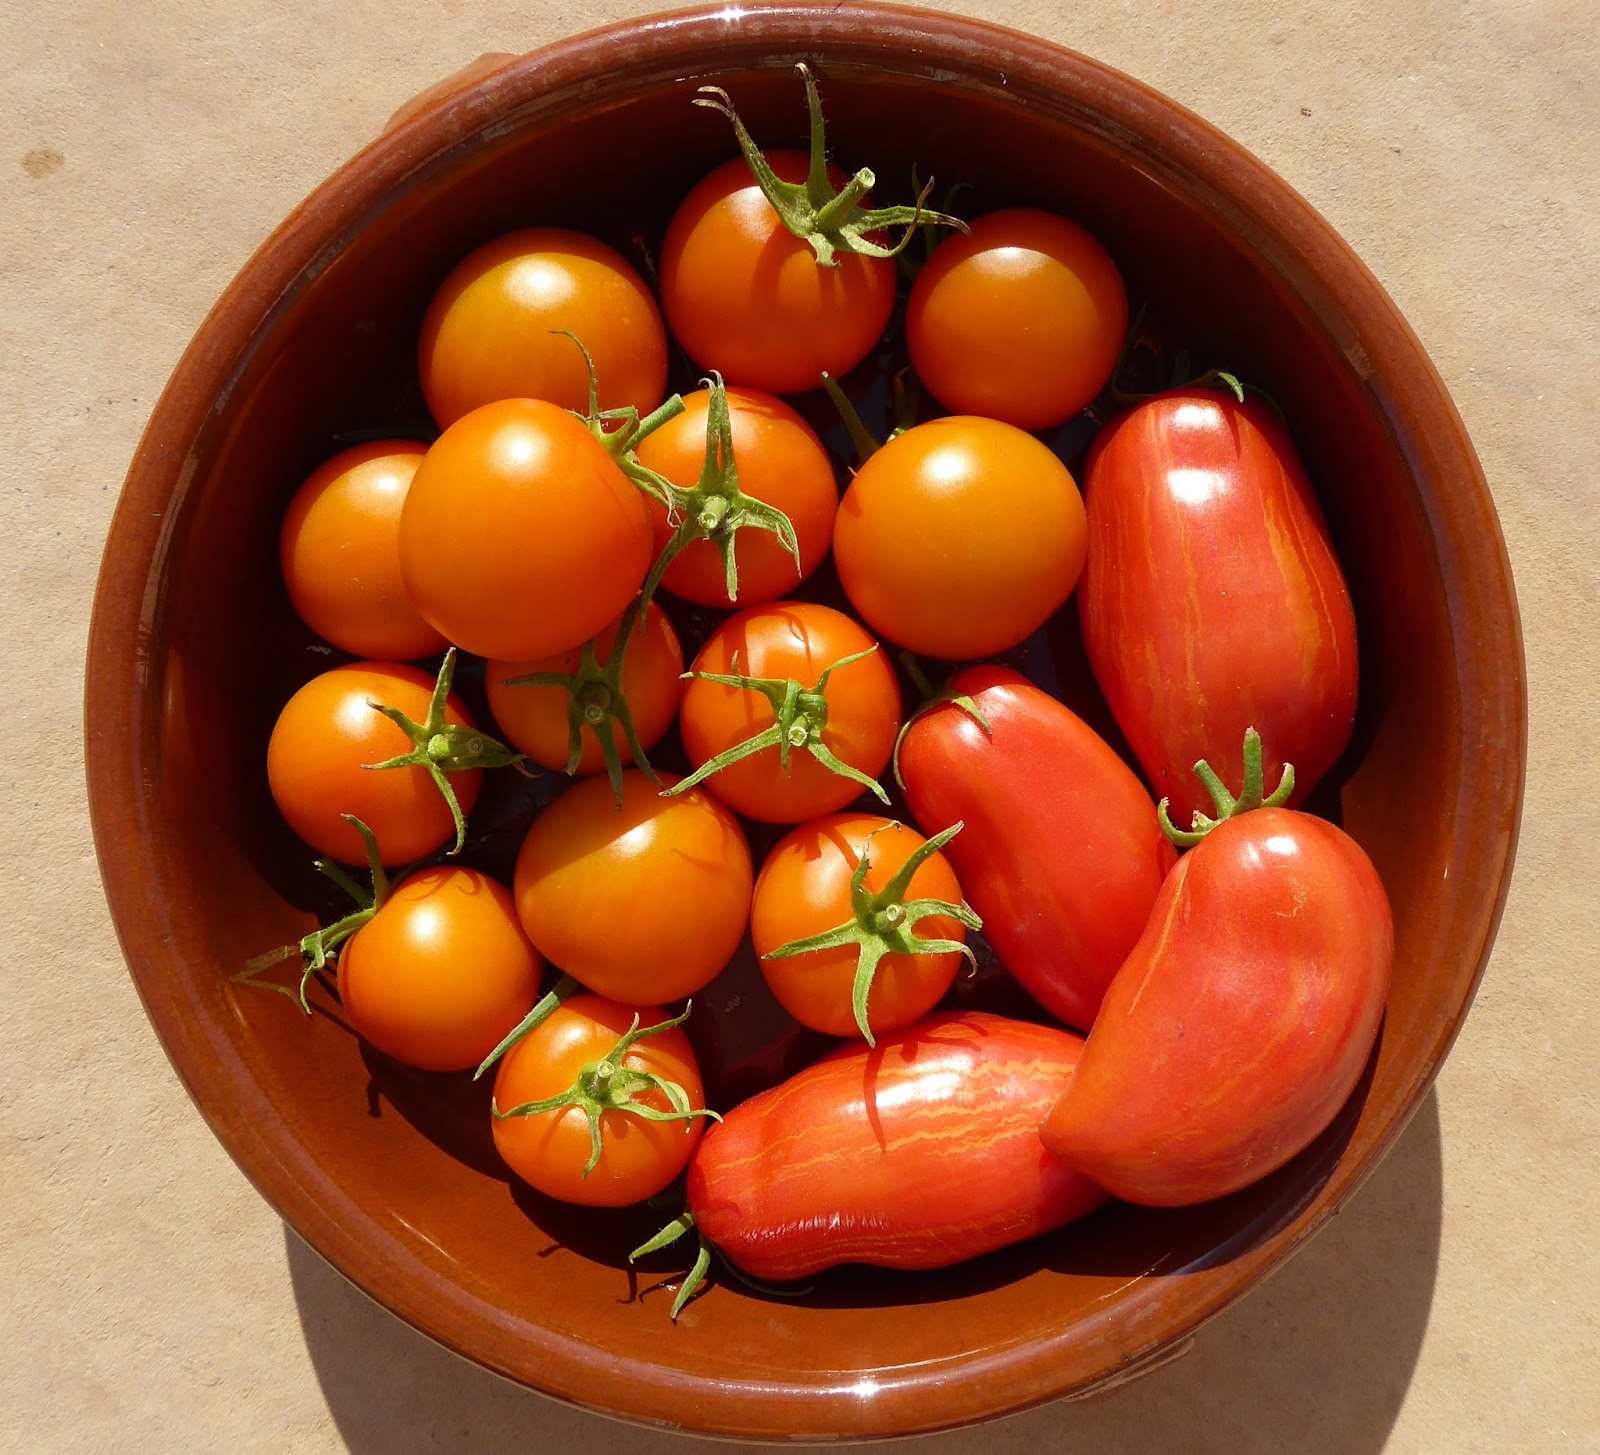
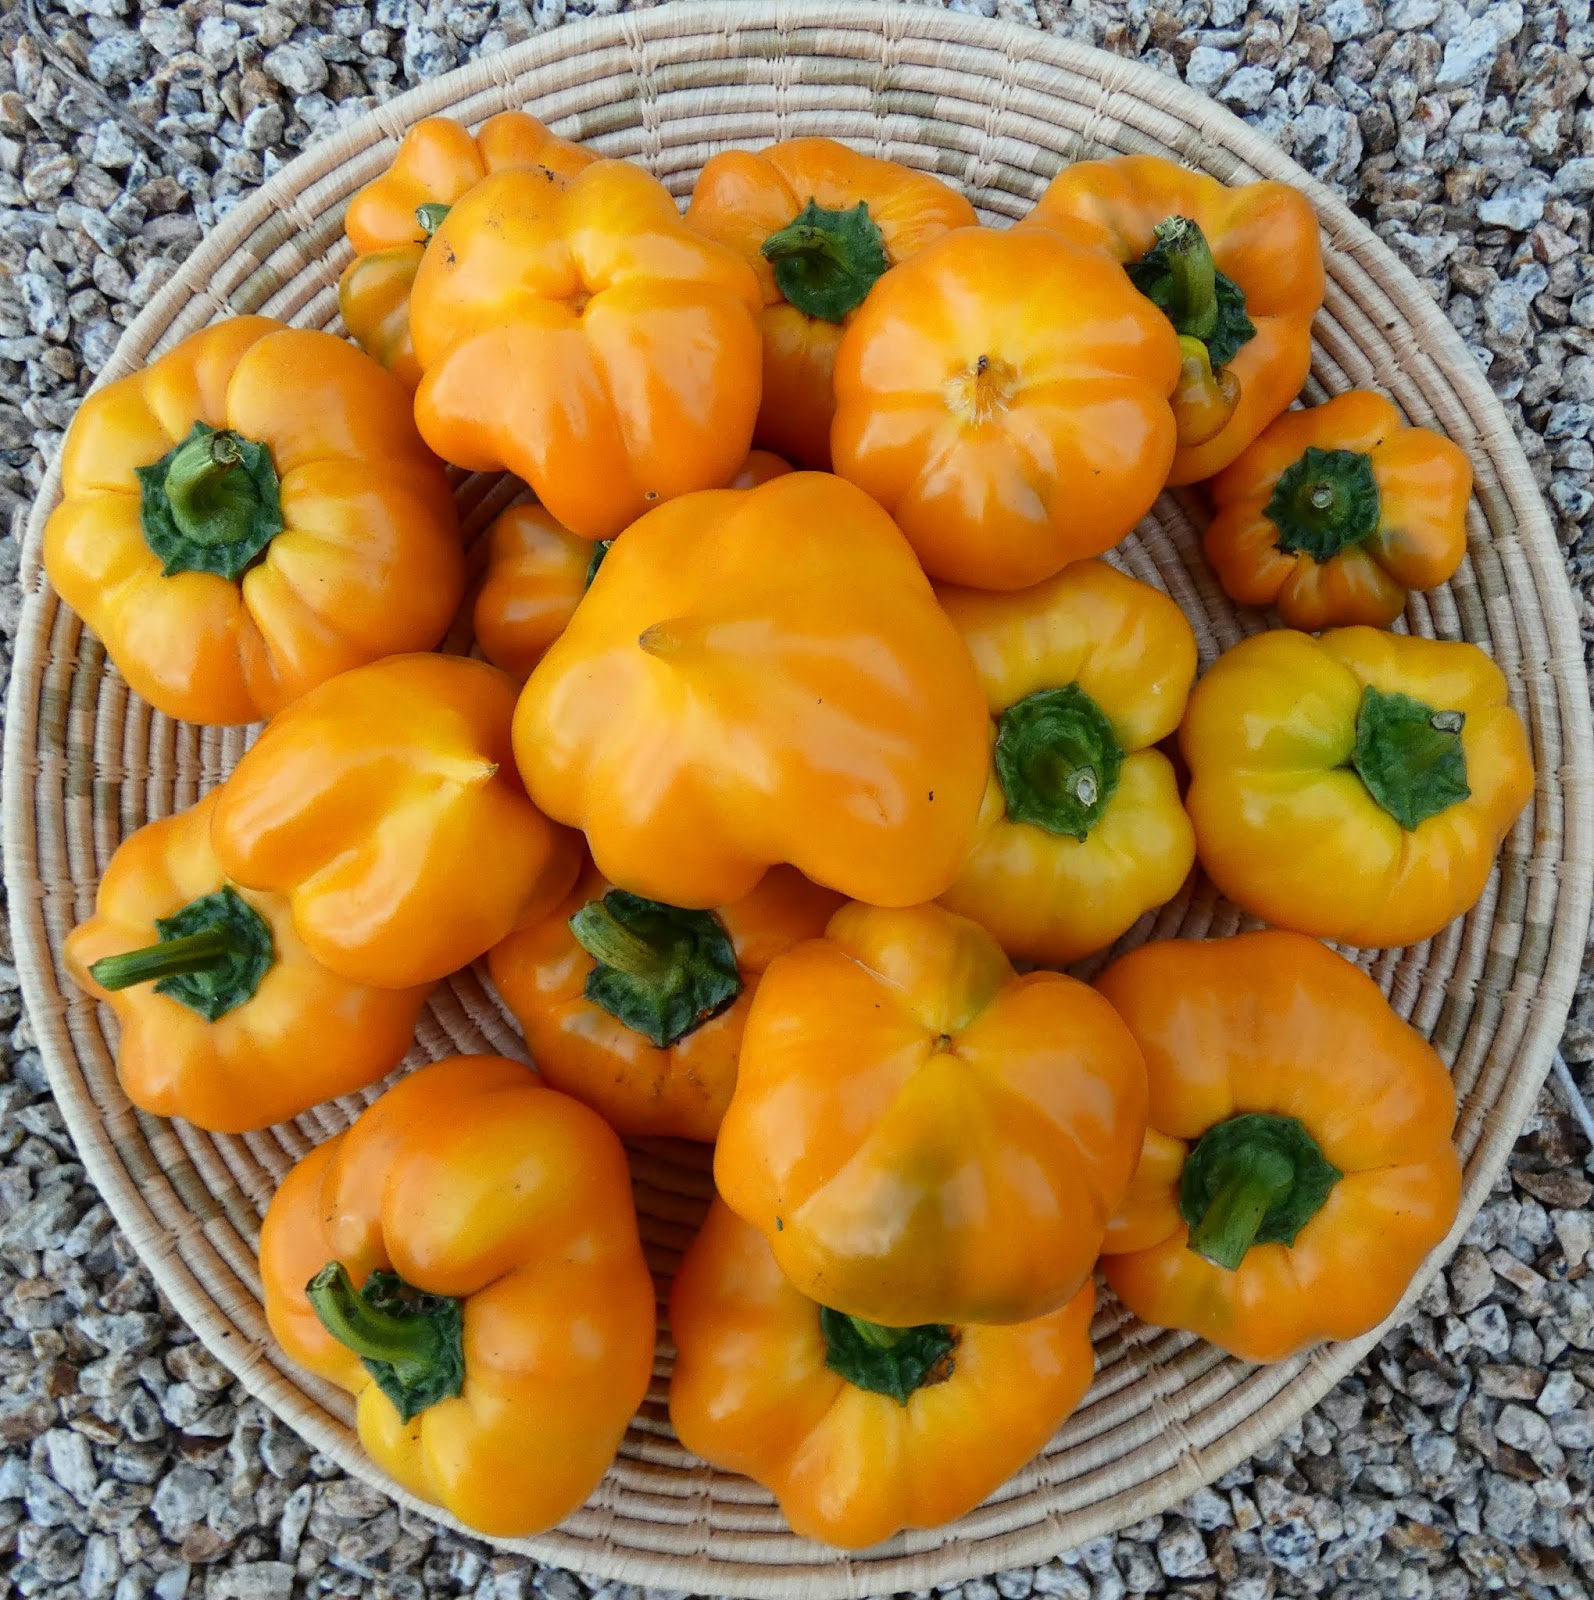
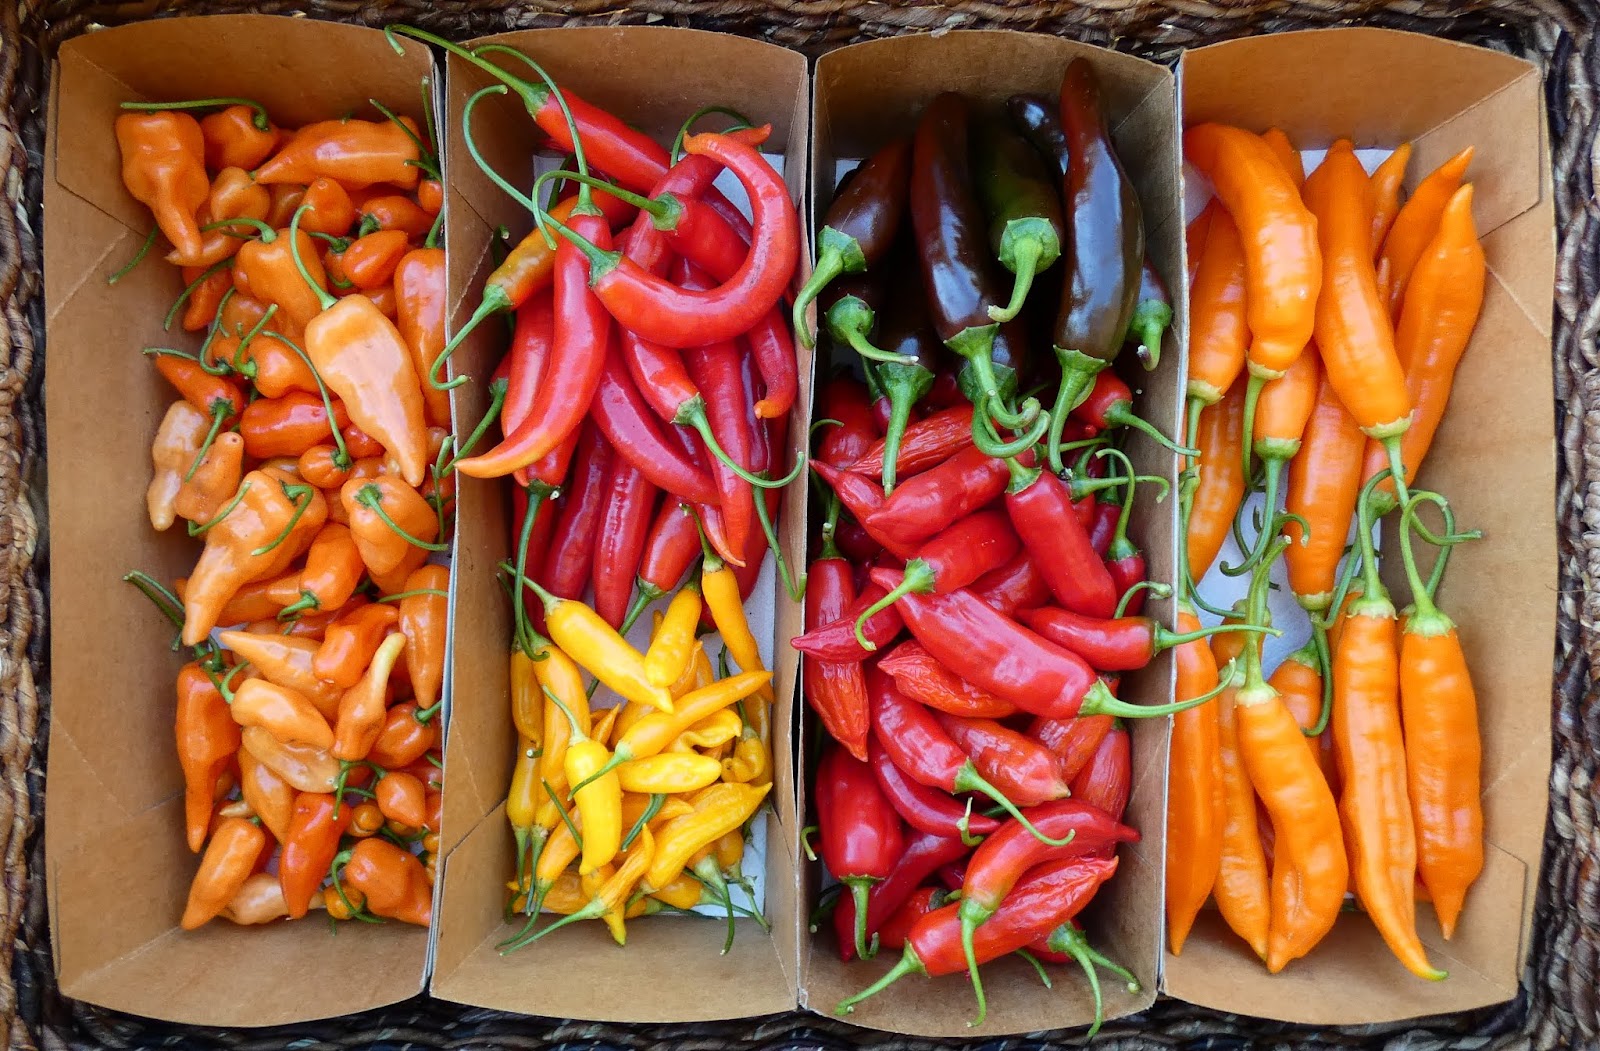
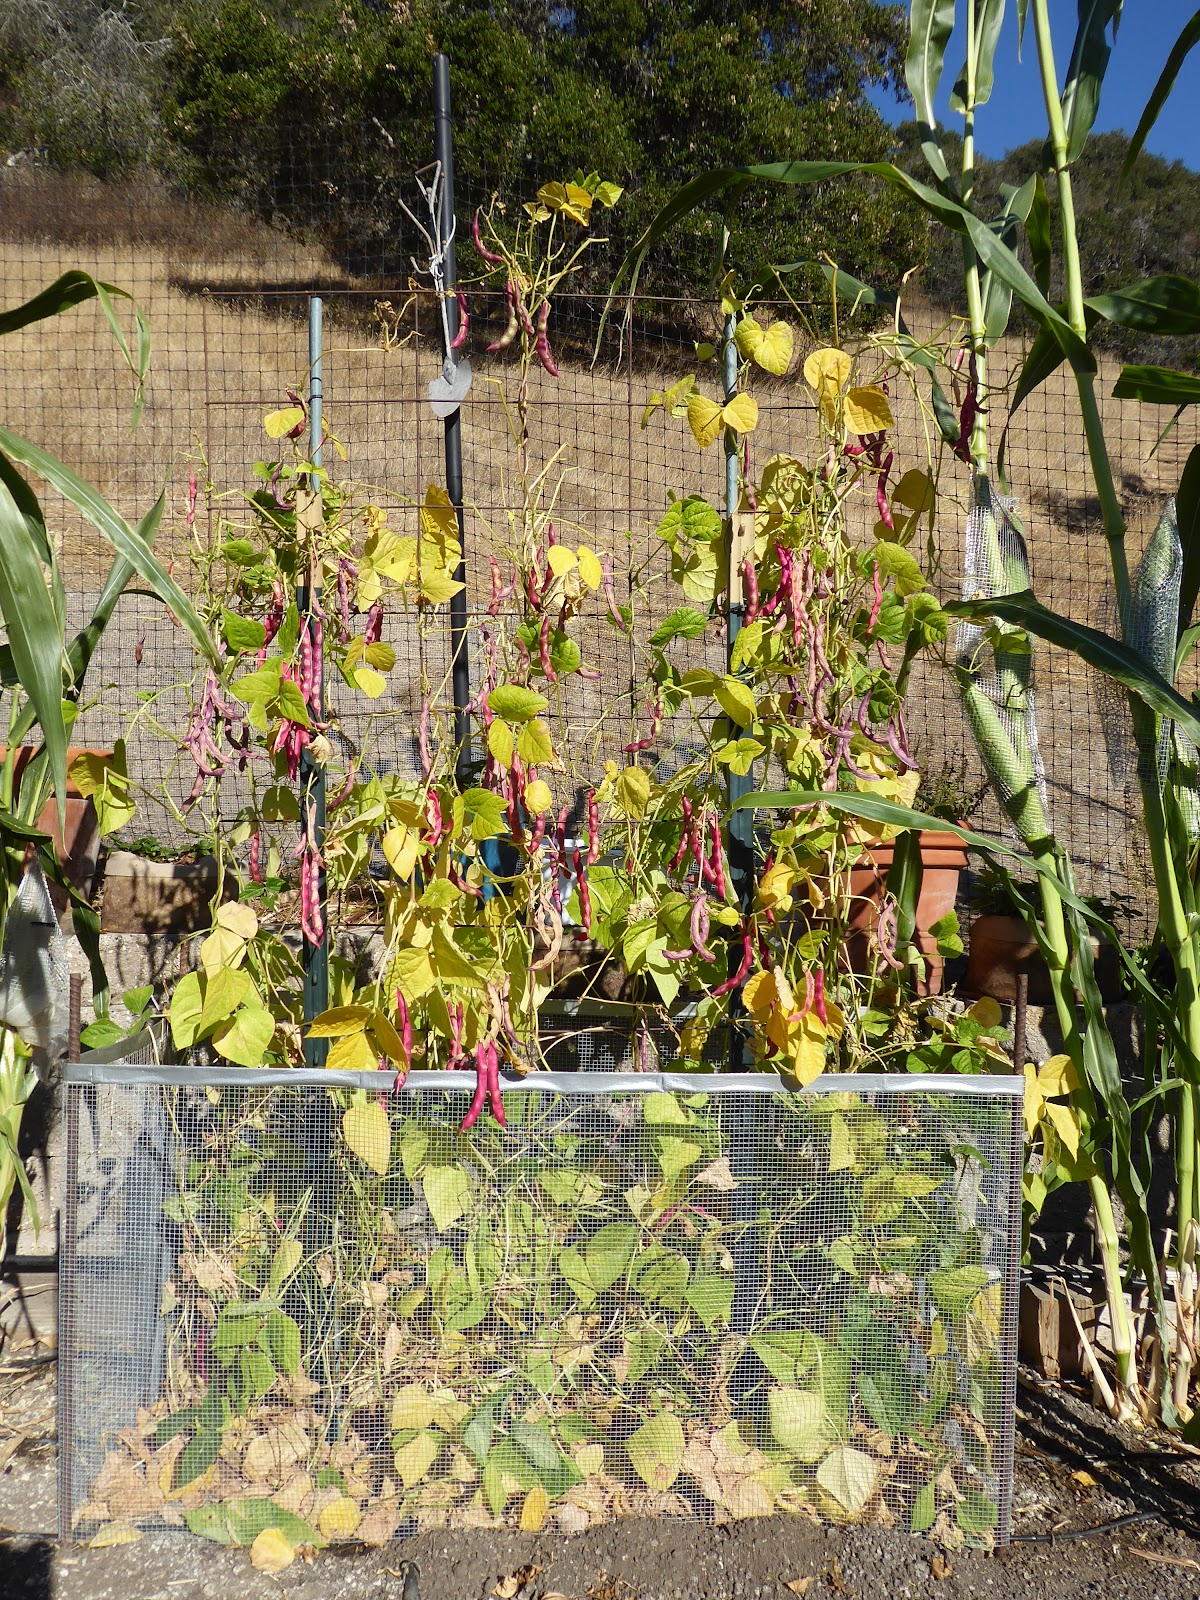
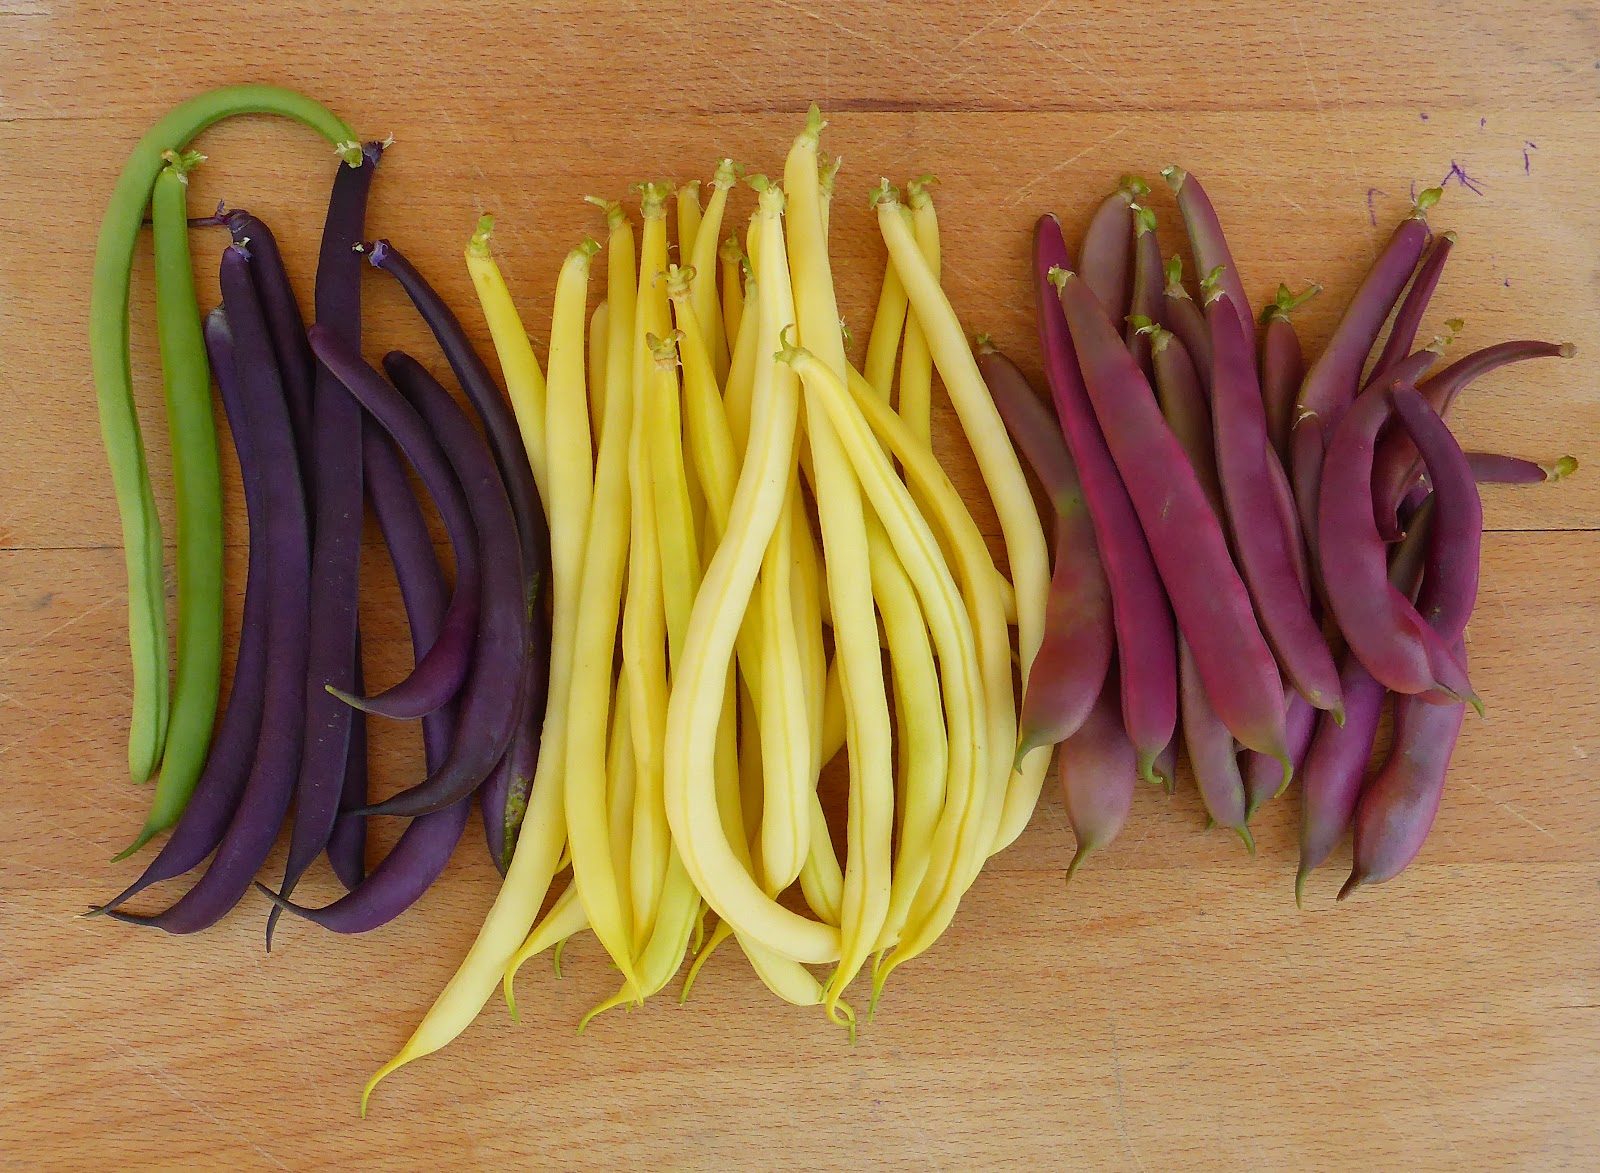
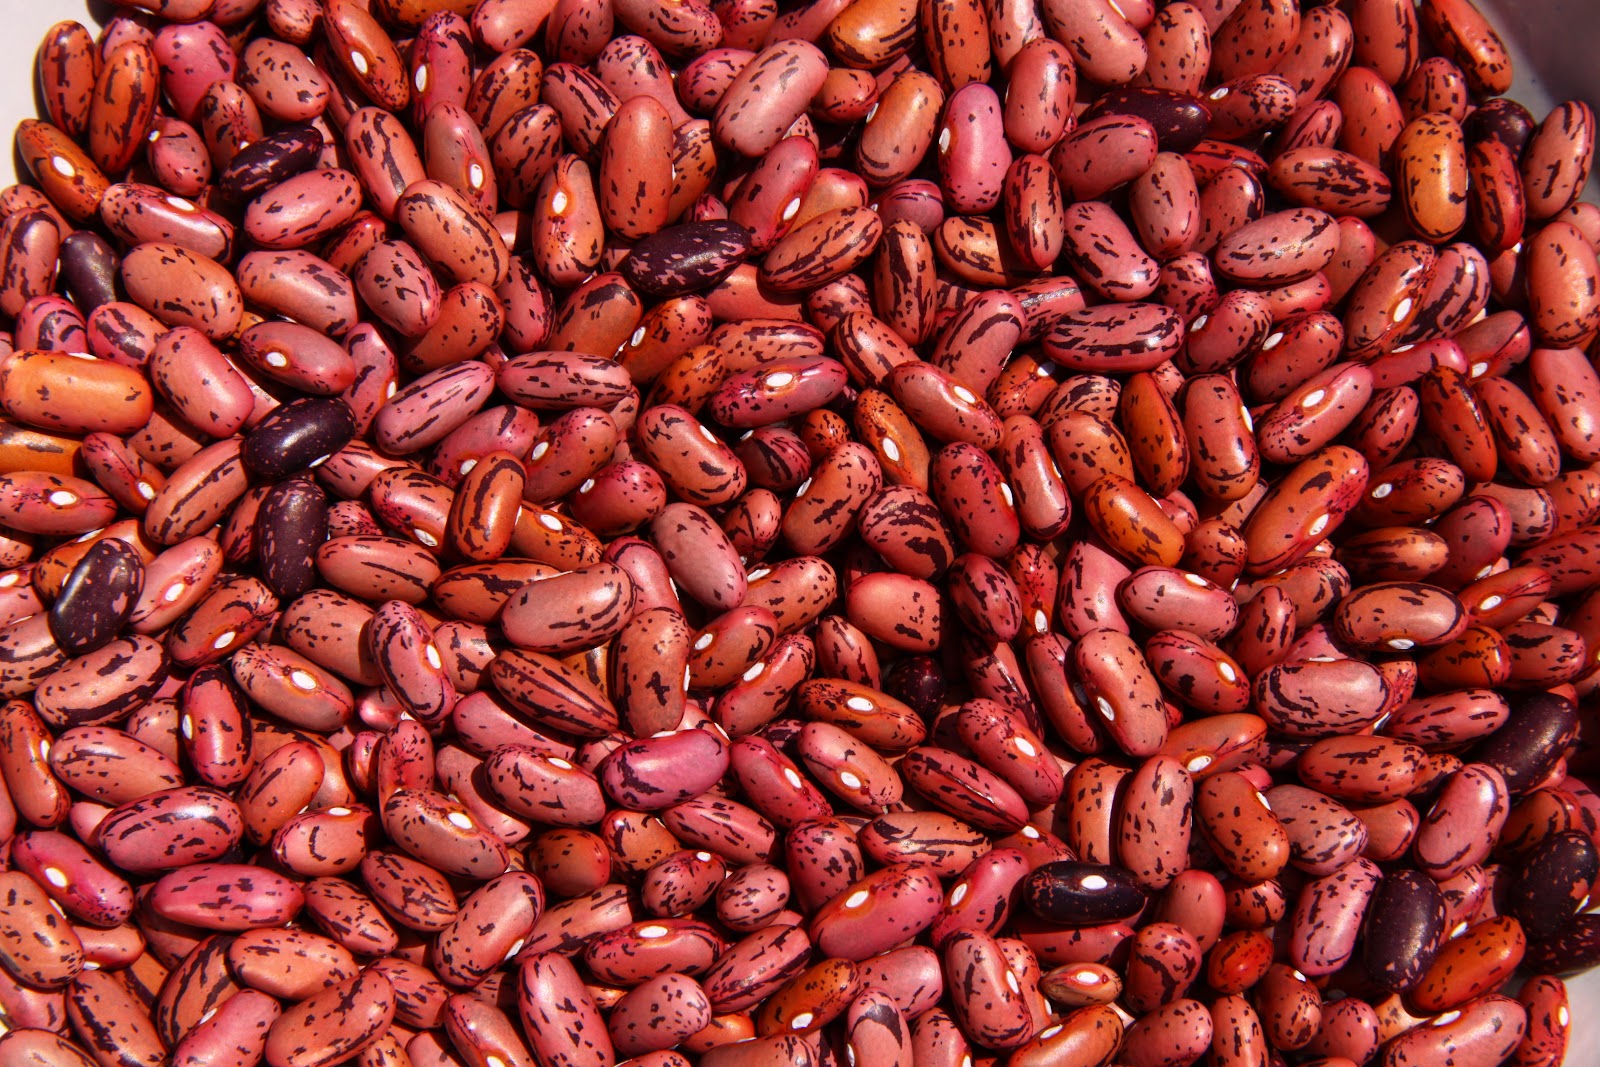
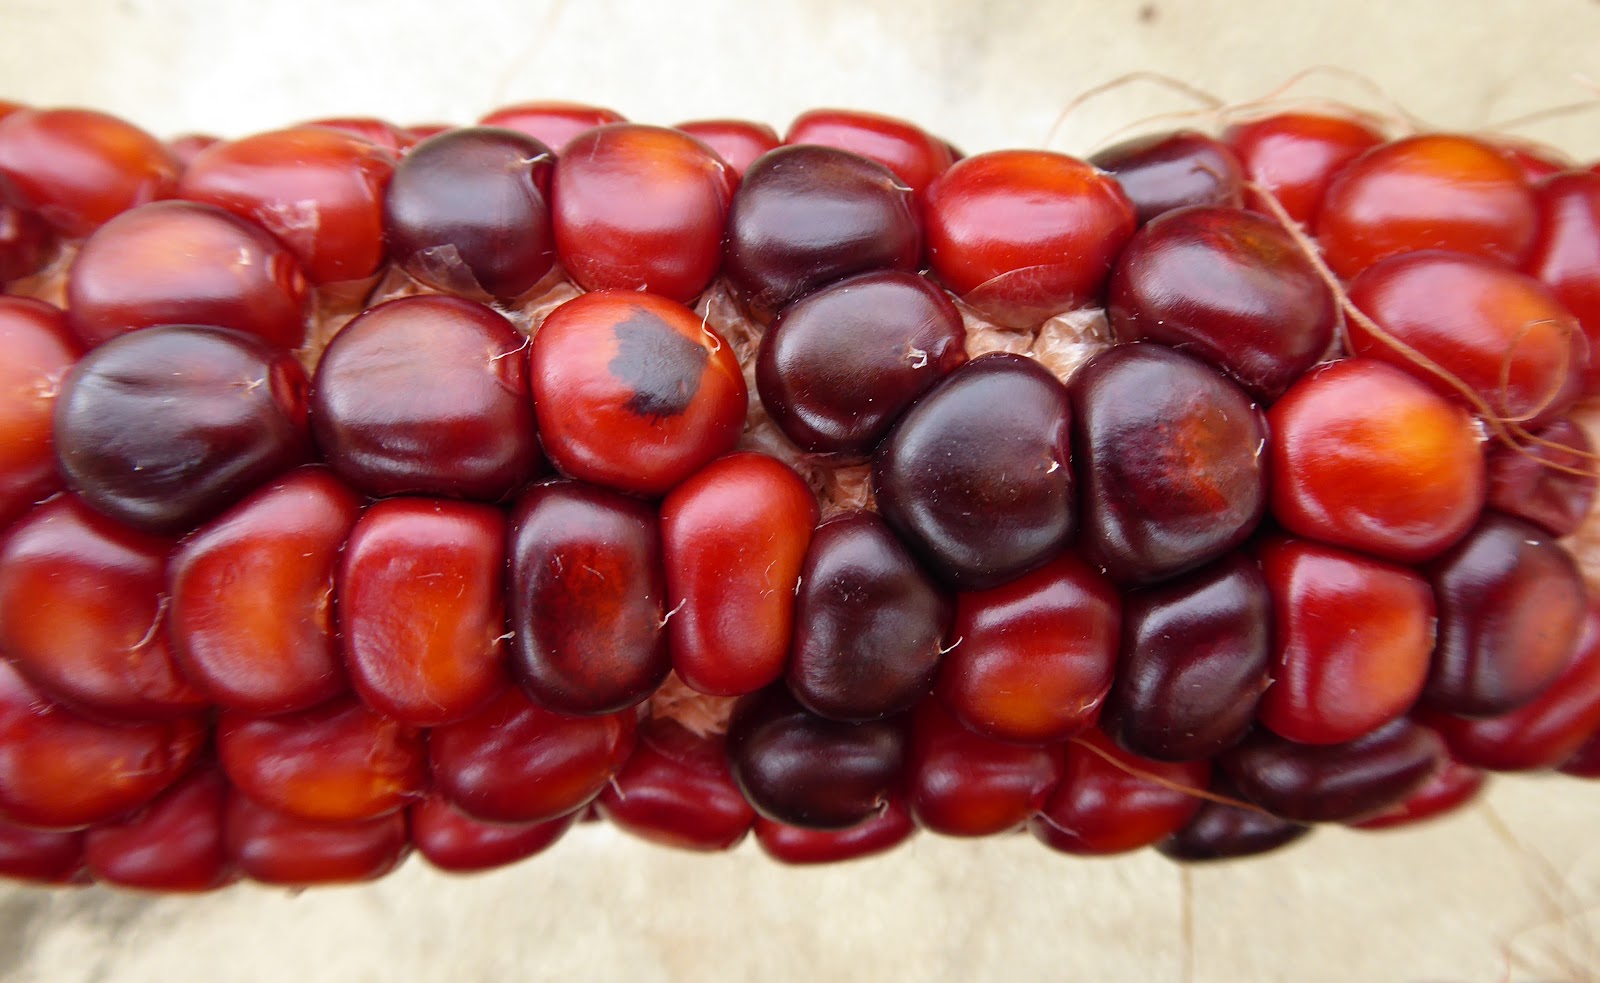
Here's why I grow my own. Where can you buy beans that look like this? No place where I shop, that's for sure.


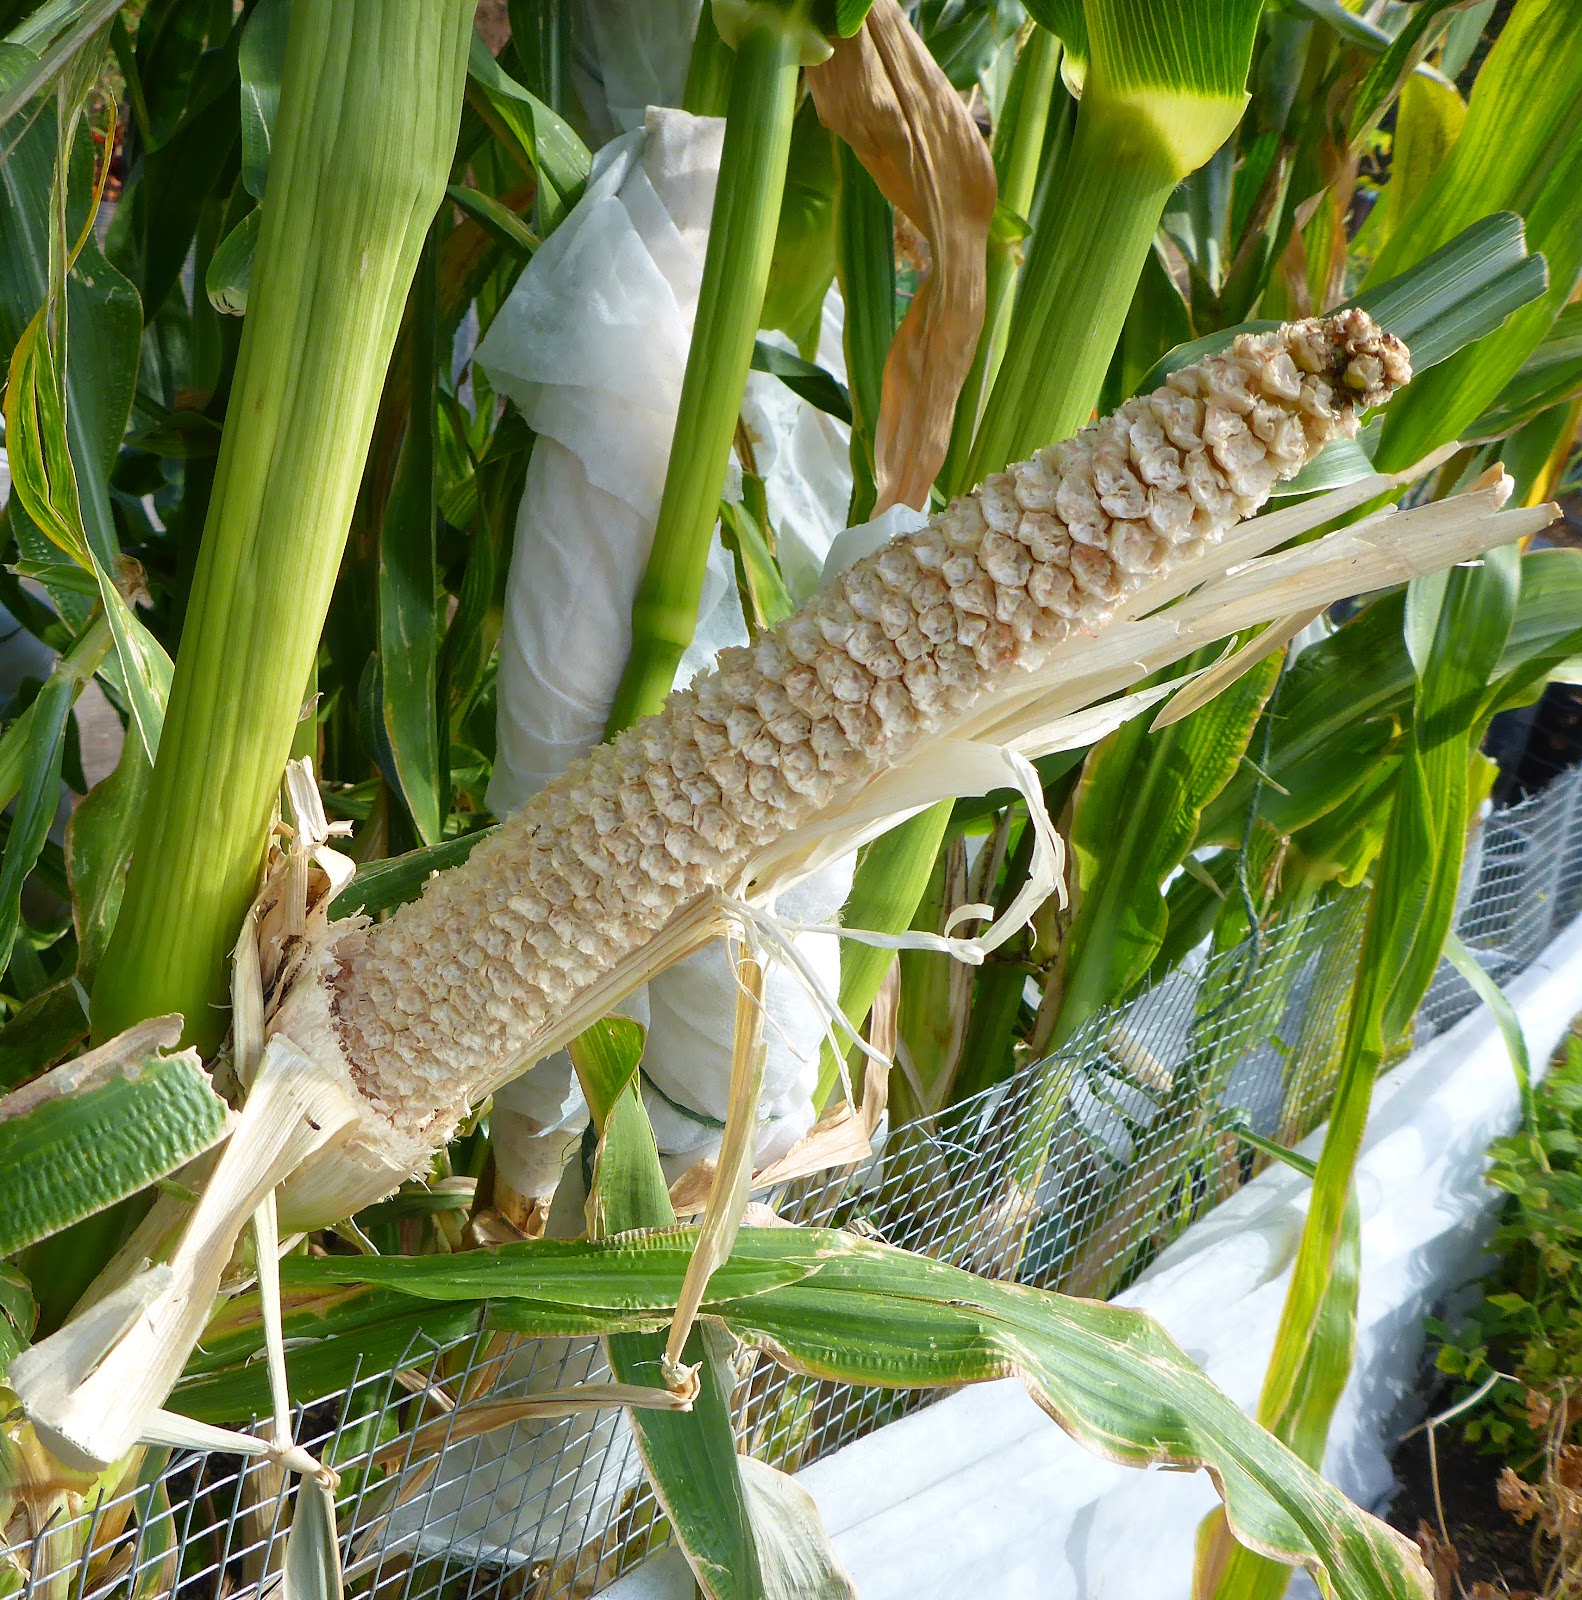
And you won't find corn like this anywhere either. This is not just ornamental corn, it's corn that can be ground into the best tasting cornmeal or polenta, or treated to make hominy or masa for homemade tortillas,

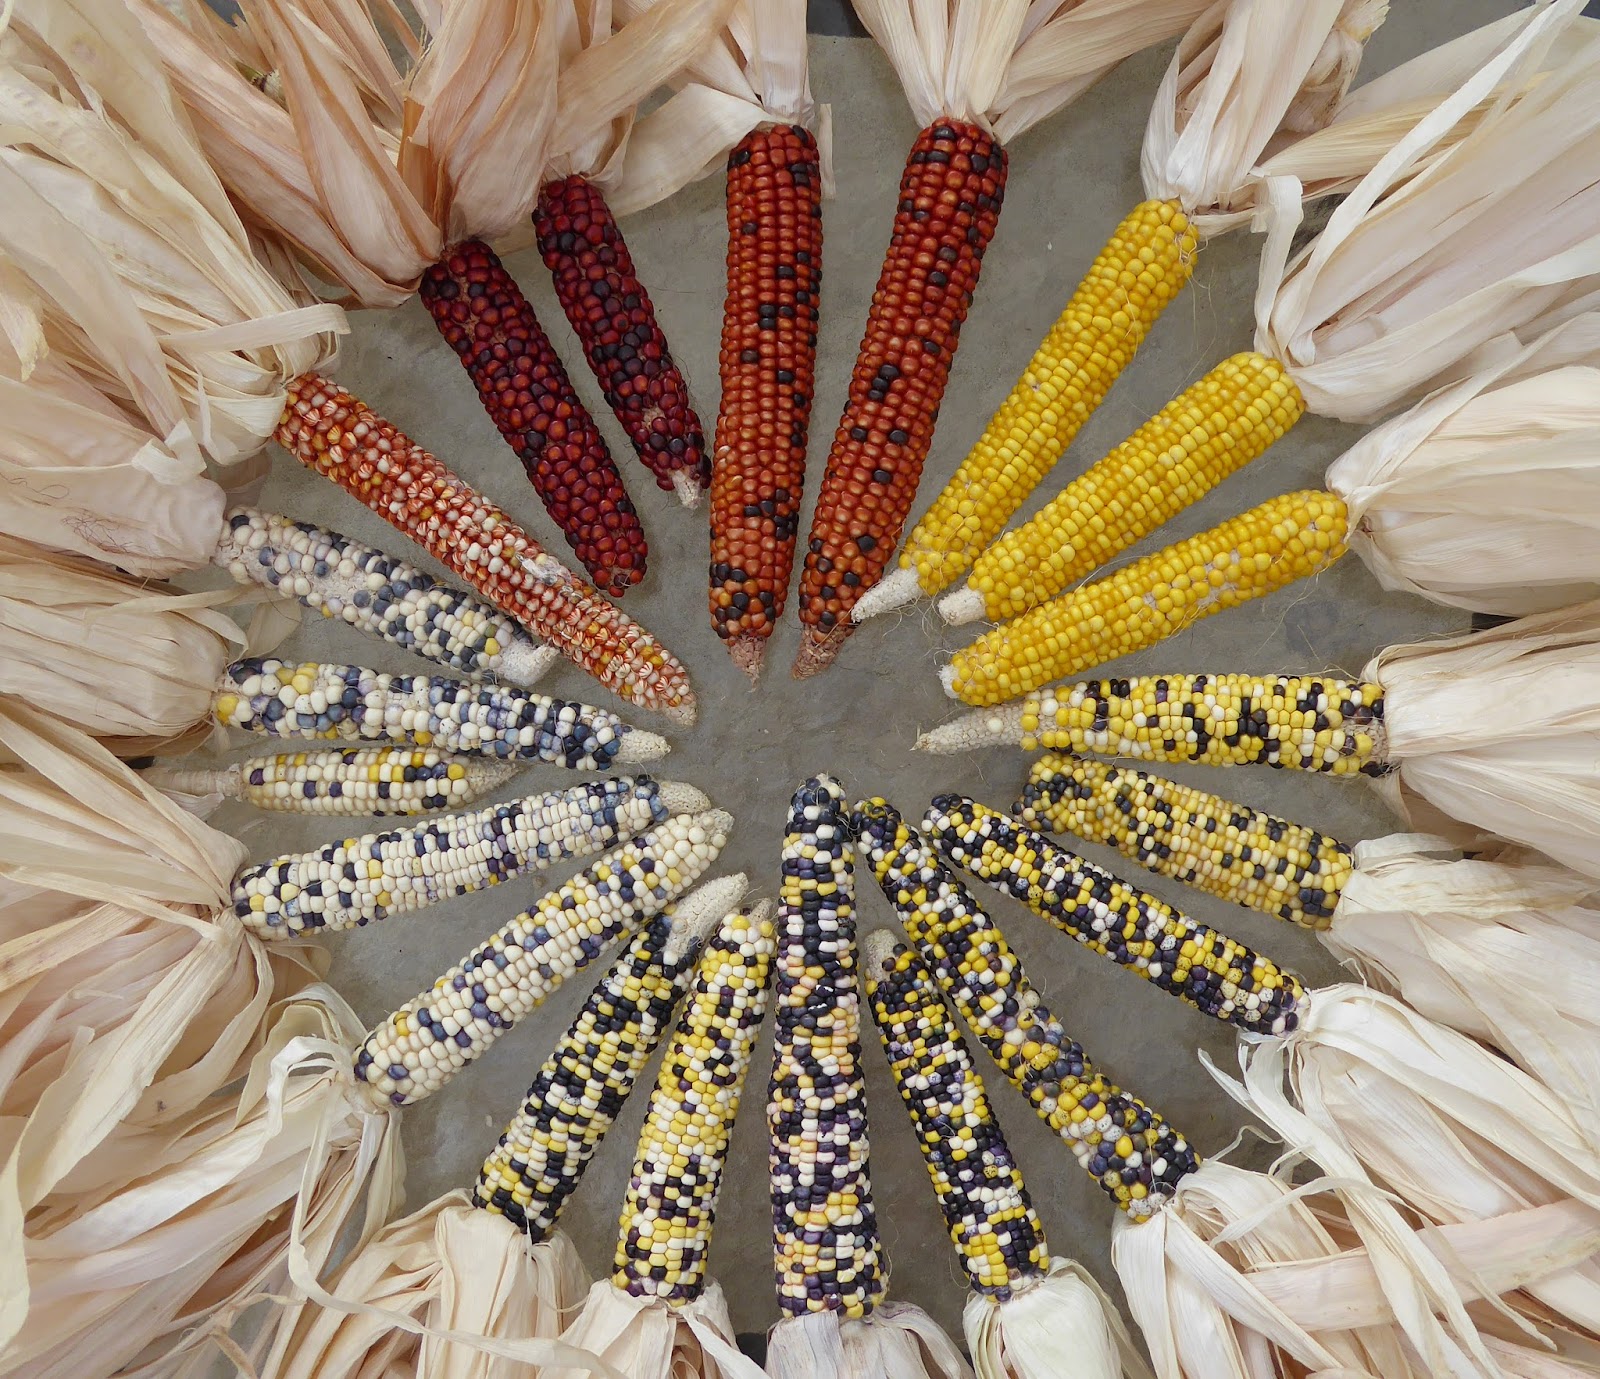
Santo Domingo Rainbow
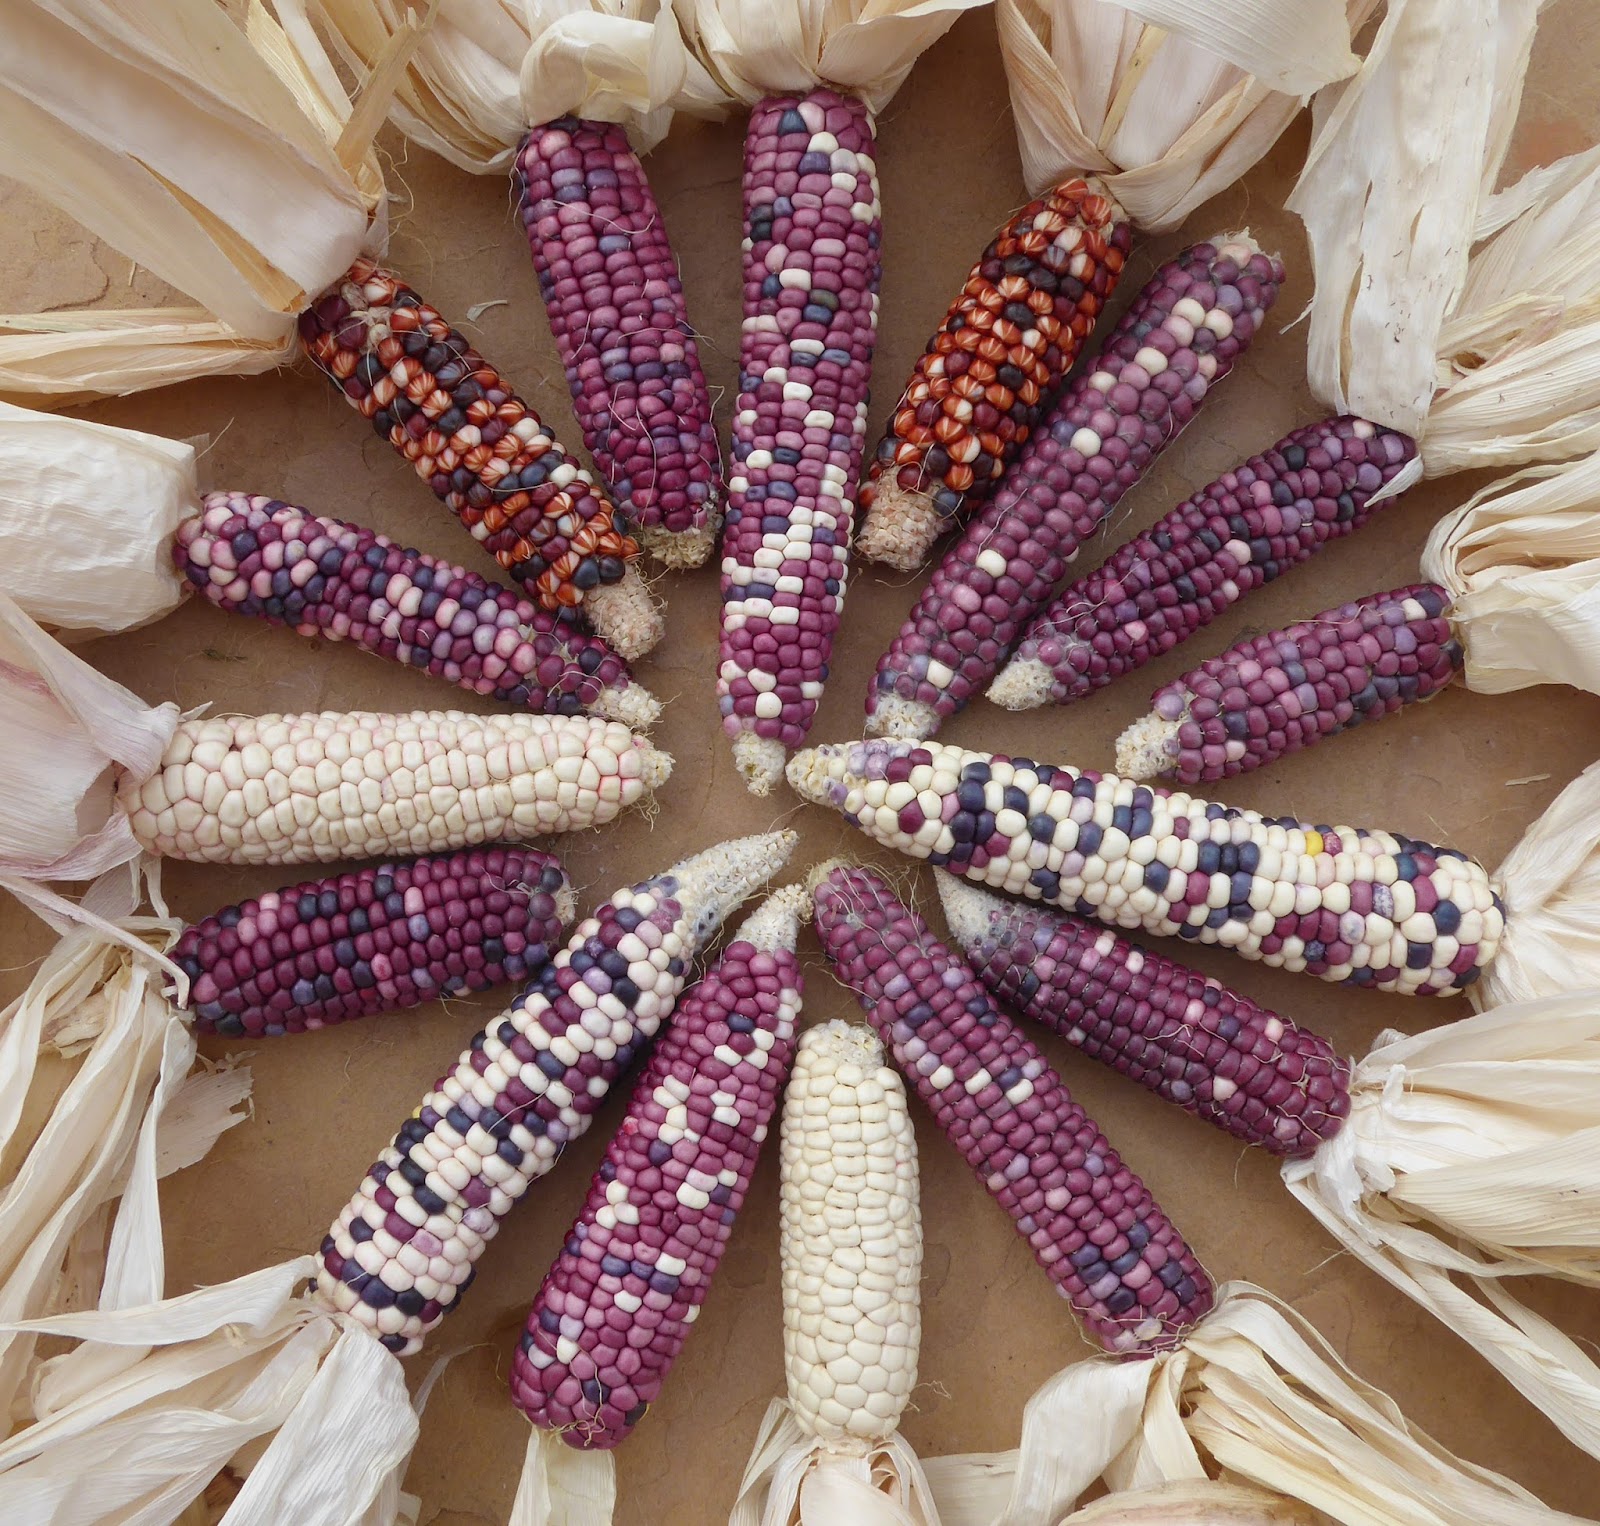
Hopi Greasy Head
And it's just simply beautiful.


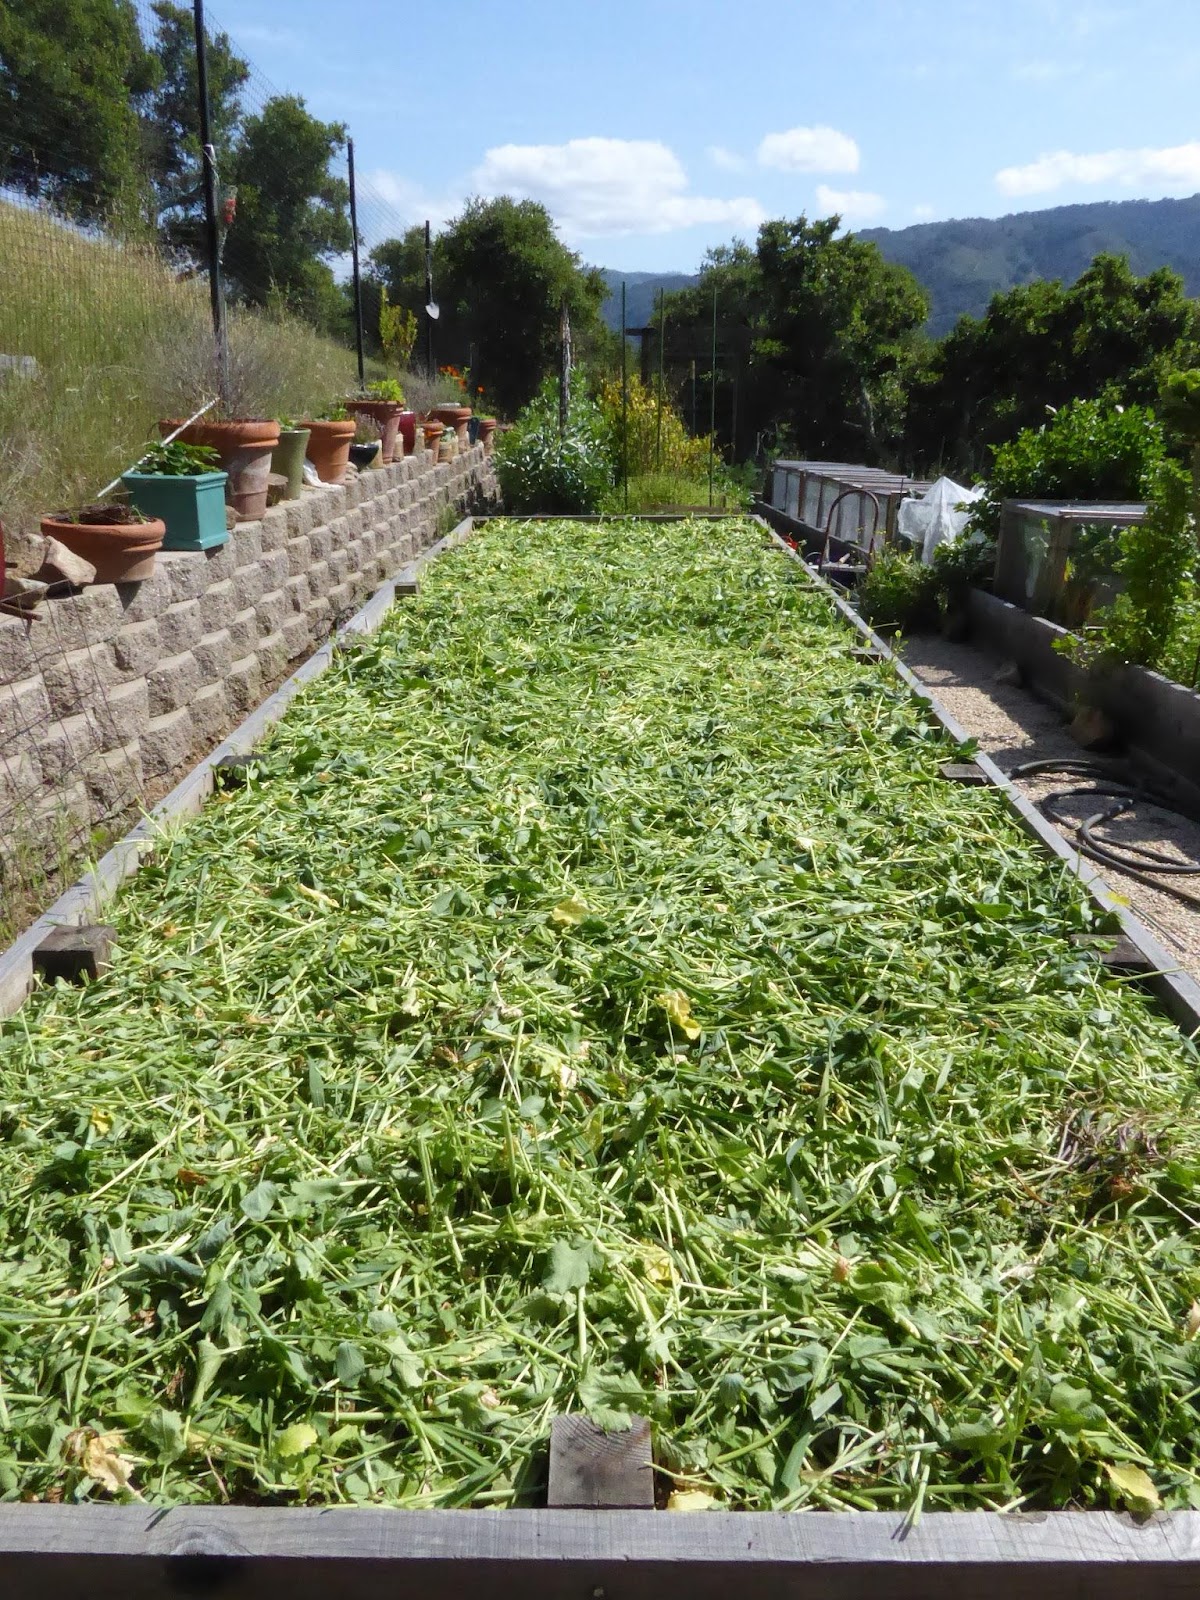
When the bush beans are finished producing in the fall I have a few options to replace them.  I can plant peas for harvesting pea shoots. If space opens early enough I can get a crop of snow or snap peas also. 


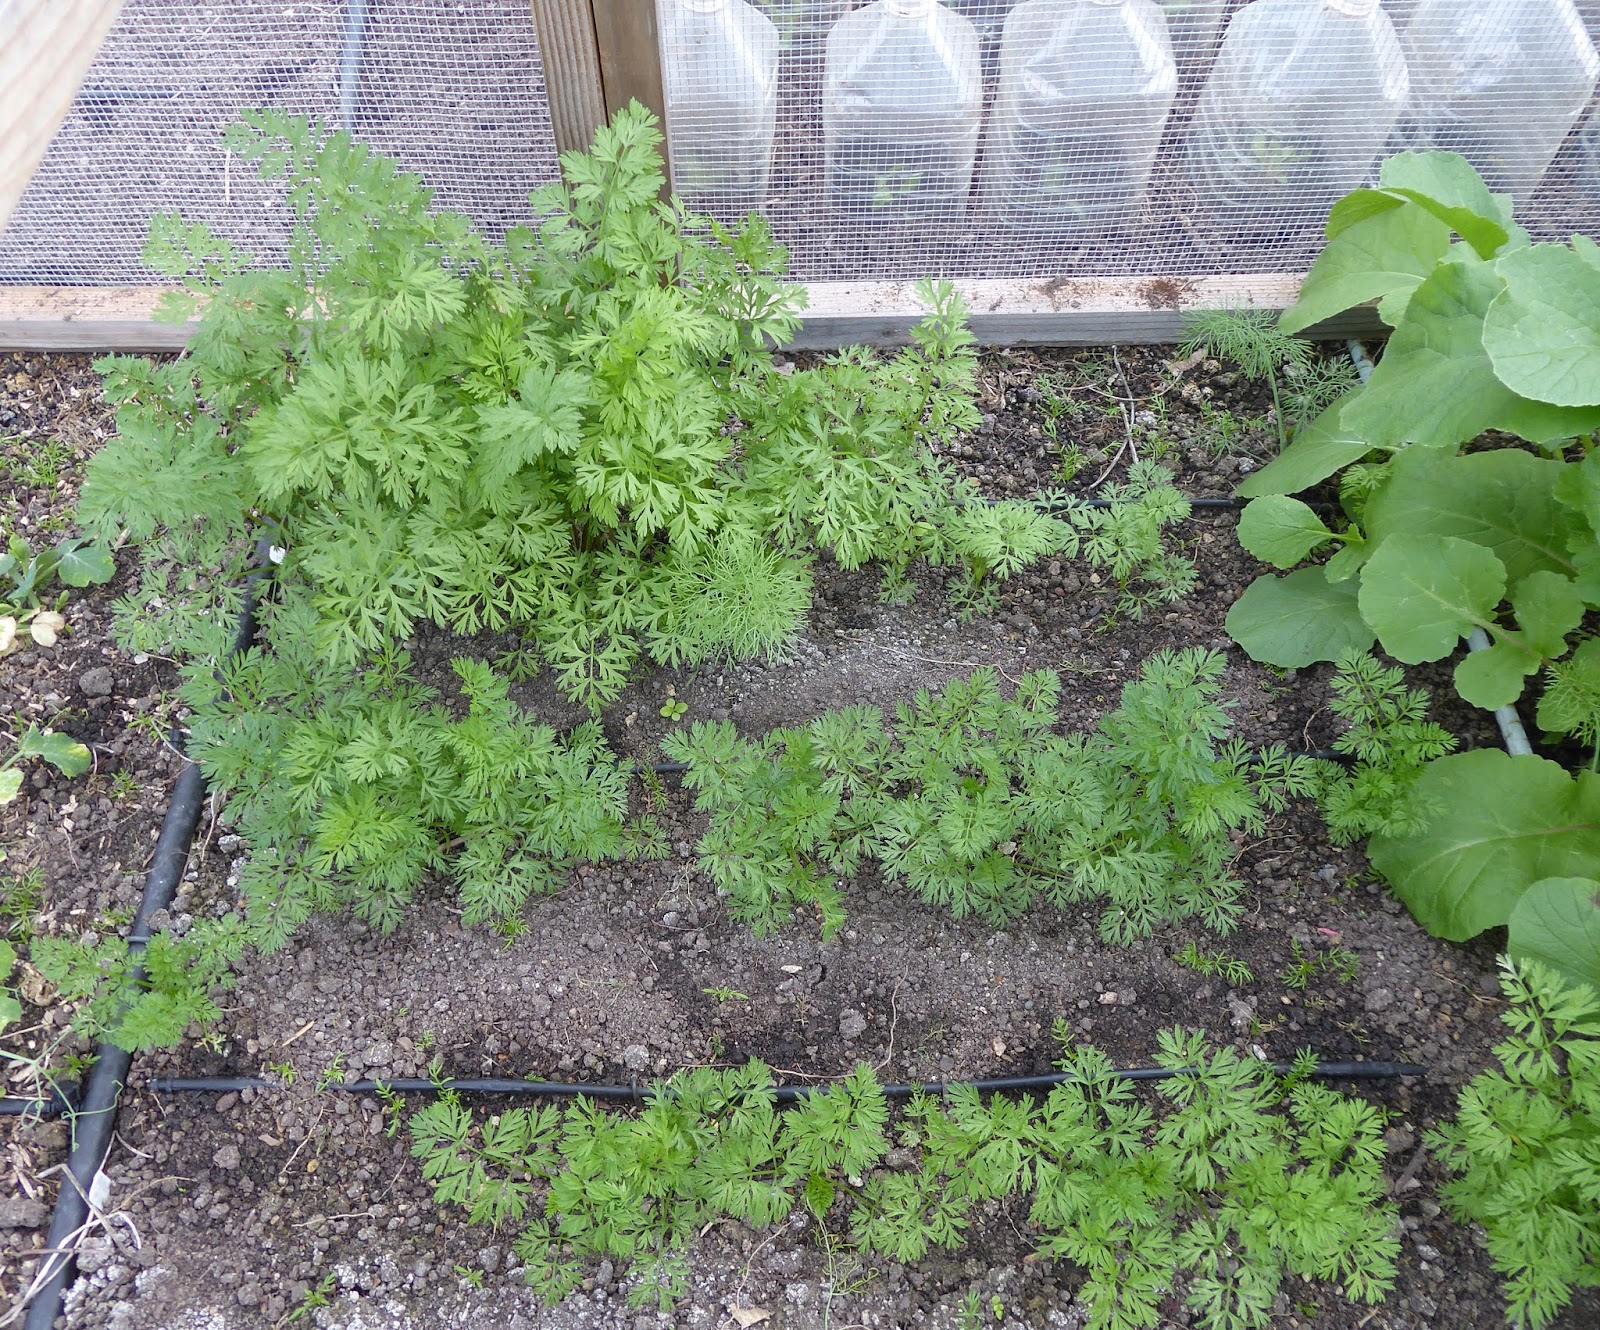
It's a good time to plant carrots for harvesting in the winter. Winter radishes such as daikon or watermelon radishes are another option. Most recently I tried a fall planting of rutabagas that worked well. Beets can also be sown for winter harvesting.


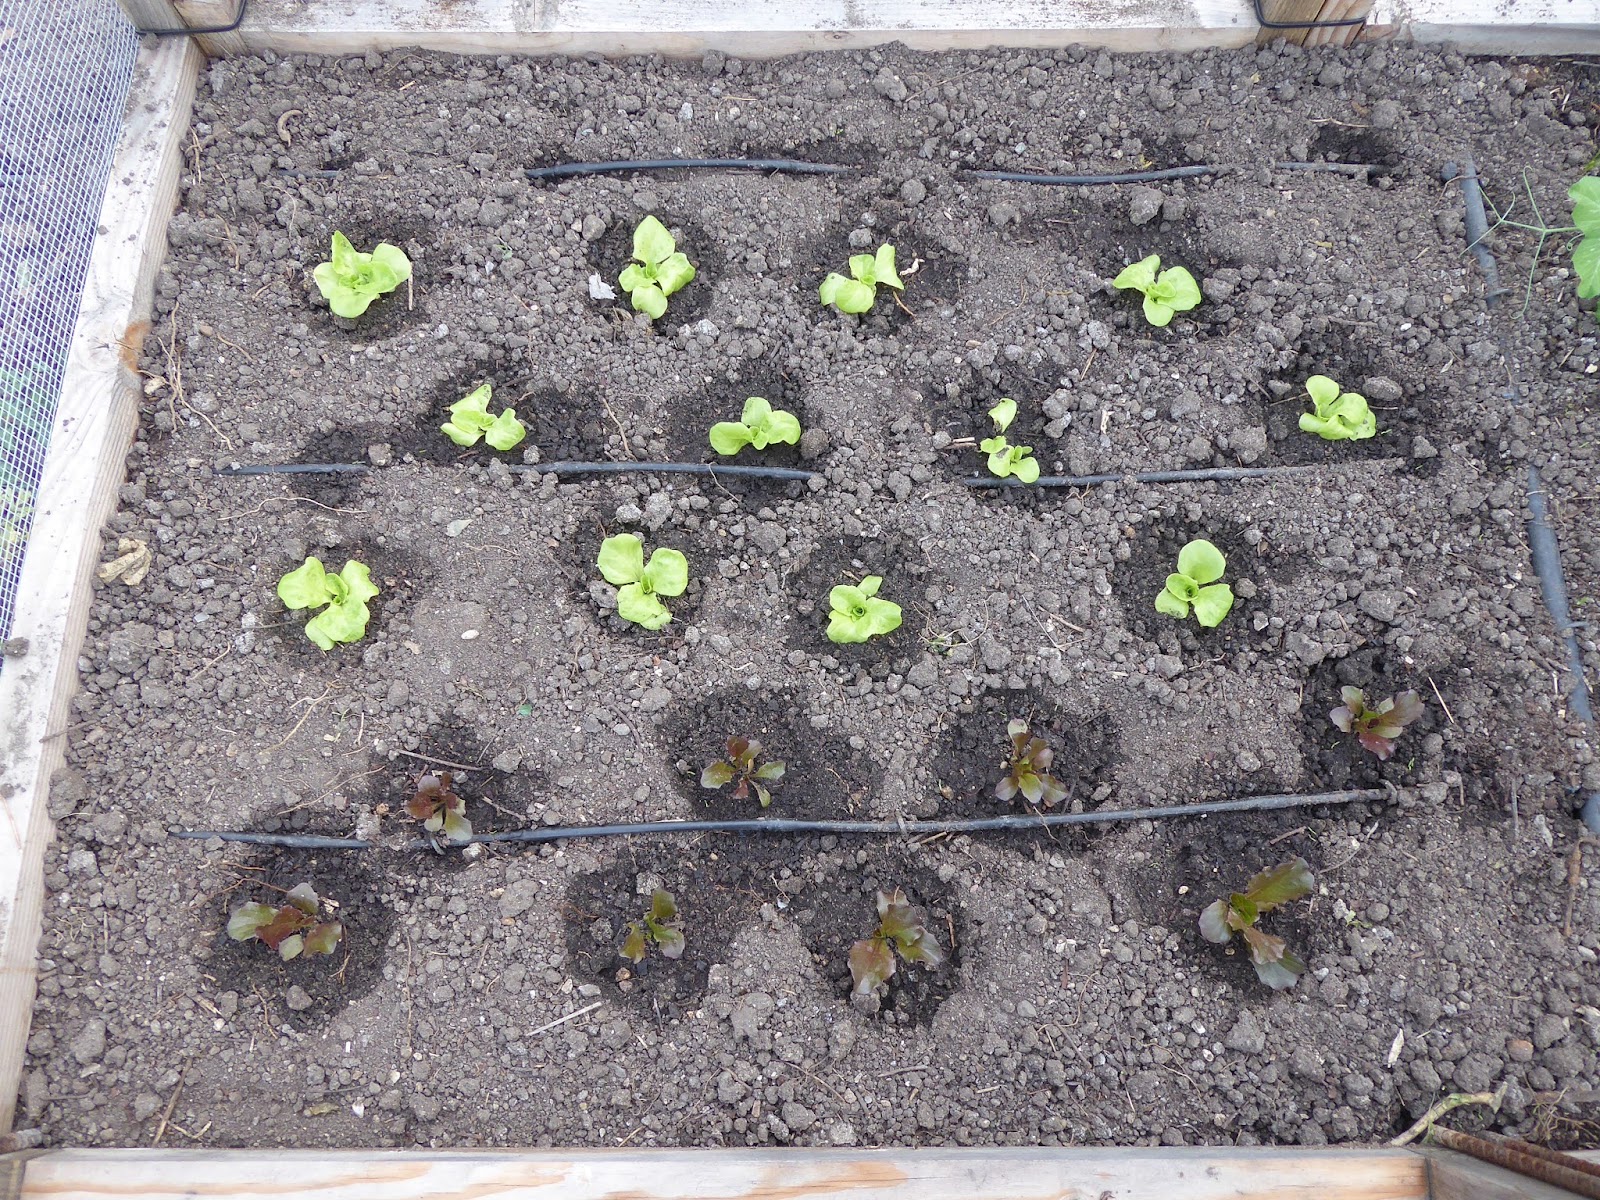
I usually plant lettuce in the fall or early winter for winter harvests. I prefer to grow heading lettuces but could plant lettuces for cutting baby leaves. My usual strategy is to set out about twice the number of plants that I need and then thin out the baby heads as I want them which leaves room for the rest of the plants to grow to full size heads.


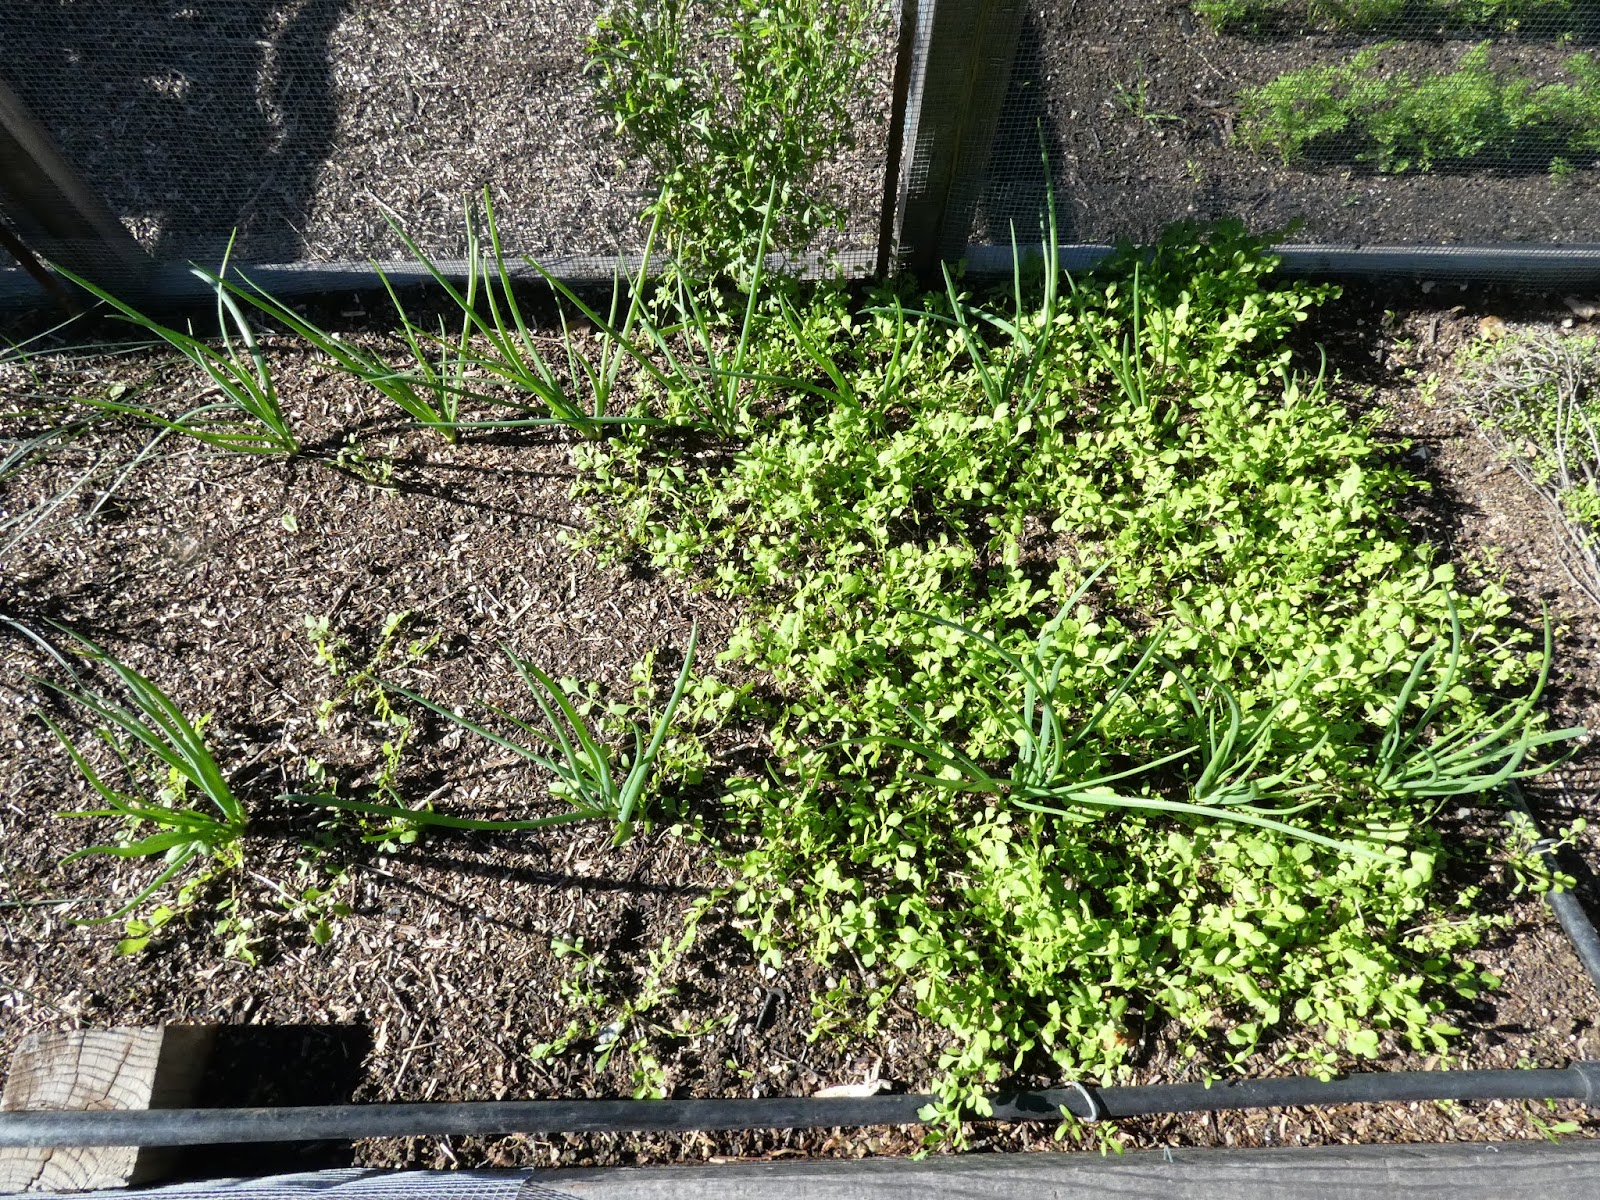
Fall is also the time to put some alliums into the garden. If I was still growing garlic I would be sure to have space available for it in this bed in October. Lately I've been trying bunching onions in lieu of garlic. One of my favorites is I'itoi, an heirloom from the southwest.


And the newest addition to the allium roundup is Yellow Potato bunching onions. On thing that I like to do is to double crop an area. When I set out the potato onions I also scattered seeds for a quick growing cool season salad green called Rishad cress. As the cress matures I cut out whole plants as I need them and to leave room for the growing onions. I also use parsley and mache to interplant. The method works well with regular bulbing onions also.

November
At the end of the year after I've cleared out the corn plants and bean trellises I can start cool weather vegetables like broccoli, broccolini, kohlrabi, mustard, cabbage, napa cabbage, and chard. Most of these will grow through the winter and give me some of my first spring harvests round about March. Mustard greens are quick growers and will provide harvests in January. I start the seeds indoors and then set the seedlings out under the protection of cloches.


If I plan on growing bulbing onions I need to reserve space in this bed for planting the onion seedlings in January. I had terrible problems with downy mildew on my onions in 2017 so I'm taking a break from growing them for a couple of years to allow the mildew spores to die out. I plan on doing some research to find downy mildew resistant varieties that are suited to the climate and day length requirements here but I haven't devoted time to that project yet.

Next up will be what I plant in the bed in the 3rd year of the rotation.


Monday, January 28, 2019

Harvest Monday - January 28, 2019

Welcome to Harvest Monday. I'm stepping in for Dave of Our Happy Acres as the temporary host of Harvest Monday for the month of January while he takes a much deserved break from the task of hosting every week. Harvest Monday is where we celebrate all things harvest related. This is the place to share your latest harvests and what you've been doing with them. If you would like to link up you will find Mr. Linky at the end of this post. Next week Dave will be returning as our host for Harvest Monday so be sure to go to his blog Our Happy Acres if you want to link up.

There isn't anything new that came out of the garden last week. It's definitely a wintry looking bunch of harvests. The Bora King daikon radishes are mild and beautiful and have been great in salads. I used that soft ball sized celeriac in a gratin which I made almost following a recipe from a book that I have a hard time believing has been in my collection for nearly 20 years - The Cook and The Gardener. It's a simple dish, slices of celery root poached in stock and then layered in a baking dish with cheese and then baked with a mixture of creme fraiche and stock. I used a truffle pecorino instead of parmesan and poultry stock instead of beef stock, but other than that I followed the recipe. It was our "main course" one night accompanied by a salad. Dave declared it a winner.

Bora King Daikon Radishes and Prinz Celeriac

I continue to harvest carrots as I need them, mostly to add to salads. We, especially I, eat a lot of salads, it's what I have for lunch most days during the week.

Short Stuff Carrot

The celery stalks have become rather short of late but they are still crisp and succulent. I think that the cold short days in the depth of winter slowed the plants down.

Short Stuff Carrot, Bora King Radish, Pink Plume Celery

I am still amazed at how productive Orion fennel is. I've never grown a bulbing fennel that has been as productive as Orion. This is one more bulb that sprouted from the root of a plant that I sowed back in the spring of 2017. Wow! And there's more to come.

Orion Fennel

Queen of Crunch lettuce is still hanging in there. I cut one more head that was starting to bolt but the lettuce was still crunchy (very!) and not at all bitter. And I cut down more Rishad cress some of which was just starting to bolt also. It is mildly peppery but not bitter. I love it in my salads.

Queen of Crunch Lettuce and Rishad Cress

That's the latest from my winter garden. If you have a harvest you want to show off then enter a link to your post below and please leave a comment too. And be sure to visit the other bloggers who link up here.


Mister Linky's Magical Widgets -- Auto-Linky widget will appear right here!
This preview will disappear when the widget is displayed on your site.
If this widget does not appear, click here to display it.

Monday, January 21, 2019

Harvest Monday - January 21, 2019

Welcome to Harvest Monday. I'm stepping in for Dave of Our Happy Acres as the temporary host of Harvest Monday for the month of January while he takes a much deserved break from the task of hosting every week. Harvest Monday is where we celebrate all things harvest related. This is the place to share your latest harvests and what you've been doing with them. If you would like to link up you will find Mr. Linky at the end of this post.

Sorry I'm late with my post today, I had a minor problem come up that kept me from finishing last night.

So the harvests have been wintery looking again. One night I was in the mood to make some soup so I raided the garden for some soup materials and then some. I used the carrots, rutabaga, and fennel in the soup and saved the parsnips and radishes for another day. I use the radishes in salads and the parsnips are still in the fridge where they keep well for a long time.

Gladiator Parsnips, Short Stuff Carrots, Improved Helenor Rutabaga,
Bora King and Mini Purple Daikons,
Orion Fennel

My first harvest of Brussels sprouts is not one of my most impressive, most of the sprouts are quite small but after trimming I still netted about a pound. These were fine in a warm shredded salad and you would have never guessed that most of them were runts.

Gustus Brussels Sprouts

Pink Plume celery is still producing impressive harvests and the stalks are extra crisp and juicy because of the cool and wet weather.

Pink Plume Celery

I finally pulled up the red beets that I sowed way back in July which just never seemed to be happy. Those were the best of the bunch and the rest were so small that I couldn't be bothered to deal with them so they went into the compost. The kalettes are much happier and I got enough to make another couple of servings. Next year, actually this year, I'm going to double up on the number of plants because even though that looks like a fair amount it only weighed 6 ounces.

Sweetheart Beats and Mistletoe Kalettes

This fennel harvest came from a fennel plant that I sowed back in April of 2017 which came back in 2018 and I allowed to bloom through all of last year and after cutting it back at the end of 2018 it started producing new shoots again and some of them are turning into nice little bulbs.

Orion Fennel

I still haven't cleared out the old rodent ravaged broccoli plants and they managed to give me a handful of shoots.

Batavia Broccoli

And the volunteer cress is still growing happily in the winter weather.

Rishad Cress

Surprise! There's still a few lingering peppers in the garden.

Aji Banana

That's the latest from my winter garden. I'll keep this post simple since I'm so late getting it done. If you have a harvest you want to show off then enter a link to your post below and please leave a comment too. And be sure to visit the other bloggers who link up here.


Mister Linky's Magical Widgets -- Auto-Linky widget will appear right here!
This preview will disappear when the widget is displayed on your site.
If this widget does not appear, click here to display it.


Tuesday, January 15, 2019

Growing Year Round in My Carmel Valley Vegetable Garden

One of my readers is a local gardener who is a member of the Carmel Valley Garden Club. He approached me with the suggestion that I make a presentation to the club about my garden. I was hesitant at first because I have very little experience talking in front of groups. But I thought it would be a good challenge for me so I gave him the ok to put my name forward to the group as a possible speaker. Well, after a bit of vetting I was extended an invitation to talk about growing vegetables year round in Carmel Valley. I even got to choose which month and I chose January so that anyone who was inspired to tackle a year round garden would have the opportunity to do some planning for the year ahead.

Last night was the big (to me) event. I think I did ok. Everyone was generous with applause at the end of the talk and I received a lot of great questions. 

In preparation for the talk I culled through the past few years of photographs to illustrate what the garden looks like through the year as I cycle my beds through the 4 year rotation that I've devised to maximize what I can grow. It was much more difficult than I had anticipated to pack a year of growing vegetables into a 45 minute talk. But I managed to whittle things down and make a coherent (I hope) narrative and it occured to me that that narrative would make a good series of blog posts. Putting the talk together was a good exercise for me because it helped to bring the process of going through those rotations into sharper focus. Putting it on my blog is a great way to document the process.

First some general things I've learned over the years.

Some Keys to a Success in my Year Round Vegetable Garden

  • Sun
    • The more the better but at least 6 hours daily year round
  • Microclimate
    • Know your average first and last frost dates
    • High and low temperatures and when they occur
    • When does it get warm at night
  • Planning
    • Make space in the summer and fall garden for winter vegetables
    • Learn what vegetables can be sown in the winter, likely indoors
    • Know the approximate time from sowing seeds to harvest
  • Know what grows when, i.e. cool season and warm season vegetables
  • Grow vegetables with similar growing requirements and longevity together
  • Keep records of sowing, planting, and harvests dates

A sketch of my garden in the summer of 2016


There's 4 large beds in my garden, each about 6 feet wide by 22 feet long for a total of about 540 square feet of bed space. Each bed is nearly 2 feet high. The boxes are filled with regular garden soil, not potting soil. The beds are irrigated with 1/4-inch drip tubing with in-line emitters spaced 6 inches apart and the lines are laid approximately 9 inches apart. The garden is surrounded by a 6 foot tall deer fence reinforced with hardware cloth a ground level to keep rabbits out. (Nothing keeps the rodents out, boohoo.)


Let's start with the first year in the rotation. I'll be looking at a hypothetical single bed as it goes from one year to the next. I hope it's not confusing that I use pictures from from more than one year to illustrate what I try to grow through the course of one year in one bed. Not every year is the same because vegetables fall on and off the grow list from year to year. What I want to illustrate is where I would be growing something if I happened to be growing it.

Year 1

In January I sow the entire bed or nearly so with a cover crop.

January


I usually make my own mix based on Kodiak mustard along with some annual grasses, peas, and favas. Sometimes I use a mix from Renee's Garden Seeds that contains Winter Rye, Hairy Vetch, Daikon Radish, Rapeseed, Purple Top Turnip and Austrian Winter Peas. Either mix works well.

The birds like to munch the emerging seedlings so I cover the entire bed with Agribon row cover fabric.

January

The birds would continue to graze on the cover crop if I didn't keep it covered as long as possible.

March

At some point the cover crop can no longer be restrained by the fabric so it gets set free. At this point the birds can't do much damage. When I mix peas into the cover crop I like to find the tender tops of the pea plants and harvest them as a green vegetable. The key to harvesting a tender pea shoot is to cut it so that it doesn't have a tendril that hasn't started to curl up because the main stem in the area of a curled tendril will already be tough. A little curve is ok, but avoid the tendrils that want to cling to something already.


I cut down the cover crop in April using hedge shears. If things were not in a raised bed I would probably opt for a string trimmer.

April

There's 2 options at this point, either cover up things up right away and let the greens rot before digging them in or dig them in right away and let them rot in the soil.

April

I usually opt to dig them in right away to just get the process over with.

April

And then I mulch the entire bed with cardboard. The worms and other critters in the soil get to work and the greens disappear in a matter of weeks. Another advantage to digging the greens in right away is that they decompose more quickly in the soil than on top of it, even when they're covered with cardboard.


I aim to plant my tomatoes and peppers sometime near June 1. First I dig in various amendments to the soil including a year's worth of egg shells that I pulverize in my Vitamix blender. Other amendments include compost, organic soybean meal, feather meal, fishmeal, rock phosphate, kelp meal, and azomite or glacial rock dust. I never use a tiller, I just turn the soil over once, break up the clods and then rake the top smooth. Then I set up a trellis along the north side of the bed to support the tomatoes. The trellis is made of T-posts and concrete reinforcing mesh which I attach to the posts using cable zip ties.

Memorial Weekend

Each plant gets a sprinkle of Mykos mycorrhizal inoculant in the planting hole and then a drench of Azos beneficial bacterial inoculant. The pepper plants in particular respond well to the inoculants. Before I started using the inoculants I had problems with peppers becoming sunburned because of poor leaf coverage. The inoculated plants grow more vigorously and have larger leaves and I rarely have problems with sunburned peppers anymore.

Memorial Weekend
Tomato and pepper plants grow very quickly at this time of year. I tie the tomato vines to the trellis using strips cut from old cotton t-shirts. I prune a lot of the suckers and remove a lot of leaves to improve air circulation and allow more light into the interior of the plants. I also like to do a prophylactic spray of an organic fungicide once or twice in the first month after the plants take off. Foliar diseases always seem to crop up some time during the growing season and I've found that spraying before the diseases show up reduces the incidence and severity of infections. Occasionally I'll treat them later in the season if foliar diseases start to appear.

July 15


August
The first small fruited tomatoes start to ripen in August but the bulk of my tomato harvests are in September and October. You can see in the photo below how I've removed leaves and suckers from the bottom of the plant. I continue to remove leaves and suckers through most of the growing season and especially target any growth that looks like it is succumbing to a disease.

August
By the end of the season I just let the plants go and don't worry so much about dead and dying foliage. The pepper plants don't need so much trimming and training, although some might need staking. The cages around the pepper plants in the photo below were covered with fabric early in the season when the plants were in bloom to isolate the plants for seed saving.

December

December - Early favas and mustard.

I may start removing plants as early as November in some years and other years I may not get around to it until the end of the year. I can sow a cover crop as soon as a space is cleared or I can plant some fava beans or I may just cover up the space with a cardboard mulch until I can get around to planting something.

December
Some peppers are tolerant of cold weather and may have peppers ripening as late as December, January or February. I group those peppers in one corner of the bed and provide some frost protection and usually let them grow on through the next year.

December
And now for a few of my favorite tomatoes and peppers.

Piccolo Dattero is an Italian hybrid cherry tomato. They are one of the tastiest cherry tomatoes that I've ever grown with a nice balance of sweet and tart. They hold well on the vine and rarely ever split. The plants are vigorous but not too much so and they are very disease resistant. Sweet Gold is another hybrid with pretty good disease resistance. The flavor is great and fruits resist cracking.

Piccolo Dattero and Sweet Gold

Jaune Flamme is a French heirloom that produces small tomatoes with a big flavor. The color is gorgeous too, the inside of the tomato is usually blushed with pink. It produces over a long season, usually one of the first to ripen and one of the last as well. Marzano Fire is a new open pollinated paste tomato bred by Fred Hempel at Baia Nicchia Farm in Sunol, California. It looks like a typical Marzano tomato but it has gold stripes. It makes great sauce, puree, and paste but it is also very good eaten fresh. 

Jaune Flamme and Marzano Fire

Chianti Rose is a cross between Brandywine and an Italian heirloom. It's a nice large pink beefsteak type with a rich flavor. It has far more flavor than any Brandywine tomato that I've ever grown. Brandywine tomatoes resent the cooler climate in my garden and never develop a good flavor but Chianti Rose just shrugs off the cool weather. Pantano is an Italian red beefsteak that I tried on a whim one year and I found it to be a winner. It produces very large fruits with excellent flavor and even though it's originally from Rome it seems to do just fine in the cooler climate here. Mavritanskite is a Latvian heirloom with dark brownish flesh, oftentimes with greenish shoulders (which some tomato connoisseurs to be a sign of superior flavor) and full flavor. It is a little more disease prone but the great flavor makes up for that.

Chianti Rose, Pantano, and Mavritanskite

I love fire roasted sweet peppers and I've grown a lot of peppers in search of the best and Ajvarski is the best yet. This heirloom from eastern Macedonia has fruits that are large and thick fleshed. The shape being straight and smooth without deep indentations or curves makes them easy to roast and peel. But most important the flavor is fabulous.

Ajvarski

Florina is my next favorite roasting pepper, second to Ajvarski only because it's shape makes it a little more difficult to roast evenly and its flesh is less thick. It does seem to have one advantage to Ajvarski though, it seems to be more resistant to powdery mildew. This is an heirloom from Greece and I'm very fortunate to have acquired the seeds in a trade with another gardener because the seeds are not available in the US.

Florina
I've been searching for a good yellow fleshed pepper for a long time. Most of the ones I've grown have had mediocre flavor or other failings. Topepo Giallo is one of the best so far. It's mostly squat squash shape and thick flesh makes it great for stuffing and roasting but it is also good eaten fresh. It also dehydrates well. It seems that I'll have to save some seeds next time I grow them because my source no longer offers them.

Topepo Giallo

Odessa Market is my favorite pepper for eating fresh. It has medium thick flesh with a thin skin and is incredibly sweet and flavorful. The plants are compact and productive. The immature peppers are lime green which really stands out and they are one of the few green peppers that I find to be tasty. I've noticed that seeds are not reliably available from year to year and this seems to be an off year so they may be hard to find.

Odessa Market

I grow a number of chile peppers, not all of them hot, but my favorites are mostly Capsicum baccatums, which are native to the Andes where they are called Aji which means "pepper". Here you will usually see them redundantly called "Aji peppers". Their notable attribute is their aromatic fruitiness. I like to ferment them and turn them into hot sauces and pepper flakes. The plants are cold tolerant and will usually overwinter easily in my garden with minimal protection. Many of them are also late to ripen.

Joe's Giant Aji, Sugar Rush Red, and Sugar Rush Peach

I also experiment with Capsicum chinense peppers on occasion. That branch of the pepper family includes the blazing hot Habanero peppers and other notable scorchers but I prefer their milder cousins. Unfortunately a lot of the chinense peppers are late to ripen and are not tolerant of cold weather so I usually don't get much of a harvest. One chinense pepper that I've had fairly good success with is Habanada, a completely mild habanero that has the aroma and fruitiness of it's spicy cousins that is usually undetectable to those of us who are pepper wimps. Another pepper that has become a favorite is a pepper from Ethiopia that goes by a few different names including Ethiopian Brown, Mareko Fana, and Berbere. It has become a favorite of mine for making chile pepper flakes.

Habanada, Aji Cacho de Cabra, Yellow Pointy,
Ethiopian Brown, Aji Angelo, Aji Amarillo Grande

Thus ends the first year in the 4 year rotation through the beds in my garden. My next post in this series will cover year 2.